When you purchase through the links on my site, you support the site at no extra cost to you. Here is how it works.
You can tell a lot about the best Kontakt libraries by how they handle the small details, mic positions, articulation switching, round robins, long before you judge the big showcase sounds.
Kontakt has been the engine behind sample based scoring and production since Native Instruments first introduced it in 2002, and the sheer range of what runs inside it now stretches far past the sampler’s original brief.
You can load a full orchestral section, a granular sound design tool, or a chord generator into the same host, and none of them will behave anything like the others once you start playing.
I put this list together to cover that spread honestly, pulling from orchestral, vocal, percussive, and generative categories instead of sticking to one lane.
Some of these libraries are built for scoring picture frame by frame, others are built to get you unstuck when a track has stalled, and I think that variety is exactly what makes a Kontakt collection worth building out properly.
1. Native Instruments Choir: OMNIA
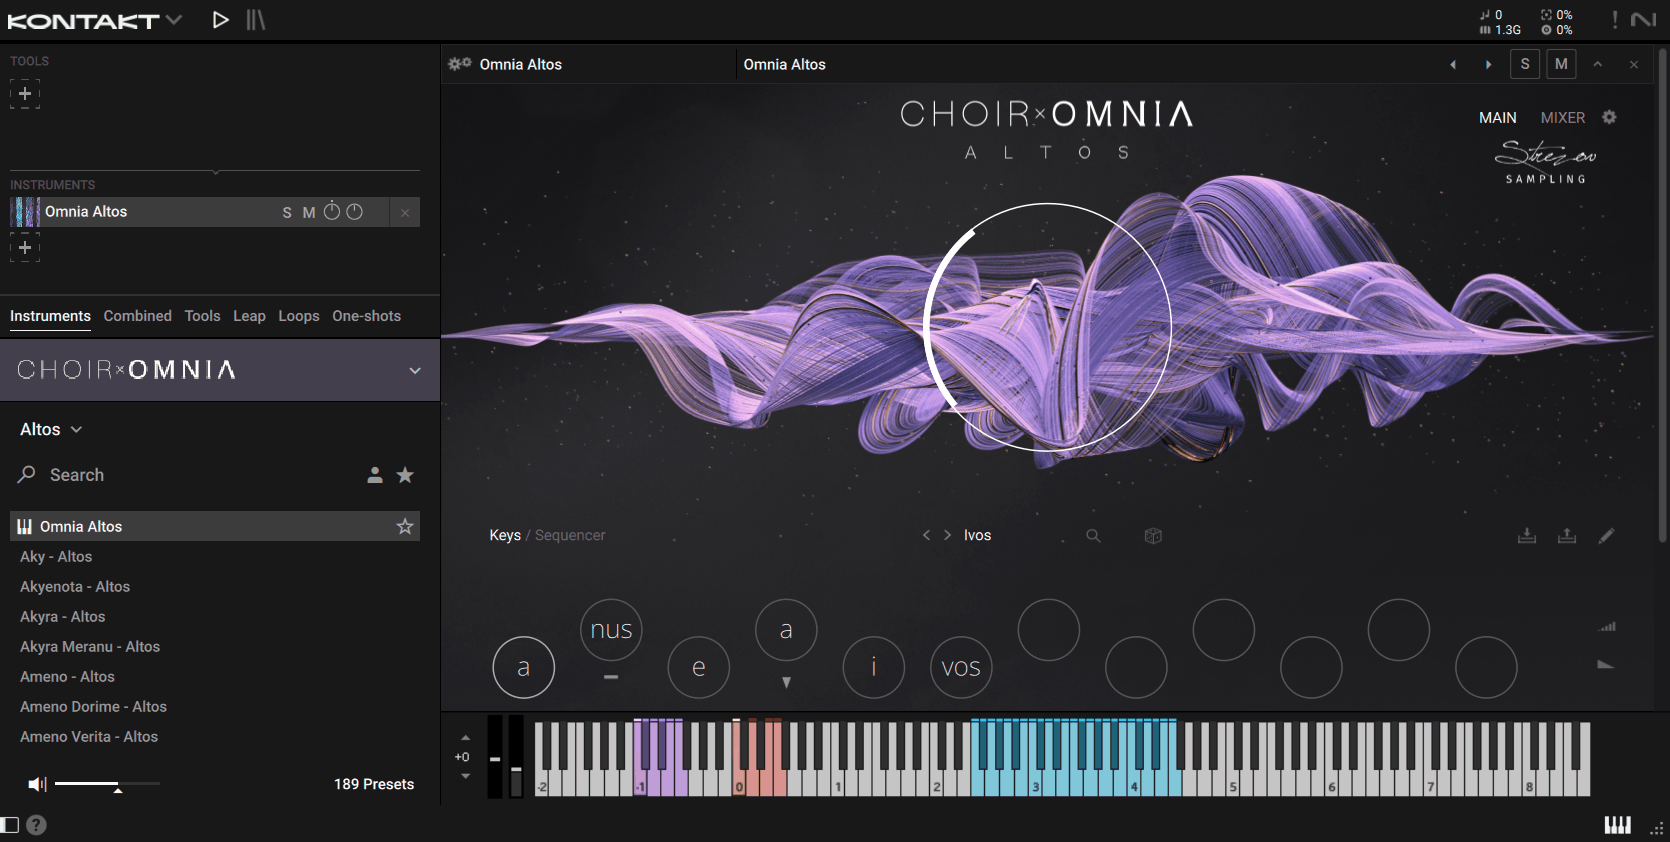
Choir libraries are notoriously hard to make sound alive instead of robotic, mostly because breath, blend, and vowel shape don’t sample cleanly the way a single instrument does. Most attempts land on one of two extremes, either too polished to feel human or too loose to sit properly in a mix.
That gap is exactly what OMNIA is built to close, and it does it by capturing 40 singers split into four traditional sections instead of relying on one blended mass.
I like that you get independent control over soprano, alto, tenor, and bass, so you can tilt an arrangement toward brightness or weight without recording an entirely new pass.
The choir was recorded over six weeks in collaboration with Strezov Sampling at Sofia Session Studio, and I noticed that shows up clearly in how naturally the sustains and staccatos blend even at extreme dynamics.
Where OMNIA earns its place for me is the Syllabuilder, which lets you trigger single syllables on the fly or build full phrases in sequence mode and save them for later use.
Here is what you get:
- 189 Scoring Presets
Two separate browsers give you fast access to the full preset range, one for the main choir sound and one dedicated to the Syllabuilder’s prebuilt phrases. The presets themselves span natural choral ambience all the way to hybrid, cinematic textures, so you are not stuck picking between traditional and modern.
- Four Articulation Types
Sustain, marcato, staccato, and staccatissimo cover the emotional range you would expect from a full choir, and each one carries enough velocity layers that transitions between soft and loud stay smooth instead of stepping obviously between samples. I find this depth valuable when a cue needs to swing from a whisper to a full throated climax inside a few bars.
- Five Mixable Mic Positions
You can build your own soundstage from five microphone positions, then shape it further with stereo spread, EQ, and a set of characterful NI reverb presets. This is where OMNIA stops sounding like a preset and starts sounding like a specific room, which matters a lot once you are trying to match a choir to an existing orchestral mix.
2. Native Instruments Straylight
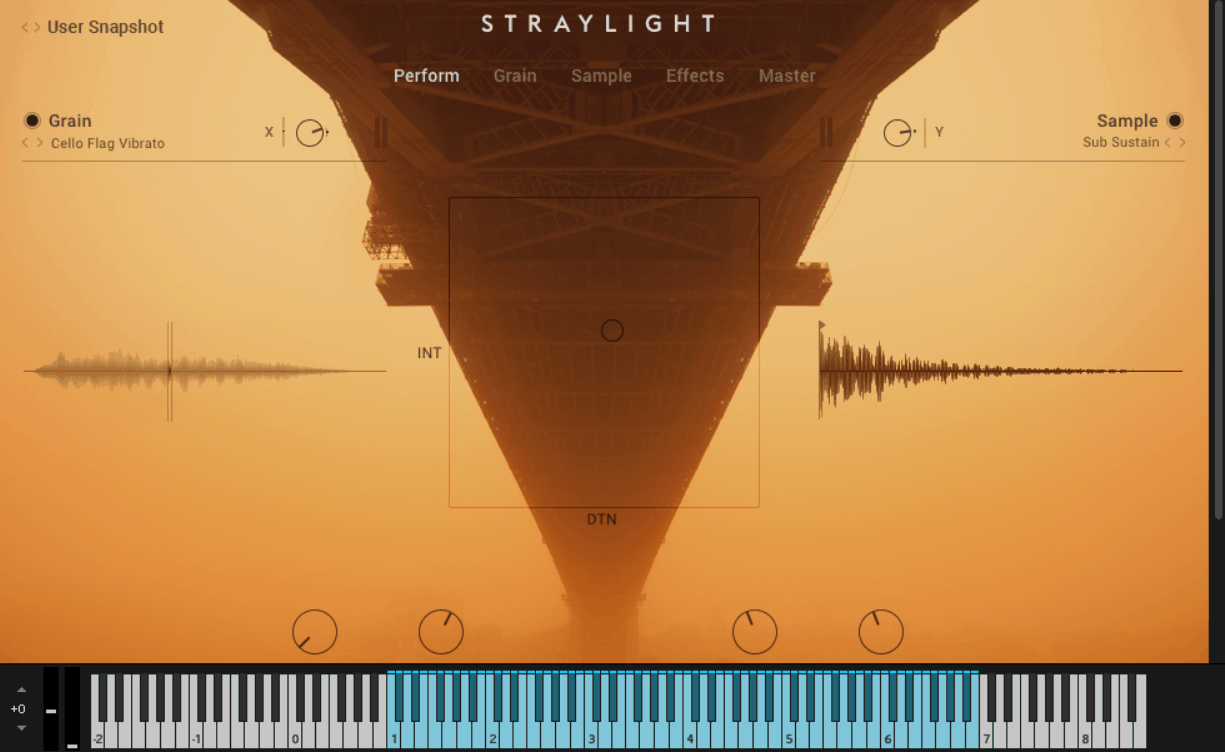
Native Instruments Straylight pairs a granular synthesis engine with a sample playback module, and the two run side by side instead of one bolted onto the other as an afterthought.
Composer Paul Haslinger was involved in shaping the instrument alongside developer Frank Elting and The Most Human Colors, and honestly you can hear that film scoring background in how quickly the presets feel screen ready.
I noticed that the grain engine lets you set grain size anywhere from 10 milliseconds to a full second, which changes the texture from a fine shimmer to something closer to the original sample being chopped into audible chunks.
- Fourteen Simultaneous Effects
You can stack up to 14 effects at once, pulled from 10 different categories, including reverb impulse responses that were captured specifically for this instrument instead of borrowed from a generic library. I would recommend starting here if you want a texture that already sounds treated instead of dry.
- 452 Snapshot Presets
Organized across categories that span atmospheres, playable keyboard style sounds, leads, pads, pulses, and transitions, the preset count gives you a genuinely broad starting point.
- Five Editing Pages
Beyond the main performance page, four additional windows give you deep access to the grain and sample module’s individual components. Personally, I think this is where Straylight separates itself from simpler granular tools, since nothing important is buried more than a click or two away.
- Import Your Own Waveforms
Drop any audio file onto either the grain or sample layer and Straylight analyzes it automatically, no separate mapping step required. This turns the whole instrument into a sound design sandbox instead of a fixed library, which is worth knowing if you already have a folder of field recordings sitting unused.
3. Heavyocity Gravity 2
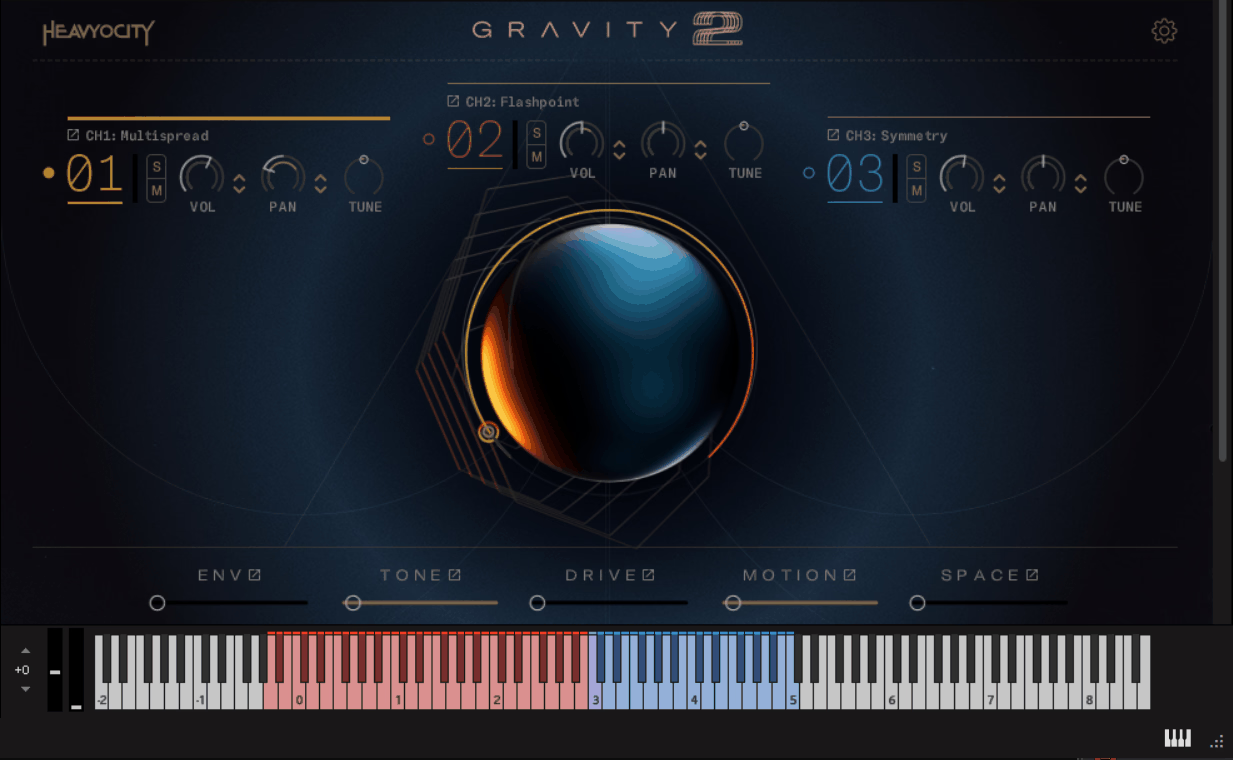
There’s a real tension in hybrid scoring tools between sounding musical and sounding like pure sound design, and most libraries end up leaning hard toward one side or the other. Gravity 2 tries to hold both at once, and for the most part it pulls it off.
The library is built from over 1,000 unique sound sources, and Heavyocity’s usual signature is all over it, junkyard clatter, mechanical noise, electrical buzz, and radio static sitting right next to digitally mangled cello, violin, koto, zither, waterphone, and piano.
Other than that, you get:
- Three Distinct Instruments
Gravity 2 splits into a Designer, a Menu, and an XL version of the Menu, each one built around a different workflow. I like how this approach lets you jump straight to sound design when you need deep control, or stay in a faster browsing mode when you just need something usable quickly.
- Over 600 Snapshot Presets
The presets are organized into themed folders across the three instruments, which cuts down on scrolling considerably. To be honest, with a sound source library this large, having presets grouped by mood or texture type instead of dumped into one long list makes a real difference.
- 144 Playable Loops
Each loop can be mixed and matched with others for unique rhythmic combinations, giving you a rhythmic foundation to build a cue around instead of starting from a blank grid. I would say this is one of the more underrated parts of the library, since most Gravity users go straight for the atmospheres and skip past the loop content.
- Three Channel Mixer
You can blend, process, and randomize across three independent channels, each with its own set of controls, to build evolving textures instead of static ones.
- NKS 2.0 Integration
Gravity 2 supports the newer NKS 2.0 standard, meaning key parameters map cleanly onto compatible keyboards without extra setup.
4. Native Instruments Symphony Series: String Ensemble
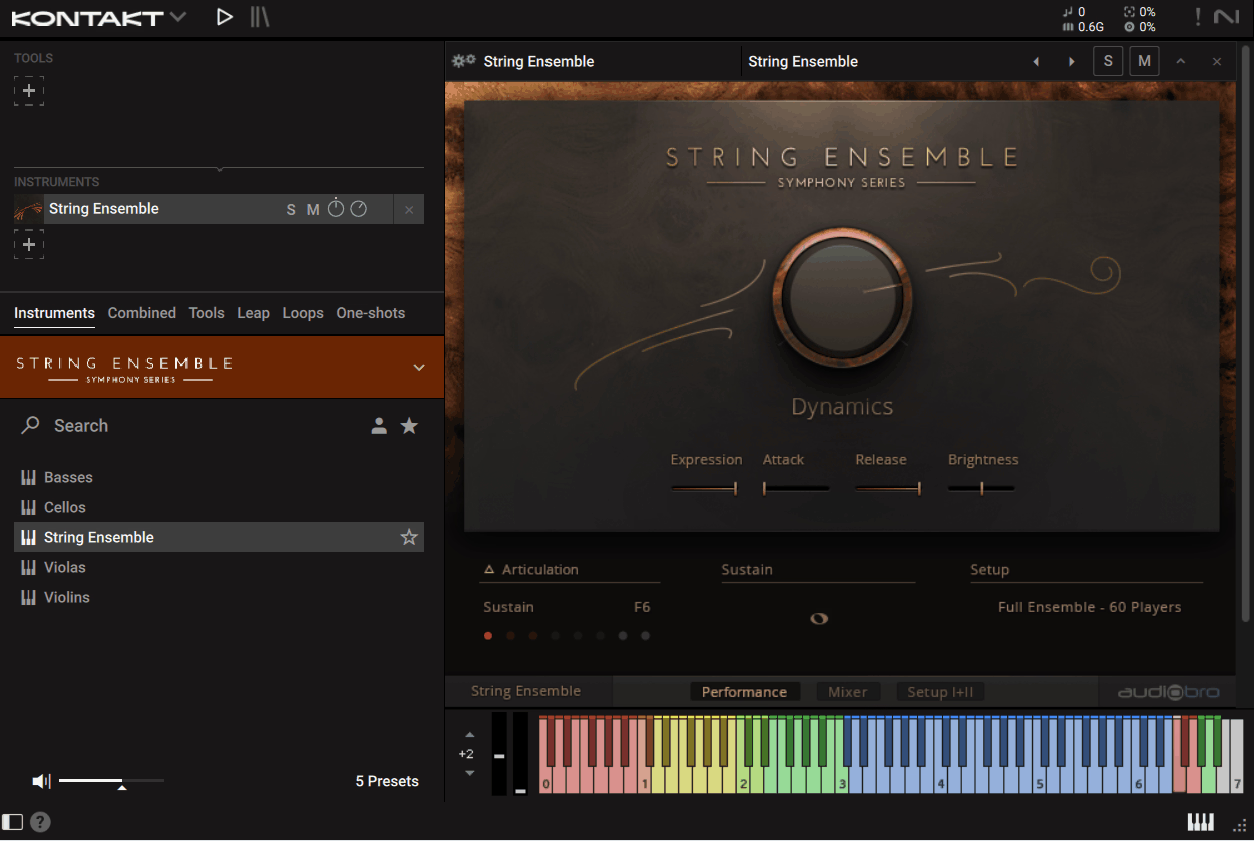
Orchestral string libraries tend to split into two camps, and NI String Ensemble sits closer to the more detailed one without giving up much speed. It’s built around a 60-piece string orchestra recorded in collaboration with Audiobro in Budapest, split into four separate instruments for violins, violas, cellos, and basses.
I find that the difference becomes obvious the moment you start layering divisi parts, since each section was recorded as separate A and B divisi groups instead of one blended take. The Auto Divisi engine distributes notes between those sections automatically, following standard scoring conventions, so you get realistic spread without manually splitting every chord yourself.
True polyphonic legato and portamento run across all sections, with up to eight voice automatic voice leading in real time, and I appreciate how that holds up even in dense chord movement. Because of that, writing a full string section that actually breathes like a real one takes a fraction of the time it would with a library that only handles single lines cleanly.
- Up To Eight Articulations Per Section
Each of the four sections can have up to eight articulations assigned at once, switchable through key switches or MIDI CC. I suggest paying attention to this detail because it means you can build a full articulation map for a cue before you even start writing, instead of stopping to reassign mid session.
- Four Microphone Mixes
Close, mid, and far positions sit alongside a production ready stereo mix, giving you room to build your own balance or fall back on something usable straight away. What stands out to me is how well the far position holds ambience without turning muddy once you push the level up.
- Sordino, Trill, and Octave Run Articulations
Beyond the core sustains and staccatos, the library includes sordinos, trills, and octave runs recorded with the same level of detail as the primary articulations. I like that these don’t feel bolted on as an afterthought, since they were part of the same recording sessions and not a separate patch job.
- Dedicated Mixer Page
A parametric EQ, convolution reverb, and compression are all built into a separate mixer page, so you’re not reaching for third party plugins just to get a workable string sound. In general, this saves a step when you’re working fast and don’t want to open a whole external processing chain for a rough pass.
5. Native Instruments Playbox
Playbox combines chord generation with sample layering and randomization, and the whole thing is playable with a single finger if you want it to be.
I mean, the roll of a dice, quite literally, blends between over 900 samples, more than 200 chord sets, and a large bank of effects presets to spark new ideas fast. What I like about it is that a total beginner can hit randomize and land on something usable, while a more advanced user can layer in their own samples and build something entirely custom on top.
You can drag and drop your own audio files directly onto the interface, and Playbox analyzes them automatically so they slot into the chord and sample engine without extra setup. Once you’ve landed on a progression you like, every chord it generates can be exported and reused for any other instrument in your DAW, which keeps it from being a one-off toy.
- Arp, Strum, and Grain Effects
Beyond the basic chord and sample engine, three dedicated effects, Arp, Strum, and Grain, add rhythm and texture on top, letting a static chord turn into a moving arpeggio, a strummed pattern, or a granular texture. This is where Playbox stops feeling like a chord tool and starts feeling like a full sound design instrument.
- Fifty Plus Ambience Samples
A dedicated bank of ambience textures, forests, busy stations, and vinyl crackle among them, sits ready to layer under any chord or sample combination. I noticed that these do a lot of work quickly when a track needs atmosphere but you don’t want to bounce out to a separate sampler.
- Up To Fourteen Effects
You can chain up to 14 high grade effects and rearrange their order for different results, which matters more than it sounds like it would. In fact, reordering a distortion and a filter can change a texture almost as much as swapping the source sample itself.
- Humanized Velocity and Timing
Built in controls loosen up the mechanical feel of triggered samples and chords, adding depth without you needing to manually program variation into every note. I would say this is a small feature that ends up mattering a lot once you’re building out a full arrangement.
6. SonuScore CHROMA – Grand Piano
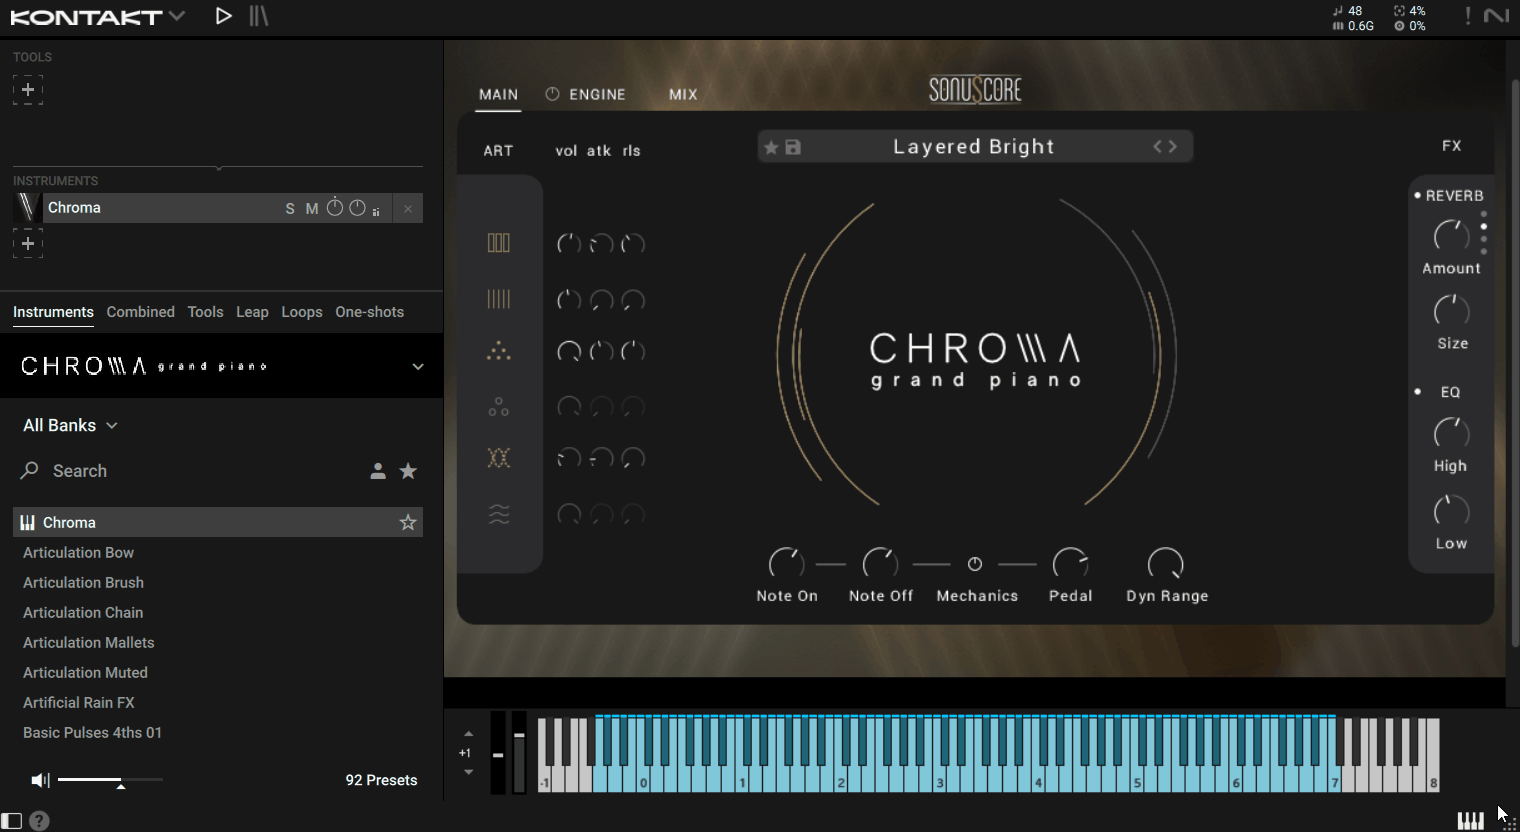
What actually makes a sampled piano feel alive isn’t the note itself, it’s everything happening around it, the mechanical noise, the pedal movement, the way a hammer catches a string slightly differently every time. Most piano libraries either ignore that entirely or bury it so deep in the settings that nobody bothers.
CHROMA – Grand Piano takes the opposite approach, and it starts with the source itself, a world class Yamaha C3 recorded in exhaustive detail. I found that the depth really shows up in the mechanical layer, note on, note off, and pedal sounds are all captured and individually adjustable instead of baked permanently into the samples.
With 23 velocity layers and 8 round robins, the dynamic range holds up whether you’re playing something delicate or leaning hard into the keys, and I noticed almost no obvious sample repetition even in fast repeated passages.
Personally, I think what separates this from a standard piano library is the engine underneath it, which can push the same recordings toward bright, natural keys or toward abstract, droning soundscapes depending on how deep you go.
- Six Playable Articulations
Beyond standard keys, you get palm mutes, brushes, mallets, e-bow, and chains, all playable and combinable within the same instrument. What stands out to me is how usable the more unconventional articulations are on their own, not just as a texture layer under something else.
- Ninety Plus Factory Presets
A large bank of ready to go presets spans both naturalistic piano tones and more cinematic ensemble sounds, so you have somewhere to start regardless of the direction a cue needs to go. In general, I find myself starting from a preset and adjusting from there instead of building a patch from scratch every time.
- Deep Sound Shaping Controls
Attack, decay, delay, density, octavation, detune, sample start, and pan randomization are all exposed and adjustable, giving you a genuine sound design layer on top of a traditional piano recording. Because of this, CHROMA works just as well for an ambient pad as it does for a straightforward piano part.
7. Native Instruments Symphony Series Brass
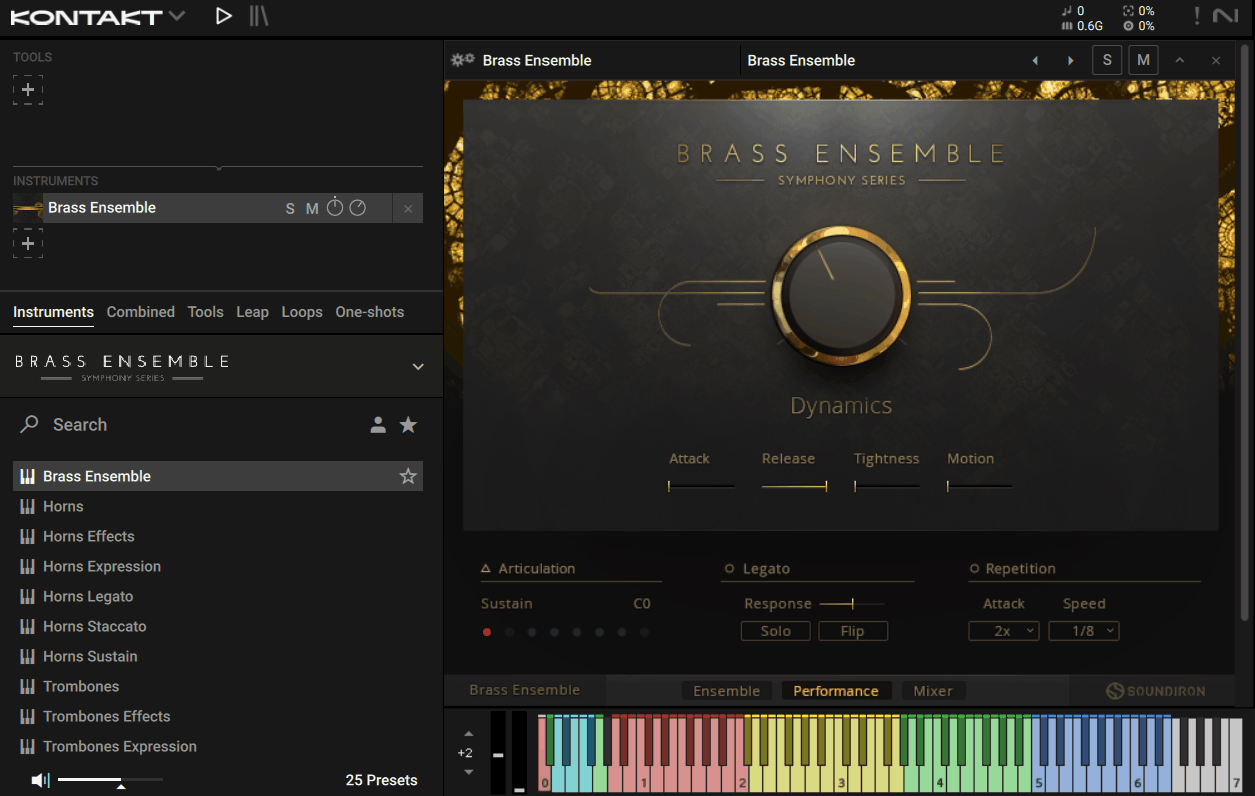
The recordings behind this sample library were captured at St. Paul’s Church in San Francisco with a 32-piece brass ensemble, split into four eight-player sections covering trumpets, horns, trombones, and tubas. That full-bodied source material is what Symphony Series Brass builds its 183 articulations around, and honestly the range covers everything from a single soft trumpet note to the full ensemble at fortissimo.
I noticed that each section is playable as its own Kontakt instrument or combined into one smartly balanced ensemble patch, which matters if you’re switching between a full brass wall and a more exposed passage in the same cue.
True and emulated legato run throughout, with up to eight round robins keeping repeated notes from sounding mechanical, and to be honest that’s the detail that made the biggest difference for me once I started writing faster passages.
- Four Discrete Mic Mixes
A dedicated mixer page lets you blend four separate microphone positions to shape how close or roomy the ensemble sits in your mix. At the very least, this gives you enough control to match the brass to whatever else is already in the arrangement without reaching for outside plugins.
- A Full Bank of Brass Effects
Clusters, sweeps, falls, risers, stabs, stingers, and valve noises are all built in, covering the kind of transitional material that would otherwise mean tracking down a separate SFX library. I like how these sit right alongside the traditional articulations instead of being tucked away in a different patch.
- Fast Articulation Switching
An articulations page, accessible directly from the performance screen, lets you assign any of the 183 options to a key switch or MIDI CC bank. I would recommend setting this up before you start writing a cue, since switching mid session pulls you out of the actual composing.
8. Native Instruments Mysteria
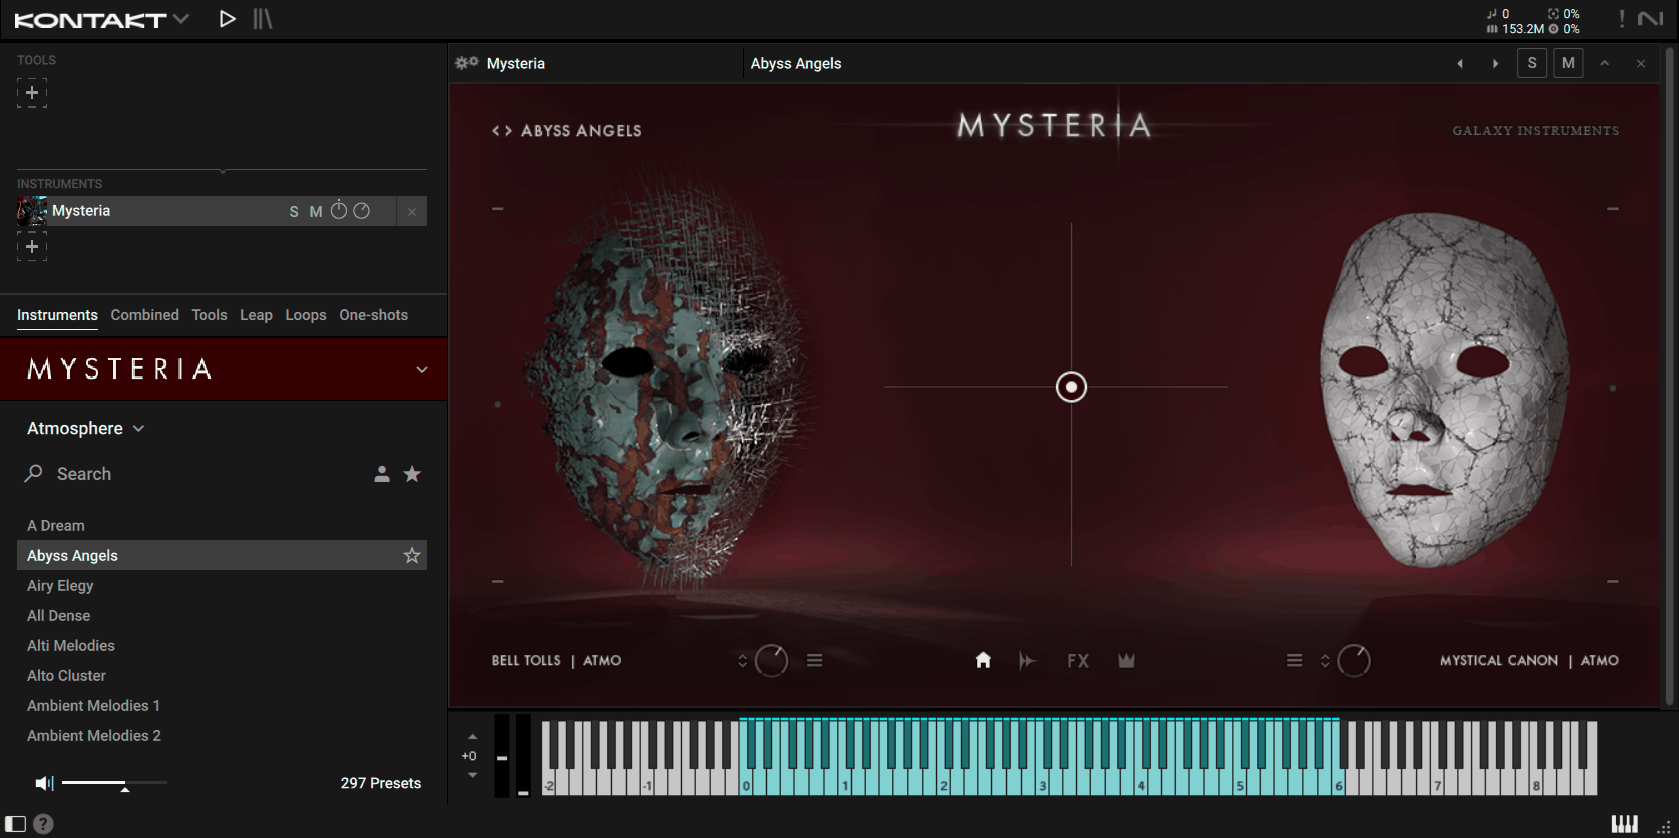
Native Instruments Mysteria was built specifically around that idea, using recordings from three separate choirs captured over 45 hours of studio time in Bratislava and Cologne.
A large symphonic choir, split into full, male only, and female only takes, sits alongside a smaller chamber choir and a New Music vocal quartet, and I noticed the range between those sources is what gives Mysteria its scale, from intimate to genuinely massive.
The central X-Y pad is where most of the actual performance happens, the X axis morphs between sound sources while the Y axis pushes the emotional intensity higher, and I feel like that single control does more work than most instruments manage with an entire page of parameters.
You get access to over 350 master presets built from more than 800 individual sound sources, which is more than enough to avoid ever touching the same texture twice across a full score.
- Cluster Designer
You can build custom tonal clusters from up to eight individually tuned and panned voices, then play them back in Glide, Add-on, or Parallel mode depending on how you want the notes to interact. I suggest paying attention to this detail because it’s where Mysteria stops being a preset library and starts being an actual sound design tool.
- Six Modulatable Effects
On top of EQ and a convolution reverb, six additional effects can be modulated in real time, which keeps a texture evolving instead of sitting flat once you land on a preset. That being said, the modulation depth is subtle enough that it doesn’t fight with whatever else is happening in the mix.
- Three Preset Categories
Presets are grouped into Clusters, Atmospheres, and a combined Clusters plus Atmospheres category, which makes browsing considerably faster once you know roughly what kind of sound you’re after. Because of that, I tend to jump straight to Atmospheres when I need something slow building and to Clusters when I need a sharper, more immediate hit.
- Choir Diversity Baked Into the Sound
Because the underlying recordings pull from three distinct ensembles instead of just one, even the simplest presets carry more textural variation than a single choir source could offer. What I like about it is that this variety comes through even at the preset level, before you’ve touched a single control.
9. Heavyocity Damage 2
Cinematic percussion libraries are everywhere at this point, and most of them lean on the same handful of tricks, big toms, layered impacts, and a pile of reverb.
Heavyocity Damage 2 was recorded at Skywalker Sound specifically to avoid blending into that pile, and from the source material alone it mostly succeeds.
- Over 860 Loops
The Loop Designer includes a large library of loops that can be layered, sliced, and recombined for rhythmic material, which is a genuinely different use case from the impact focused Ensemble Designer. Not to mention, this is the part of the library most likely to get overlooked if you already know Damage for its impacts.
- Sixteen Voice Kit Designer
The Kit Designer lays out 16 voices designed to integrate directly with Maschine, MPC style, and standard MIDI kit controllers, and every voice is freely MIDI note assignable. I would recommend this workflow specifically if you’re producing instead of composing to picture, since it feels built for a pad controller first.
- Over 200 Snapshots
Snapshots are organized across 20 categories, covering the full spread from organic orchestral hits to heavily processed, damaged textures. In general, I find the category grouping saves a lot of time compared to scrolling through one long undifferentiated preset list.
- Five Discrete Mic Channels
Close, Room, Hall, LFE, and CRUSH channels give you an unusual amount of control over how big or how crushed a hit sounds before you’ve touched a single external plugin. I like how the CRUSH channel in particular lets you push a hit into something more aggressive without destroying the cleaner channels underneath it.
- Fifty Plus Kit Snapshots
Ready made kit snapshots, split across Hybrid and Damaged categories, give you a fast starting point before you dive into custom voice assignment. I noticed these hold up well enough on their own that I’ve used a few directly in a mix without much further tweaking.
10. Native Instruments Symphony Series Percussion
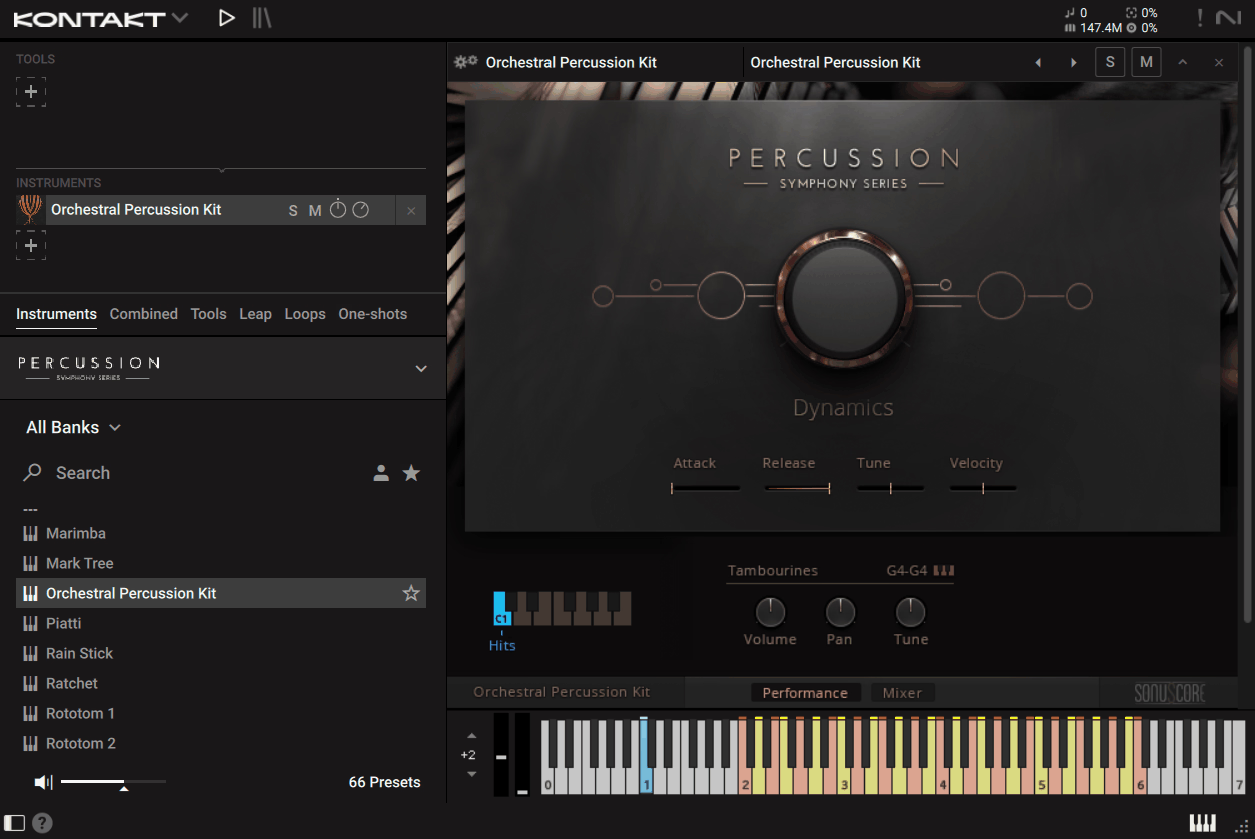
Orchestral percussion libraries have leaned hard into the epic, modern cinematic sound over the last several years, huge hits, layered impacts, aggressive processing. That’s a fine sound to have access to, but it’s not always what a traditional scoring session actually calls for.
The instruments in this library were recorded at Studio 22 in Budapest, developed in partnership with Sonuscore, and the focus sits squarely on realistic, classical style percussion instead of trailer ready processing.
Symphony Series Percussion covers 55 orchestral percussion instruments, and I found the balance between precision and natural room ambience is where it really separates itself from more modern leaning libraries.
- Spot Mic Plus Four Room Mixes
An ultra-detailed spot microphone captures transient detail up close, while four distinct room mixes add depth and space depending on the style you’re going for. I suggest paying attention to this detail if you’re scoring something that needs to sit convincingly inside an existing orchestral recording space.
- A Genuinely Wide Articulation Set
Rolls, flams, rim shots, mallets, brushes, sticks, and hot rods are all covered, giving you far more nuance than a basic hit and roll setup. Personally, I think this is where a lot of cheaper percussion libraries fall short, since the playing technique variety here actually holds up under close listening.
- Full Tuned Percussion Section
Celesta, marimba, timpani, vibraphone, xylophone, glockenspiel, crotales, and tubular bells are all included, so you’re not stuck sourcing a separate mallet library for melodic percussion parts. From my experience, having tuned and untuned percussion in the same interface speeds up scoring considerably when a cue needs both.
- Seven Combined Kits
Beyond the individual instruments, seven smartly combined kits group related percussion together for faster performance, which is useful when you need a quick, full sounding pass before refining individual parts later. I would say these work especially well as a starting sketch you build detail into afterward.
11. Native Instruments Action Woodwinds
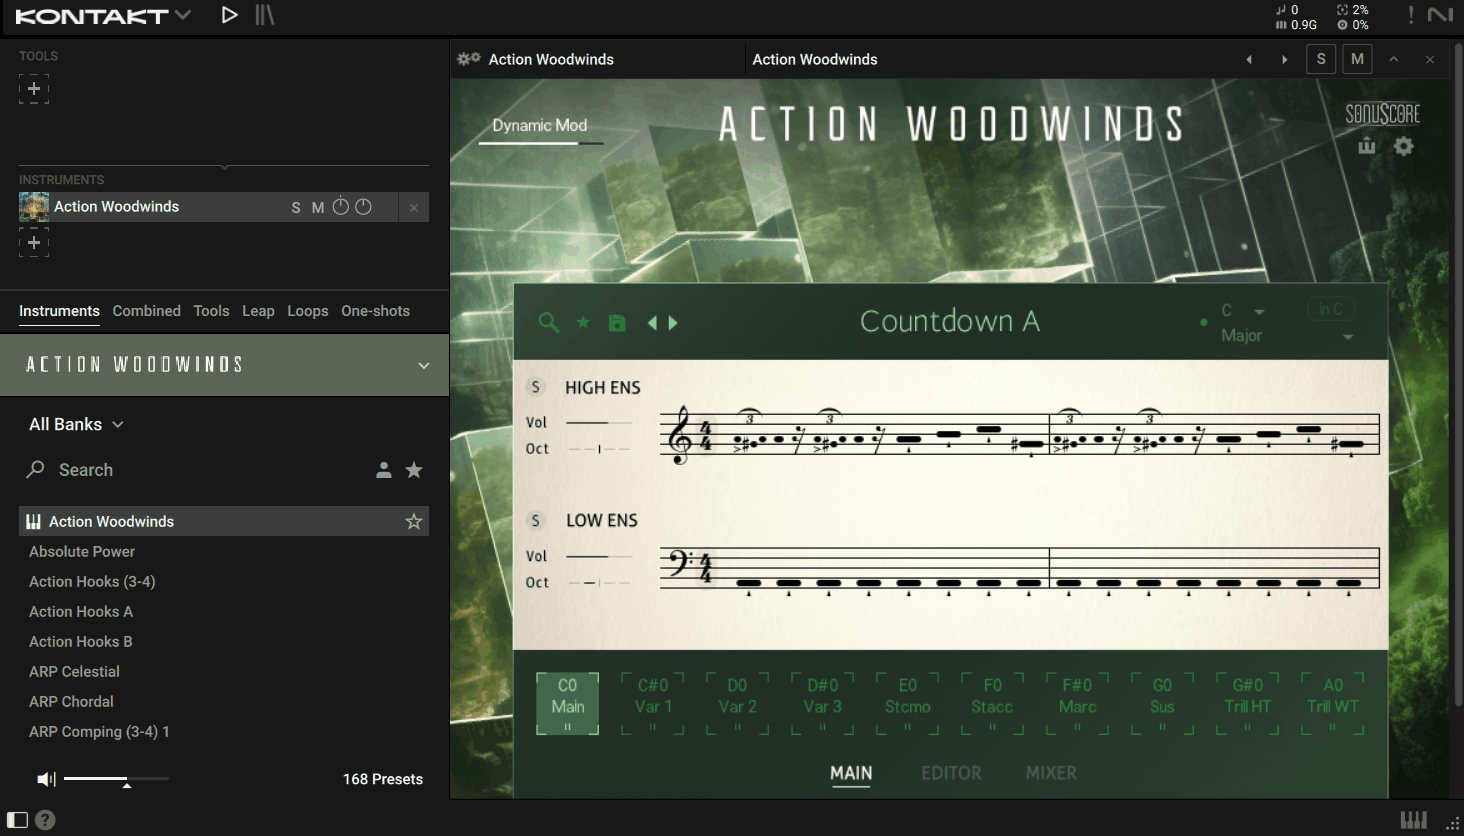
Action Woodwinds covers a 13-piece orchestral woodwind ensemble split into high and low sections, clarinets, English horns, oboes, and flutes on one side, bassoons and contrabass clarinets on the other.
I like how you get over 160 themes to start from, pulled from a bank of more than 1,000 swappable phrases, so you’re rarely stuck with one fixed idea if the first thing you try doesn’t fit the cue. It was developed in collaboration with the Sonuscore team, and honestly that partnership shows up in how musically the phrases are constructed instead of feeling like generic runs stitched together.
Beyond the prebuilt material, Live Modules let you chop, duplicate, and refine sections to build your own trills, crescendos, falls, and runs from scratch, which matters if you need something more specific than what a preset theme offers.
- Scaler With Twenty Scale Types
A dedicated Scaler feature keeps every note you play locked to a chosen key, using one of 20 available scale types, so wrong notes simply don’t sound. I would recommend this specifically if you’re sketching quickly and don’t want to stop and think about key signatures mid idea.
- Custom Mode Sequencing
Custom mode lets you design each step of a sequence individually, choosing exactly which notes of a chord get triggered at each point. What stands out to me is how much more precise this feels compared to just randomizing within a scale, since you’re shaping the actual contour of the line.
- Octave Doubling With 8va
A single 8va button doubles your current phrase an octave higher, adding presence without needing to duplicate a track or manually transpose anything. I find this useful for pushing a melodic run further into the foreground during a climactic moment in a cue.
Hey, I’m Vil, I started this site to help you find the best audio plugins covering various categories including synths, pianos, strings, and effect tools of all sorts as well. I pick these plugins based on various criteria so it best matches the actual topic.