
When you purchase through the links on my site, you support the site at no extra cost to you. Here is how it works.
A good compressor does not need to cost anything. Free options now cover mix buses, vocals, drums, mastering, parallel compression, and aggressive sound design, so the main question is which type of compression suits the job.
Some are best for bus glue, some for smooth leveling, and others are built to make drums, synths, or loops much denser. I picked these ten because each one does something useful enough to justify keeping it in your template.
With that being said, I would like to share with you ten free compressors below:
I will talk about these specifically: Analog Obsession BUSTERse, Kiive Audio Xtressor NUKE, Sixth Sample Cramit, BPB Dirty LA, Analog Obsession SPECOMP, and few more options.
Starting with Audio Damage:
1. Audio Damage Evil Otto
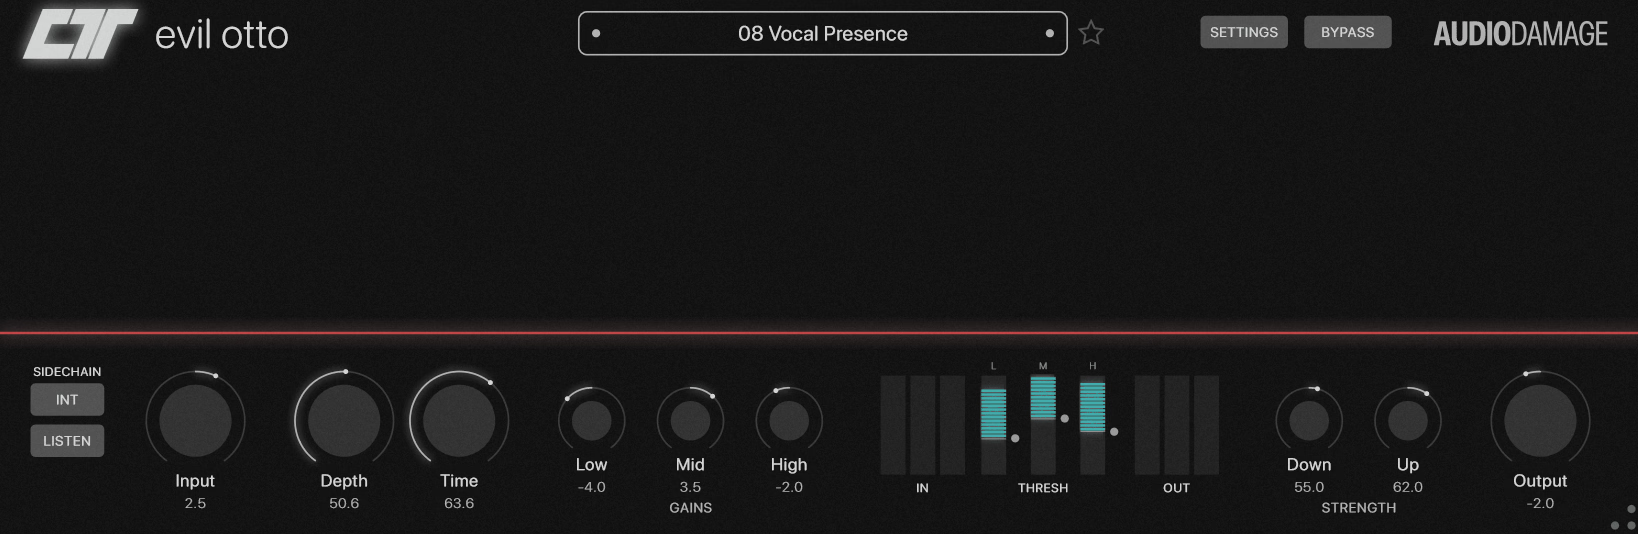
Evil Otto is the simple choice here for OTT-style compression. It pushes quiet details forward while controlling louder material across three bands, which makes it useful when a synth, drum loop, or bass sound needs more density and presence.
I would use it for electronic production and sound design, not for subtle bus compression. Compared with Cramit, it is the more direct option: you get the OTT-style result without putting as much attention on the distortion side.
That makes it easy to keep around as a quick creative insert. When a sound is technically loud but still feels too small, this is the kind of compressor I would try.
- Three-Band OTT Processing
Each of the three bands applies upward and downward compression, pushing quieter material forward while controlling louder material at the same time.
I like that this keeps the aggressive behavior obvious rather than hiding it behind a huge collection of controls. On a synth bus, drum loop, or even a full mix, you can drive the effect hard and then back it down once the density starts becoming too obvious.
- Per-Band Thresholds
Each band has its own threshold, so the low, mid, and high ranges do not all have to receive the same amount of treatment.
That makes it easier to keep the low end from getting excessively squashed while still pushing the upper mids and highs forward. For electronic material, that distinction can be more useful than having another dozen controls for shaping the compressor.
- Sidechain Input
An external sidechain input lets another track control the compression, which gives you a practical way to make one signal push another out of the way.
On a bass-heavy mix, for example, you can let another element trigger the multiband movement rather than asking the compressor to react only to the audio already passing through it.
2. Kiive Audio Xtressor NUKE
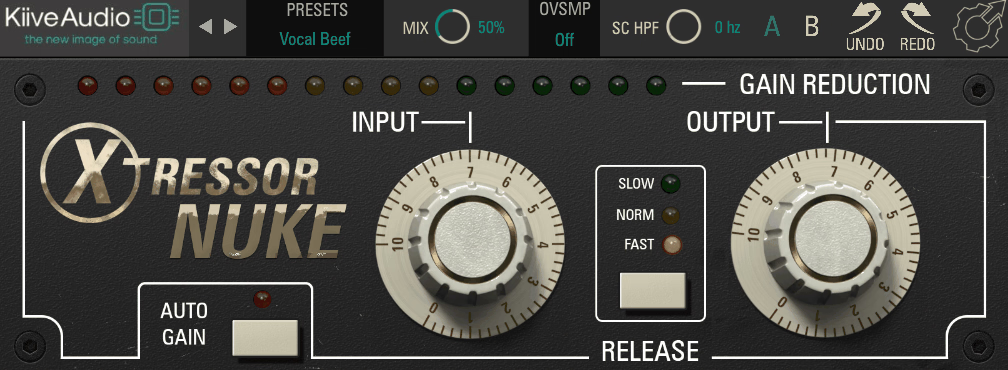
Xtressor NUKE is for the point where normal compression is not enough. It focuses on aggressive dynamics, making it a better fit for parallel drums, room mics, drum buses, and punchy sound design than for subtle bus control.
The limited control set is part of the appeal. You do not spend time fine-tuning every parameter; you choose the amount of compression, set the release behavior, and judge the result.
I would keep it for situations where you want obvious movement and impact rather than transparency. It is especially useful when a drum track needs to sound more explosive without building a complicated parallel chain.
- Three Release Modes
Fast, Normal, and Slow cover the range that actually matters when you’re working on drums.
Fast is where the extreme pumping lives, and on a parallel drum bus or a set of room mics it gives you that exaggerated, snappy movement that makes a chorus feel bigger than it measures. Normal sits in genuinely usable territory for a full drum bus, while Slow calms things down enough that you stop hearing the compressor and start hearing the kit.
- Sidechain High-Pass
You’re able to filter the detection path, which keeps the kick from dictating every bit of gain reduction the plugin applies.
I would say this is what turns NUKE from a drums-only tool into something you can put across a full mix. Without it, low frequency energy runs the show and everything above it just gets dragged along, which is why I’d always set this before touching anything else.
3. Sixth Sample Cramit
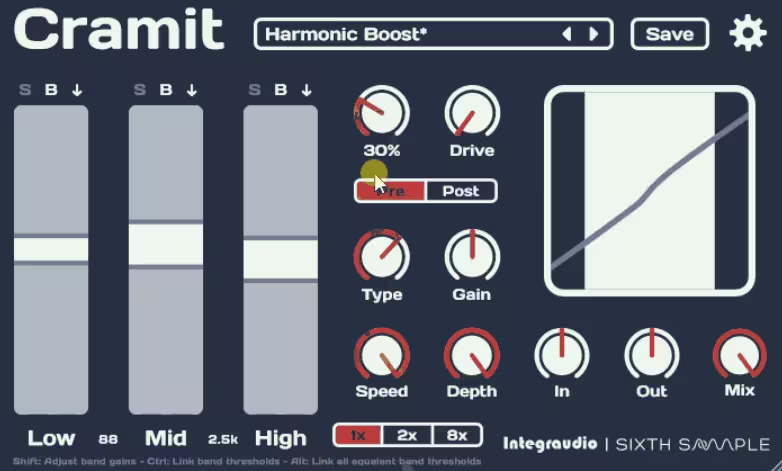
Cramit is the one to reach for when you want OTT-style density and distortion in the same processor. It is aimed squarely at electronic production, where a synth, drum loop, or bass sound may need more energy and presence without simply being turned up.
The three-band layout gives you more control than a basic single-band compressor, while the distortion section lets you decide whether the added harmonics happen before or after the compression. That makes it useful for both cleaner density and more obvious sound-design effects.
I would use it when a sound is already loud enough but still feels too small, soft, or disconnected from the rest of the arrangement.
- Three-Band Sections
You’re working with separate low, mid, and high sections, each handling upward and downward compression plus expansion, and each one soloable.
Soloing while you adjust makes a real difference to me, because multiband work goes wrong quietly when you only ever hear the combined output and can’t tell which band is causing the problem.
- Pre and Post Distortion
Seven distortion types are on offer, and the pre and post switch decides whether they hit before or after the compression stage.
- Variable Crossovers
Instead of accepting fixed split points, you decide where the three bands divide.
This matters most on sources with lopsided frequency balance. An 808-heavy low end or a bright percussion loop will often put the interesting content on the wrong side of a default crossover, and I’ve seen that look like a compression problem when moving the split was the actual fix.
- Oversampling
2x and 8x modes are both available, and I would recommend reaching for one when you’re driving the distortion hard enough that aliasing starts creeping into the top end.
4. Analog Obsession BUSTERse
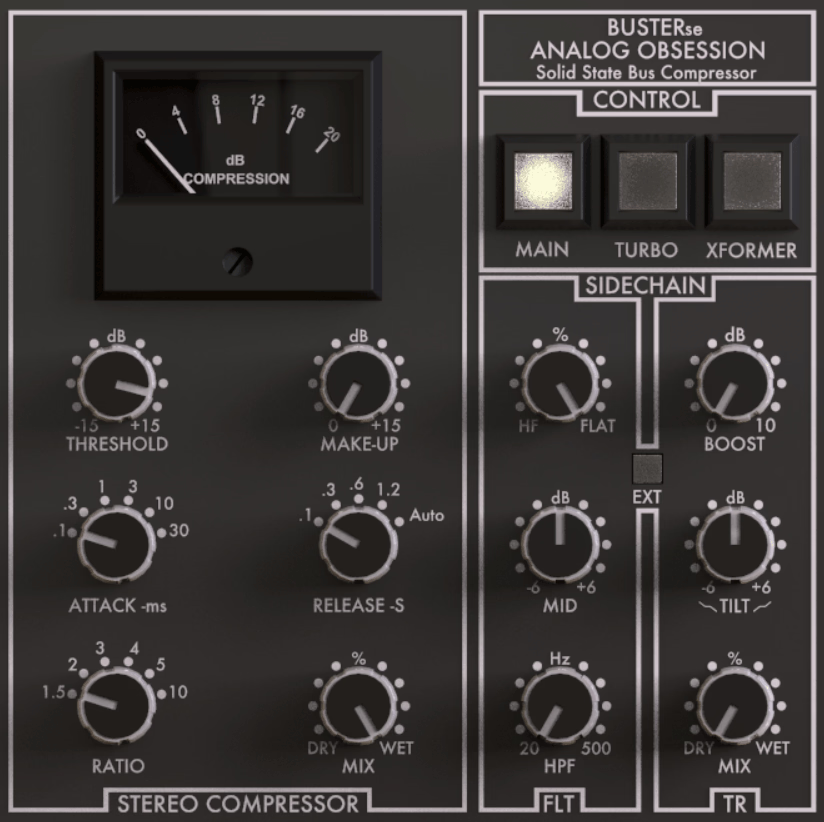
If you need a VCA-style bus compressor, BUSTERse gives you the familiar job of pulling a mix together while giving you more control over what triggers the compression. I would use it on a drum bus or mix bus when the basic compression is close but the kick, snare, or cymbals are still making the detector react too much.
The sidechain controls are the main reason I would choose it over a simpler bus compressor. You can shape the detection before changing the main compression, which makes it easier to keep the low end and transients from dominating the result.
If you want a conventional VCA compressor with enough extra control to handle difficult material, this is one of the stronger free options.
- Sidechain Filtering
You’re working with three bands in the detection path instead of a single high-pass switch, which gives you far more say in what the compressor actually reacts to.
The HPF sweeps from 20Hz up to 500Hz, so on a dance mix where the kick is doing most of the heavy lifting you can pull the trigger point up past it and let the compressor respond to the rest of the arrangement.
There’s also a mid band near 1500Hz with 6dB either way, plus a high band around 10kHz cutting up to 10dB, and to me that top band works much like an optical-tube unit does when you want the compressor to stop chasing cymbals.
- Transient Boost
Engaging BOOST gives you up to 10dB of emphasis on the attack portion, and because it shortens the decay at the same time, you’re making the compressor sensitive to hits instead of to sustain.
Sitting in front of it, TILT centers near 1kHz with 6dB of movement either direction, so you can send just one frequency range into the boost. Personally, I leave TILT flat most of the time and boost transients across the whole signal, though narrowing it down helps when only the snare needs the attention.
- Turbo and Transformers
By default you’re compressing mostly the mid frequencies, matching the original hardware, and TURBO opens detection out across the full range.
XFORMER swaps the input and output ICs for transformers, which changes impedance and adds character. Honestly, this strikes me as fairly subtle until you’re two or three dB into gain reduction, at which point it becomes obvious, and that’s roughly how it behaves on real gear too.
5. BPB Dirty LA
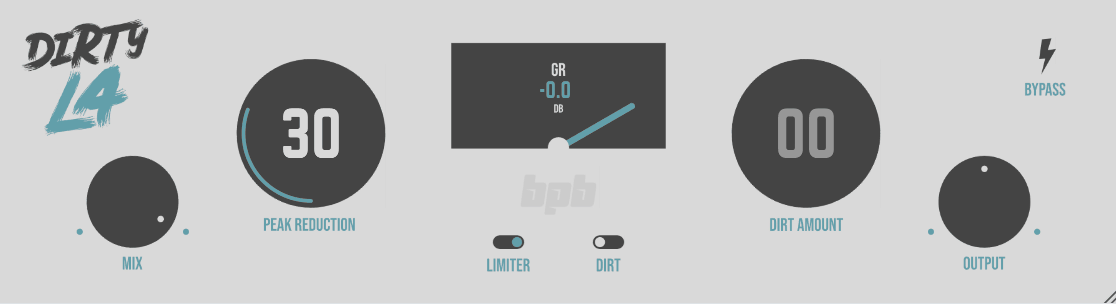
BPB Dirty LA is a simple choice for vocals, bass, guitars, synths, and drum groups when you want compression with some character and do not need a complicated interface. The optical-style approach keeps the controls straightforward, while the separate Dirt section adds saturation when you want more color.
I would use the regular compressor mode for general leveling and switch to Limiter mode when I want more control and a harder result. The Mix control also makes it easy to blend aggressive compression underneath the original signal.
For a free plugin, it covers a lot of common jobs without making you spend much time setting it up.
- Compressor and Limiter
The default mode gives you a fairly fast attack with a moderate ratio, tuned so that you can put it on a vocal, a synth pad, a bass line, or a guitar without stopping to think.
Flipping to Limiter mode moves you into faster attack and higher ratio territory, and on a master bus or across a drum group that’s where I’d start, since that combination is what people actually mean when they talk about mix glue.
- Dirt Saturation
Turning on Dirt brings in one of BPB’s own saturation algorithms, so you’re adding harmonic character and taking a small amount of edge off the transients at the same time.
4x oversampling kicks in automatically with Dirt engaged, then bypasses itself when you switch the saturation off. I think that’s genuinely considerate design, because you’re only paying the CPU cost when the feature needs it.
- Parallel Mix
The Mix knob runs from 0 to 100%, letting you balance dry against compressed without building a separate send.
Instead of setting up a parallel channel every time you want New York style drum compression, you’re driving the compressor hard and blending it straight back underneath the kit inside one plugin window, and for me that saves more session time than it sounds like it should.
6. Analog Obsession SPECOMP
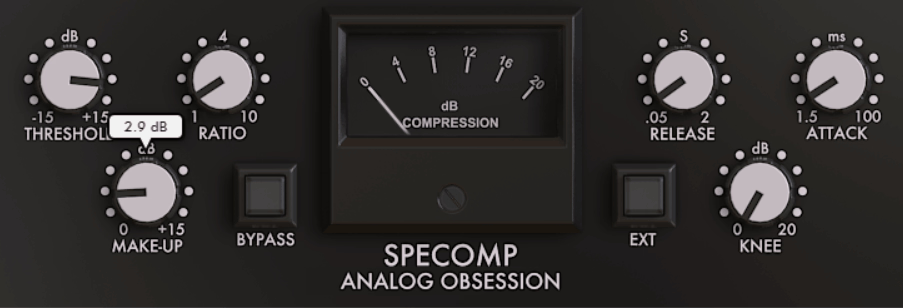
SPECOMP is useful when a regular compressor is reacting to the whole signal but you really need more control over which frequencies are driving the compression. It sits somewhere between normal wideband compression and full multiband processing.
I would try it on a vocal, bus, or dense mix when certain parts of the spectrum keep pushing the compressor too hard. Instead of changing the whole signal every time those frequencies become prominent, you can keep the overall dynamics more controlled.
That makes SPECOMP less of a general-purpose first choice and more of a problem-solving compressor. When a standard compressor feels too blunt, this is where I would try it.
- Spectral Compression
Beyond ordinary gain reduction, you’re also compressing individual frequency areas, so the plugin tames the full range instead of just reacting to overall level.
To me this is why things click faster with SPECOMP than with a comparable wideband compressor. Problem frequencies stop poking through the mix when the compressor is working hard, which is normally the moment a wideband unit starts making a vocal sound brittle.
- Saturation Character
Push it and you’ll get a layer of warm analog saturation that stops short of noticeably darkening anything.
That balance is the part I keep coming back to, since plenty of analog-style compressors hand you warmth and quietly take your clarity in exchange.
7. Outobugi Dynastor
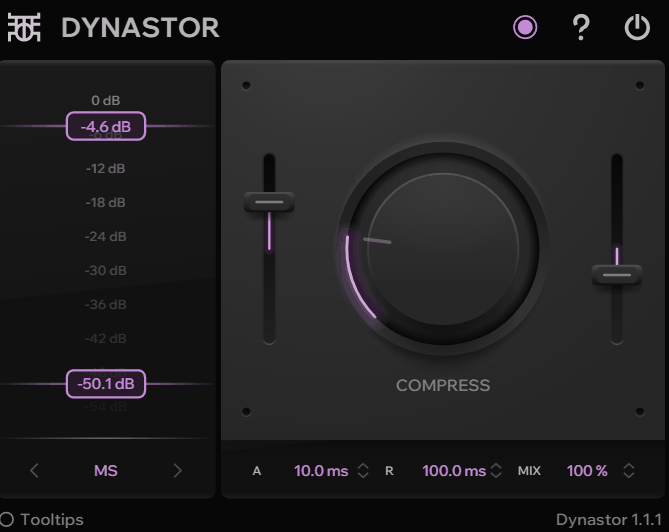
Dynastor gives you a denser, more aggressive form of compression without making you set up a full multiband processor. It is a single-band design, but it can push quiet material up while controlling louder material at the same time.
I would use it on electronic drums, loops, synths, and sound-design sources when ordinary compression makes the sound smaller rather than fuller. The different stereo modes also let you work on the left/right, mid, or side information instead of treating the whole signal the same way.
That makes it one of the more unusual compressors in the list. It is not really about transparent control; it is about changing the density and energy of the source.
- Dual-Direction Compression
One Compress control handles both directions at once, so you’re raising quiet signals and lowering loud ones with a single move.
I noticed the useful range sits well up the control, with the bottom portion doing almost nothing audible. That felt slightly awkward to me at first, and once you know where the plugin actually starts working it stops being an issue.
- Four Processing Modes
LR treats left and right independently, MS splits mid and side, while MID and SIDE each let you work on one component alone.
Side-only is the mode I find genuinely interesting. Compressing just the side information while leaving your mono center completely alone changes how wide a mix feels without touching the vocal or the kick, and finding that in a free plugin still surprises me.
- Threshold Against Analyzer
You’re setting threshold directly against a live frequency analyzer, so instead of guessing at a number you can see the content you’re about to compress.
If you’re still developing an instinct for what compression does, I feel like watching the threshold sit against real frequency content teaches you more in an afternoon than reading about ratios does in a week.
- Independent Channels
Channel processing stays fully separate in the relevant modes, which I find helps when your left and right genuinely need different treatment because of how something was recorded or panned.
8. Variety Of Sound Density mkIII

Density mkIII is mainly a bus and mastering compressor, with extra saturation and stereo control that let you shape the overall feel of a mix as well as its dynamics.
I would use it when a bus feels too disconnected or too clean and I want a little more density and character without reaching for a separate saturation plugin. It is more of a finishing tool than an aggressive track compressor.
That also separates it from BUSTERse. Both work well on buses, but BUSTERse is the more conventional VCA-style choice, while Density mkIII gives you more control over the color and stereo behavior.
- VCA Color
You’re dialing in a stateful saturation stage that produces strong second and third order harmonics along with frequency and load dependent higher order content.
Because it’s stateful, the behavior shifts depending on what you feed it instead of applying a fixed curve. On a master bus I would recommend keeping this modest, since to me it gets assertive well before you reach the upper half of its range.
- No Ratio At All
There’s no ratio control anywhere on the panel. The compressor works out how much gain reduction to apply based on the incoming signal.
- True Mid/Side
One switch puts you into M/S mode with a genuine two-channel layout, where mid and side get adjusted separately.
The dedicated RANGE functions per channel are what make this usable, since capping how much gain reduction each component can take stops your stereo image from collapsing inward. I find M/S compression goes wrong more often than not, and this is one of the few free implementations that makes it approachable for me.
9. TDR Kotelnikov
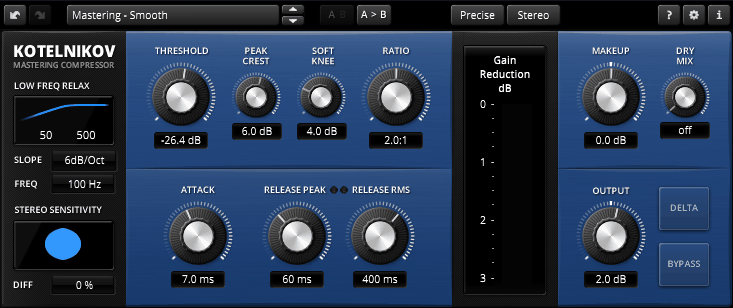
If you want bus or mastering compression without adding obvious color, TDR Kotelnikov is one of the first free compressors I would try. It is built for controlled dynamics rather than vintage-style saturation, so the original tone of the mix stays much more intact.
I would use it on a mix bus, drum bus, or master when I want to tighten the dynamics, reduce peaks, or add a little glue without making the signal noticeably darker or thicker. That makes it especially useful when the mix already has enough character and just needs better control.
The standard version is also capable enough that you do not need to treat it as a temporary free plugin. It can stay useful even as your compression technique becomes more advanced.
- Crest Factor Control
You’re given independent release controls for peak and RMS events, which is the idea the whole plugin is built around.
Peaks and average level settle at different rates in real music, and a dense mix needs exactly that separation when you want glue without flattening the snare hit that gives a chorus its lift. What stands out to me is that this is one of the few free compressors letting you treat those two things as separate problems.
- Delta Preview
Switching to delta preview plays you only the difference between the compressed and original signal.
I find this teaches me more than the finished result does, because hearing what a compressor is removing makes it very obvious when you’ve gone too far, and you’ll usually back the threshold off a decibel or two afterward.
- Bit Transparent Path
The oversampled Delta signal path stays bit transparent at 0dB of gain reduction, meaning your audio passes through completely untouched whenever the plugin isn’t actually compressing.
- Stereo Linking
Advanced stereo linking options were tuned specifically for the stereo bus, controlling how much each channel’s gain reduction influences the other.
10. Analog Obsession LALA
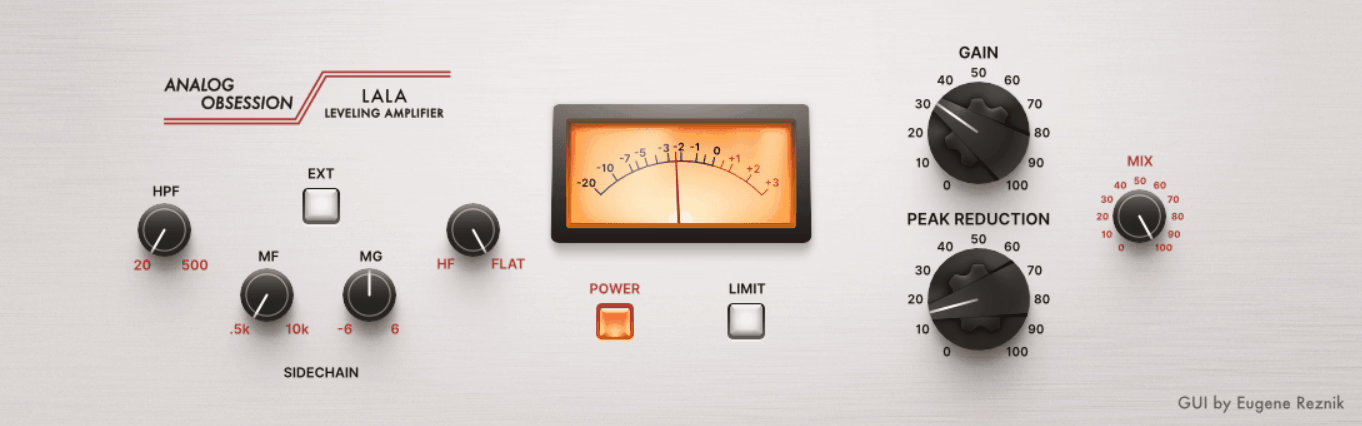
LALA is the obvious choice here when you want smooth optical compression, especially on vocals and bass. The basic workflow is simple, so you can concentrate on how much leveling you want instead of managing a long list of timing controls.
I would start with it on a lead vocal, bass guitar, or melodic instrument when I want the performance to become more even without the sharper response of a FET or VCA compressor. The extra sidechain controls also make it easier to keep low end, sibilance, or other frequency ranges from driving the compression too much.
That gives you the familiar optical approach with more flexibility than the simplest vintage-style compressor. It is a good choice when you want leveling first and character second.
- Compress or Limit
One switch moves you between compressor and limiter behavior.
For a lead vocal I’d sit in Compress mode with moderate Peak Reduction, which evens out the performance while leaving the consonants intact. On bass guitar, Limit mode firms things up considerably, and instead of feeling clamped the low end just stops wandering around.
- Three-Band Sidechain
You’re getting three bands in the detection path: an HPF pulling low end out, an MF/MG control setting sensitivity to mid frequencies, and an HF control doing the same up top.
That HF band extends the original unit’s R37 setting, and I must say it’s more useful than the description suggests. Backing off high frequency sensitivity keeps sibilance and plosives from triggering gain reduction across the entire vocal, which to me is normally the point where people give up and reach for a de-esser instead.
- External Sidechain
The EXT option accepts an external sidechain signal, and you keep access to the sidechain filter while using it.

Hey, I’m Vil, I started this site to help you find the best audio plugins covering various categories including synths, pianos, strings, and effect tools of all sorts as well. I pick these plugins based on various criteria so it best matches the actual topic.