When you purchase through the links on my site, you support the site at no extra cost to you. Here is how it works.
Choosing the best Waves plugins is less about finding the ones with the biggest feature lists and more about avoiding overlap. The catalog is large, and there are often several plugins that can solve roughly the same problem, so the practical question is which ones give you a clear reason to keep them around.
This is the shortlist I would use for building a Waves setup from scratch. Curves AQ gives you guided EQ decisions, CLA-76 handles fast compression, SSL G-Master Buss Compressor is aimed at mix-bus work, F6 Floating-Band Dynamic EQ deals with moving frequency problems, and Abbey Road J37 covers tape coloration.
There are also plugins here that solve less glamorous but very common problems. Clarity Vx DeReverb can make a poorly recorded room more manageable, while Harmony, Vocal Bender, and OVox are more about creating or reshaping vocal parts than simply cleaning them up.
The main distinction worth keeping in mind is between hardware-inspired plugins, where the appeal is a particular circuit and its behavior, and analysis-based processors, where the main benefit is speed and control. That difference usually tells you how to approach the plugin before you even open it.
1. Curves AQ
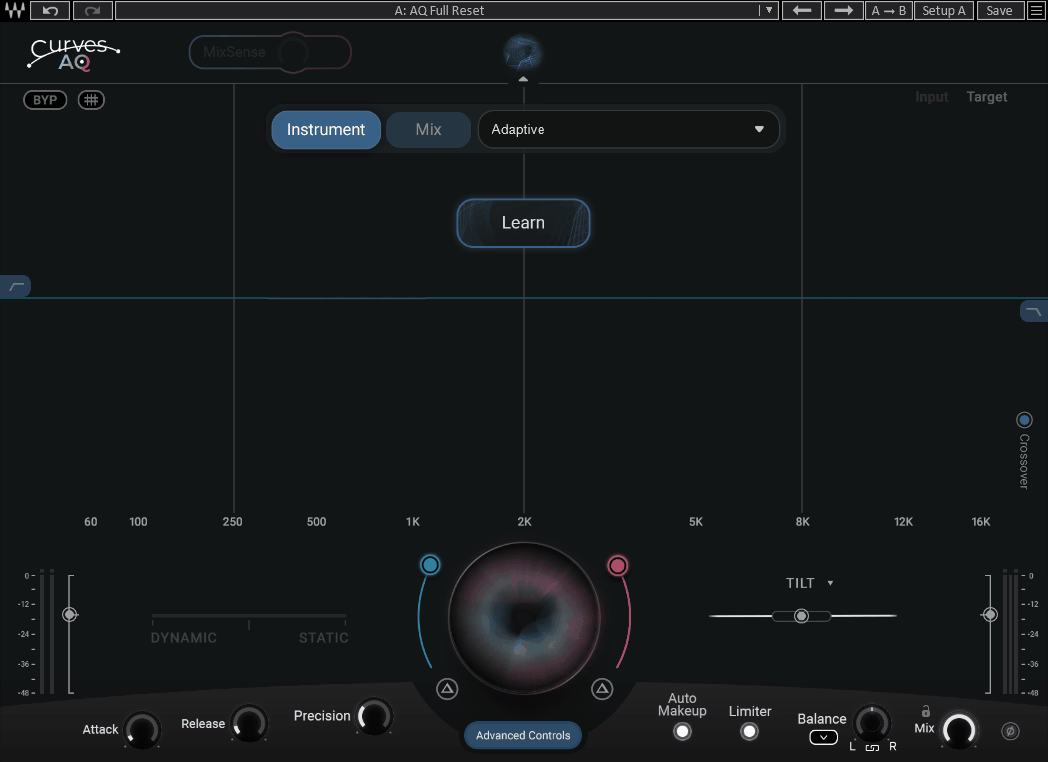
Most smart EQ plugins are built around an automatic curve that you then adjust after the fact. Curves AQ takes a slightly different approach by giving you a spectral target and adapting the processing toward that target as the source changes.
Hit Learn and the plugin analyzes the material, then creates curves based on what it hears. I find that more practical than a one-click correction because you can keep shaping the target afterward rather than being locked into one fixed result.
- Boosts And Cuts Shown Separately
The interface separates boosts and cuts visually, which makes it easier to see whether the processor is mostly adding, removing, or doing a bit of both. That is helpful when deciding whether the source actually needs correction or whether you are trying to compensate for a recording problem.
- Static, Dynamic, Or Any Blend
You can combine static and dynamic EQ rather than choosing one mode for the whole process. A steady source can handle more static correction, while a vocal or live instrument usually benefits from leaving more of the processing dynamic.
- Four Frequency Anchors
Each Learn pass creates four broad frequency anchors covering the low end, fundamental, harmonics, and air. I would start there, make the broad balance feel right, and only then move into narrower corrections.
- MixSense
With another track feeding the sidechain, Curves AQ can reshape its processing to make room for that source. This is most practical when two important elements keep occupying the same range, such as a vocal and dense guitars.
- Smart Tilt And Offset
Smart Tilt adjusts the spectral balance without behaving like a simple tilt filter, while Offset changes where the processing begins. These are good controls to try before you start moving individual bands around.
2. L4 Ultramaximizer
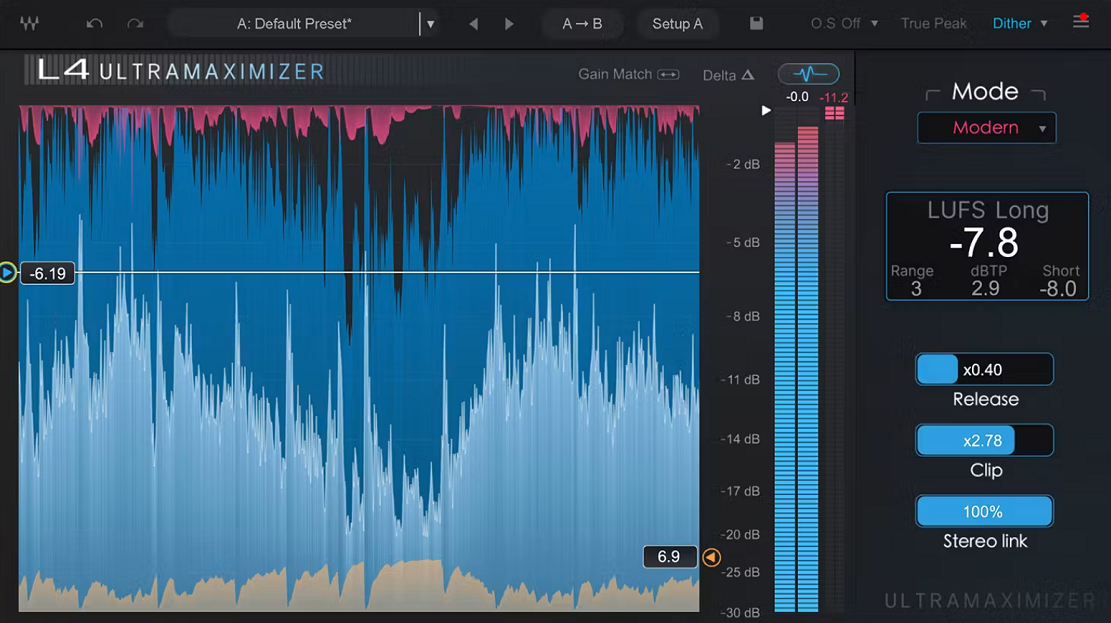
Waves built a lot of its reputation on the L1 and L2, but the practical thing about the L4 Ultramaximizer is that it does not simply try to make those older limiters louder. It gives you several ways to approach limiting depending on how much density, impact, and control the material can handle.
That matters because modern mixes often contain more low end and more transient information than the material those earlier limiters became known for. The L4 is easier to work with when you want more level without automatically turning the whole mix into a flat block.
- Four Algorithms Plus L2 Mode
The L4 gives you Modern, Smooth, Aggressive, and Safe modes, plus a Classic L2 option. I would treat those as starting points rather than presets with fixed jobs, because the right mode depends heavily on how dense and transient-heavy the source is.
- Adaptive Clipping
The clipping and release behavior adapts to the material instead of relying entirely on one static timing choice. That can make heavier limiting feel less obviously processed, particularly when the source contains a mixture of short peaks and sustained material.
- Upward Compression
The plugin also includes upward compression, which raises quieter material instead of only reducing peaks. On vocals and some buses, that can be handy for bringing quieter detail forward without adding another leveling processor.
- LUFS Metering
Built-in short-term and long-term LUFS metering lets you check level without opening a second plugin. I would still judge the result by ear first and use the meter to confirm where you actually landed.
- Delta And Gain Matching
Delta lets you hear what the limiter is removing, while gain matching helps keep A/B comparisons at comparable levels. Those controls matter because a louder version will almost always seem better during a quick comparison.
3. SSL G-Master Buss Compressor
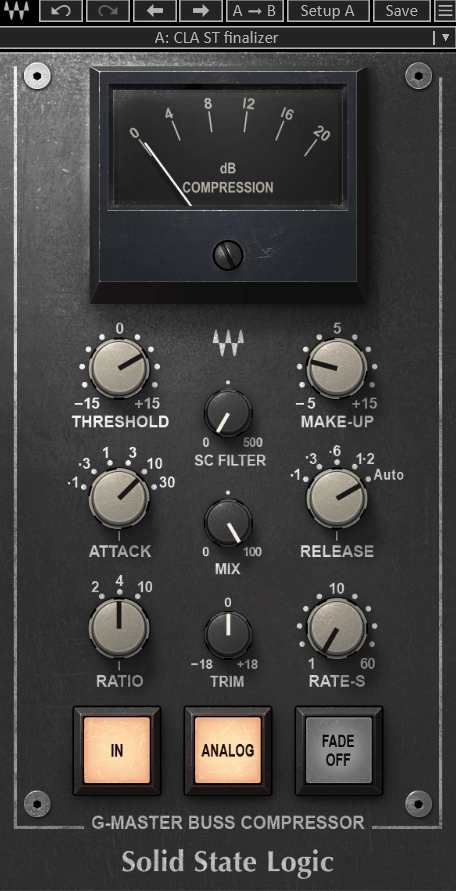
The SSL G-Master Buss Compressor is usually described as a “glue” compressor, but that shorthand does not explain why it works. What matters is the behavior of the original feedback-based VCA design and the way its timing interacts with a mix rather than treating each transient as an isolated event.
Waves models the SSL 4000 G console bus compressor, including its input stage and gain-reduction behavior. In practice, that makes it most appropriate when you want the major elements of a mix to feel a little more connected without having to compress every track individually.
- Presets
The plugin includes settings associated with engineers such as Chris Lord-Alge, Steve Lillywhite, and Dave Pensado. I would use these as starting points rather than rules, especially because bus compression reacts strongly to arrangement and low-frequency content.
- External Sidechain
An external sidechain lets you control what drives the compression instead of automatically letting the full mix determine it. A filtered key signal can be handy when the kick is causing more gain reduction than you want.
- Analog Character Switch
You can include the modeled analog behavior, including subtle noise and harmonic coloration, or keep the path cleaner. On a mix bus, the difference is usually small enough that I would decide by tone rather than treating it as an essential feature.
4. Harmony
Generating harmonies by hand can become surprisingly time-consuming, especially when you want the backing parts to change from section to section. Harmony gives you several ways to approach the same task, depending on whether you prefer to generate notes, play them, or draw them.
It can create up to eight voices from a single vocal, and you can control the voices individually after they are generated. That makes it practical both for quick songwriting and detailed vocal arrangement.
- Independent Control Per Voice
Each voice has its own pitch, formant, panning, delay, and filtering controls. The independent formant control is especially handy when you want the harmony stack to feel like several people rather than one voice duplicated eight times.
- Key And Scale Locking
You can set the key and scale so generated harmonies stay within the selected musical framework. I would still check the notes against the actual chord progression, because technically diatonic does not always mean musically correct.
- Nine Modulators
The plugin includes nine modulators that can be assigned to many of its controls. Slow, slightly different modulation across the voices can make the stack feel less mechanically aligned.
- Radar Display
The radar display shows the relative level and stereo position of the voices in one place. For fast arrangement decisions, that is easier to read than trying to keep track of eight separate pan and level controls.
- Automatic Formant Correction
Formant correction helps keep shifted voices sounding more natural instead of turning into obvious pitch-shift effects. It works best when the source is clean and reasonably consistent, so very breathy or heavily processed vocals may need a lighter touch.
- 450+ Presets
There are more than 450 presets, and the graphical mode supports snapshots that can be automated between song sections. That becomes handy when you want a verse stack to behave differently from a chorus without creating several separate plugin instances.
5. Silk Vocal
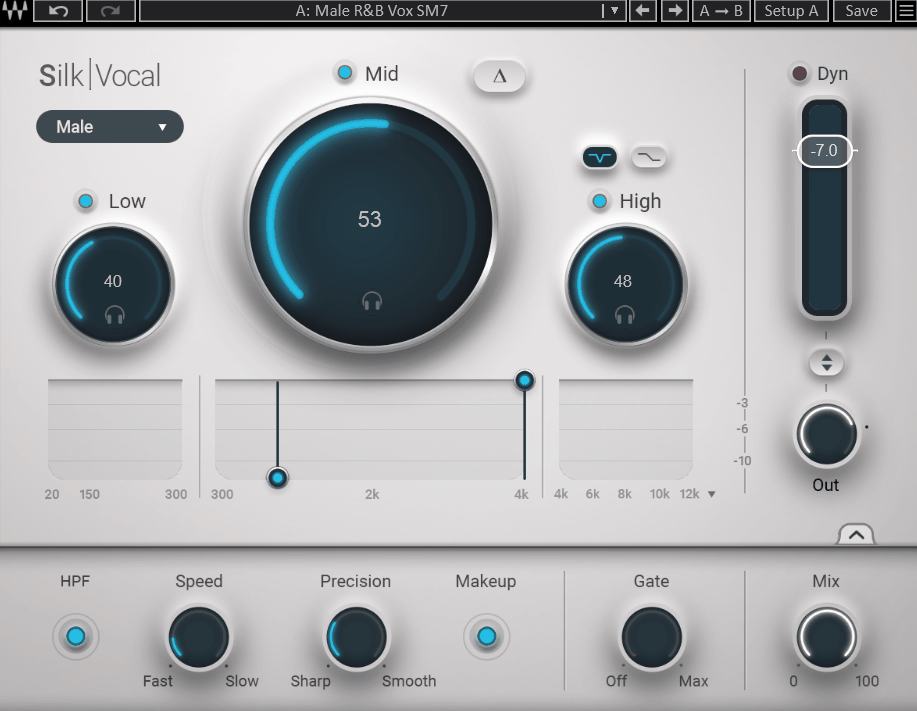
A vocal can have the right performance and still sound difficult to mix because of resonances, proximity buildup, or harsh upper-mid information. Silk Vocal is designed around that problem, using analysis to identify areas that need attention instead of making you sweep through the spectrum by hand.
The plugin works across Low, Mid, and High sections, so you can decide which part of the voice needs the most help. I find that approach more practical than treating the entire vocal with one automatic setting.
- Three Targeted Sections
The Low section is aimed at buildup and proximity effects, Mid handles boxiness and related problems, and High focuses on harshness and sibilance. Because they are separated, you can work on the upper mids without automatically stripping low-end weight from the voice.
- Precision Control
Precision controls how narrow or broad the smart EQ action becomes. Narrow settings make more sense for obvious resonances, while broader settings are often easier on intimate or dynamic performances.
- Speed
Speed changes how quickly the processing responds to the vocal. Faster settings follow sudden changes more closely, while slower behavior can sound smoother when the source has a lot of continuous movement.
- Male And Female Voice Modes
Separate male and female voice modes give the analysis a better starting point for the expected frequency range. That does not replace listening, but it can make the initial result more consistent.
- Advanced Controls
The advanced section adds a 60 Hz high-pass filter, gate, Mix control, and automatic makeup gain. Those controls are handy when you want Silk Vocal to handle more of the basic cleanup instead of adding several small processors around it.
- Silk Vocal Live Included
The package also includes Silk Vocal Live, which is designed for low-latency monitoring while tracking. The distinction matters because a plugin that works perfectly during editing is not necessarily the one you want in a singer’s live monitoring chain.
6. F6 Floating-Band Dynamic EQ
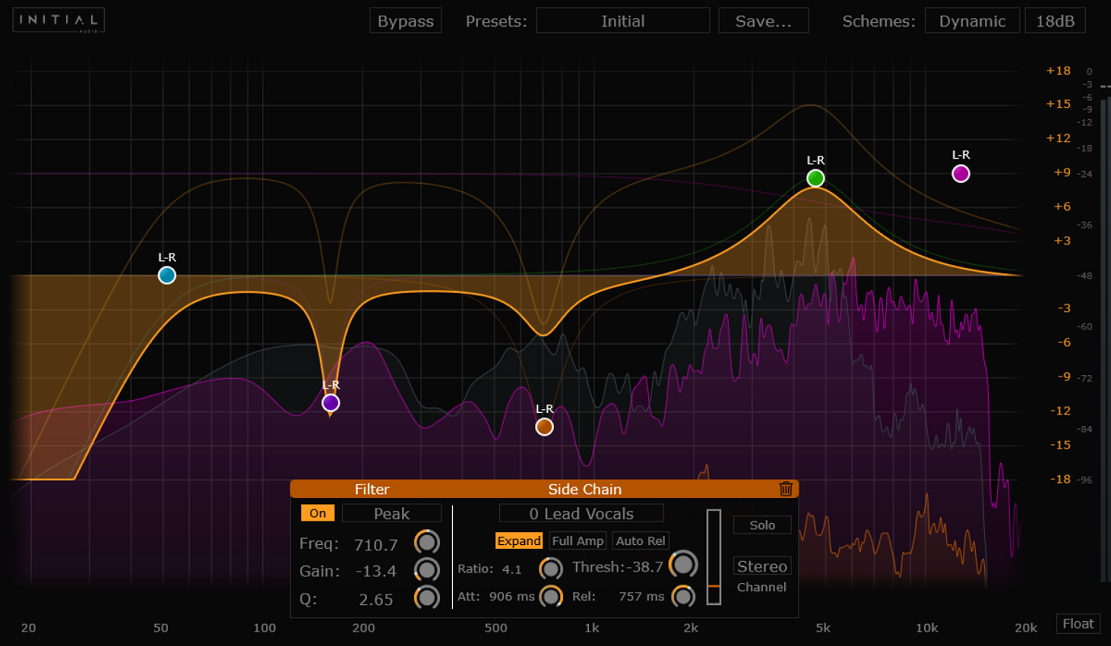
Static EQ works well when the problem stays in the same place, but singers, guitars, synths, and drum buses rarely behave that consistently. Waves F6 is handy when you want an EQ move to happen only when a particular frequency range becomes a problem.
It gives you six fully parametric bands, each with its own dynamics section. Because the bands can overlap and move freely, the plugin works more like a collection of targeted dynamic processors than a fixed multiband EQ.
- Compression And Expansion Per Band
Each band can use either compression or expansion. Compression is practical for controlling a frequency when it becomes too prominent, while expansion can bring a range forward when it temporarily disappears.
- Mid-Side Per Band
Every band can operate in stereo, mid, or sides mode. This is particularly handy on buses because you can, for example, control a vocal-related frequency in the center without automatically changing the same range in the sides.
- Full De-Essing Capability
A narrow dynamic band can handle de-essing as well as general EQ work. That means one instance of F6 can deal with sibilance while leaving other bands available for tonal shaping.
- Advanced Sidechaining
The sidechain supports internal and external sources plus different detection modes. Feeding the vocal into a guitar bus, for example, lets you reduce only the part of the guitar spectrum that interferes with the vocal instead of turning down the entire guitar group.
- FFT Analyzer
The built-in FFT analyzer helps you see what is happening before and after the EQ, with controls for resolution, response, and monitoring. The note readout is particularly useful when a resonance turns out to be tied to a specific pitch rather than just a random frequency.
7. Abbey Road J37
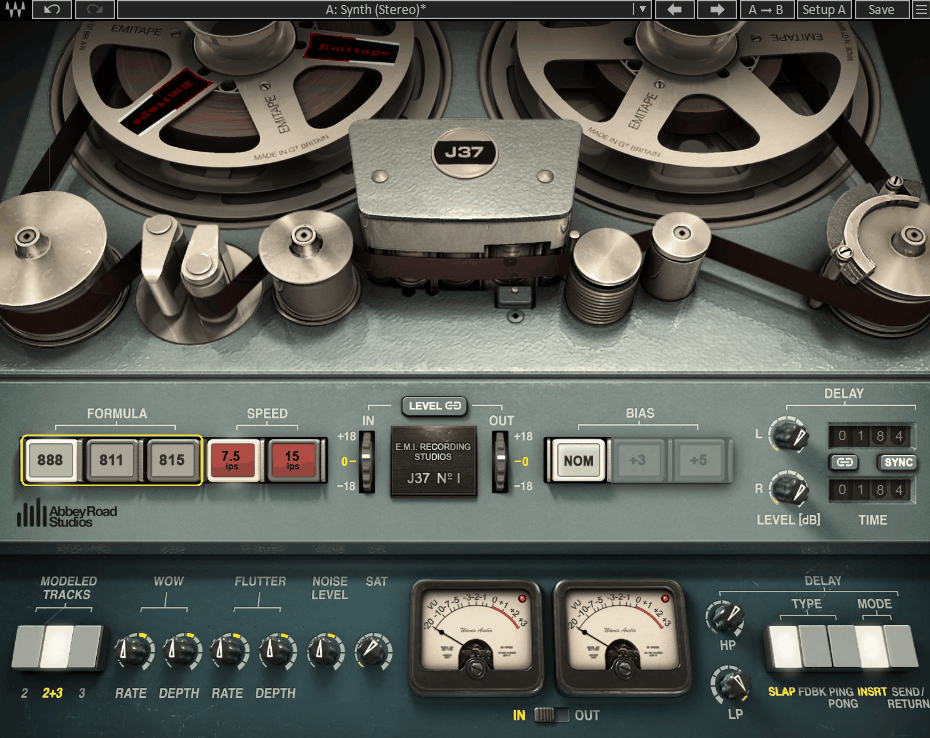
The Abbey Road J37 is modeled on the Studer J37 machines used at Abbey Road, which makes it a more specific tape recreation than a general-purpose tape saturation plugin. That matters because tape machines do not all respond the same way, and the details of the transport, tape formulation, speed, and bias all affect the result.
The plugin gives you several of those variables instead of hiding everything behind one saturation control. I would use it when you want tape to become part of the sound rather than simply adding a generic “analog” effect.
- Three EMI Oxide Formulas
There are three modeled EMI tape formulas, each with its own frequency response and harmonic behavior. Switching between them can change the amount of top-end softness and harmonic density, so it is worth treating them as genuine tonal choices.
- Two Routes To Saturation
You can drive the modeled tape by increasing input level or use the separate Saturation control. Level Link helps keep the output level stable as the input changes, which makes it easier to judge whether you are hearing a better tone or simply a louder one.
- Bias Control
The Bias control changes the tape’s high-frequency response and distortion behavior. Underbiasing tends to produce a brighter, more distorted result, while overbiasing generally moves in a smoother direction.
- Wow, Flutter, And Noise
Wow and flutter introduce the small speed variations associated with tape transport, while Noise adds tape hiss. I would keep both subtle unless the point is deliberately lo-fi, because obvious modulation quickly stops sounding like a recording and starts sounding like an effect.
- Built-In Tape Delay
The built-in Tape Delay includes different delay behaviors plus tempo sync and filtering. Because it sits inside the tape model, the delayed signal inherits the same kind of coloration rather than remaining perfectly clean.
8. Abbey Road TG Mastering Chain
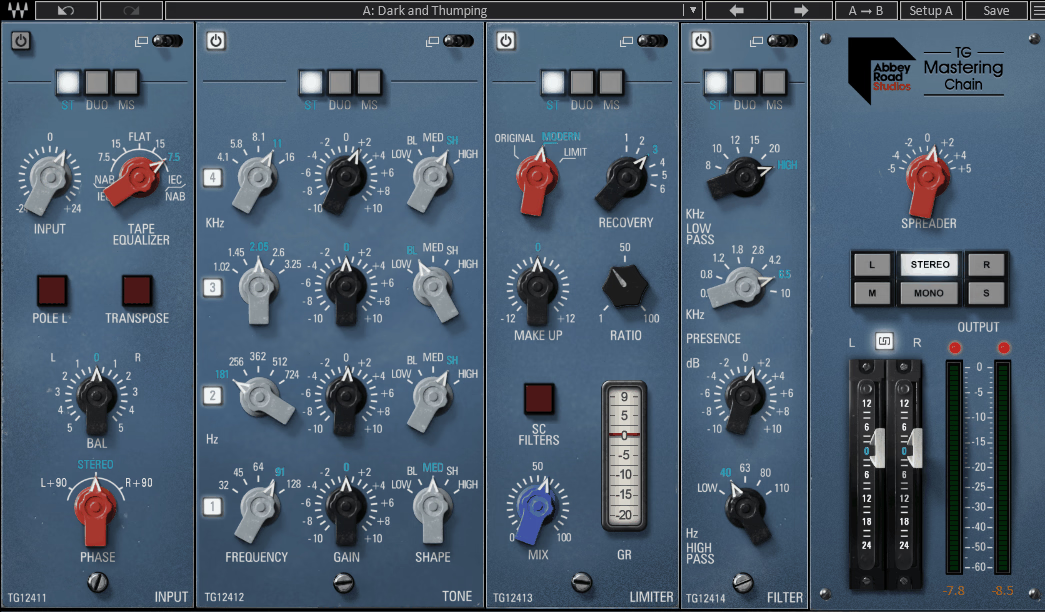
The Abbey Road TG Mastering Chain makes more sense when you think of it as a modular mastering console rather than a single all-purpose processor. It is based on the EMI TG12410 Transfer Console, and its modules are designed to behave like parts of that system.
The default order takes you through input, tone, limiting, filtering, and output, but several of the modules can be reordered. That makes it more flexible than a fixed mastering chain while still keeping the workflow focused.
- The Five Original Modules
The chain includes the TG12411 Input, TG12412 Tone, TG12413 Compressor/Limiter, TG12414 Filter, and TG12416 V.A.L spread section. Individual modules can also be used independently on tracks and buses, so the plugin is not limited to final mastering.
- Original And Modern Limiting
The limiter offers Original and Modern approaches. The original character is more aggressive, while Modern is designed for cleaner control when you want more level without as much audible coloration.
- Linear-Phase Sidechain Filters
The compressor includes linear-phase sidechain filtering across several frequency regions. That gives you another way to decide what drives the compression without changing the audio being processed.
- Per-Module Stereo Modes
Individual modules can work in stereo, dual mono, or mid-side. This is useful when the job calls for different treatment of the center and sides without building a separate routing system.
- TG Meter Bridge
The separate TG Meter Bridge provides PPM, VU, and phase-correlation information and can be connected to another TG Mastering Chain instance. That makes it easier to keep metering visible while you work inside the main processing window.
- 170 Engineer Presets
The presets include approaches from several mastering and mix engineers. I would use them mainly to study module order and broad settings rather than expecting one preset to solve a complete master.
9. Magma BB Tubes
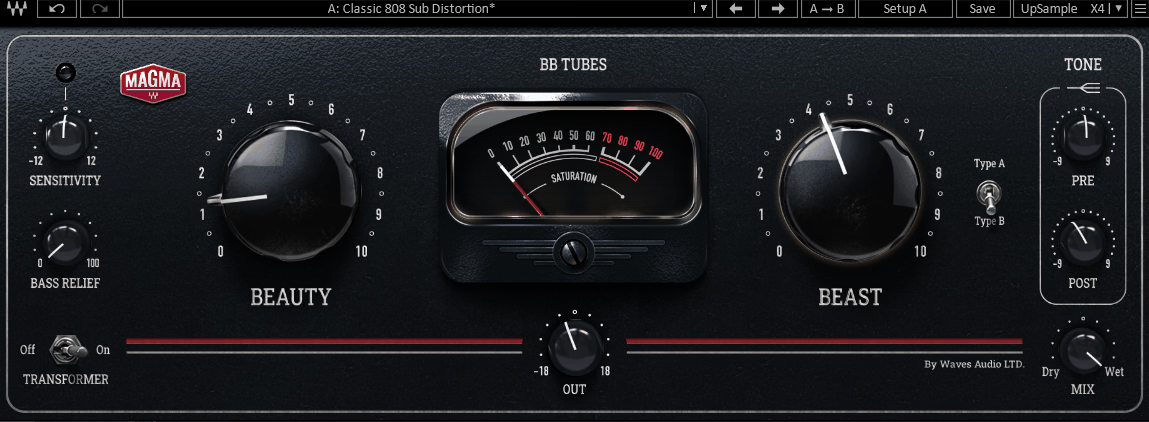
Magma BB Tubes is built around a simple distinction: one stage is intended to create mostly even harmonics, while the other is aimed more toward odd-harmonic distortion. That gives the two main controls different jobs rather than simply making one knob “more saturation.”
It is an original Waves design rather than a recreation of one named piece of hardware. That makes it a practical choice when you want a straightforward way to add tube-style color without trying to imitate a specific vintage unit.
- Beauty Into Beast Cascade
The Beauty stage feeds directly into Beast, so pushing the first stage changes what the second stage receives. That interaction gives you more range than the two knobs suggest, especially once you start combining moderate amounts of both.
- Two Tube Types
The Beast stage has two tube choices. The difference is not especially important at very low settings, but it becomes more apparent once you are using the plugin for audible distortion rather than subtle thickening.
- Sensitivity With Gain Compensation
Sensitivity changes when the signal hits the tubes while compensating the level. That makes it easier to compare different drive points without constantly changing the output to compensate.
- Soft Clipping For Loudness
The soft-clipping stage can reduce peaks while increasing perceived level. It works as a finishing stage on a bus, but I would keep it restrained because it is still changing the dynamics of the source.
- Bass Relief And Tone EQ
Bass Relief keeps low-frequency energy from driving the saturation too hard, while the input and output shelves shape what is being distorted and what comes out. This is especially helpful when you want harmonic density in the mids without making the low end cloudy.
- Transformer And Mix
The modeled transformer adds another layer of low-frequency color, and the Mix control lets you blend the processed and original signals. That makes parallel saturation practical without creating a second bus.
10. Vocal Bender
Traditional pitch correction is usually about making a vocal more accurate, while Vocal Bender is better thought of as a performance and sound-design tool. It lets you shift pitch and formant independently, so you can change the character of a voice without simply moving every spectral component along with the note.
The plugin can also run in real time, which makes it practical during recording as well as after the fact. I would start with small pitch or formant shifts and only push further when the effect itself is the point.
- Pitch And Formant Independence
Separating Pitch from Formant means you can make a voice sound heavier, lighter, younger, older, or simply different without relying entirely on pitch shifting. Small formant moves are often enough to thicken a lead vocal without making the effect obvious.
- Four Modulation Sources
The plugin includes a step sequencer, LFO, amplitude envelope, and pitch envelope. That makes it possible to build rhythmic pitch changes that respond to the performance instead of using a static modulation pattern.
- Flatten
Flatten forces the vocal toward a single pitch, which creates an intentionally robotic starting point. From there, you can sequence movement rather than trying to extract a natural melody.
- Mix Control
The Mix control lets you blend the processed vocal with the original. That is particularly handy for doubling effects, where a moderate pitch and formant shift can widen the vocal without sounding like an obvious harmonizer.
- Beyond Vocals
The plugin also works on monophonic instruments such as guitar and bass lines. It is much less predictable on chords or complex polyphonic material, so I would treat it as a monophonic processor first.
11. OVox Vocal ReSynthesis
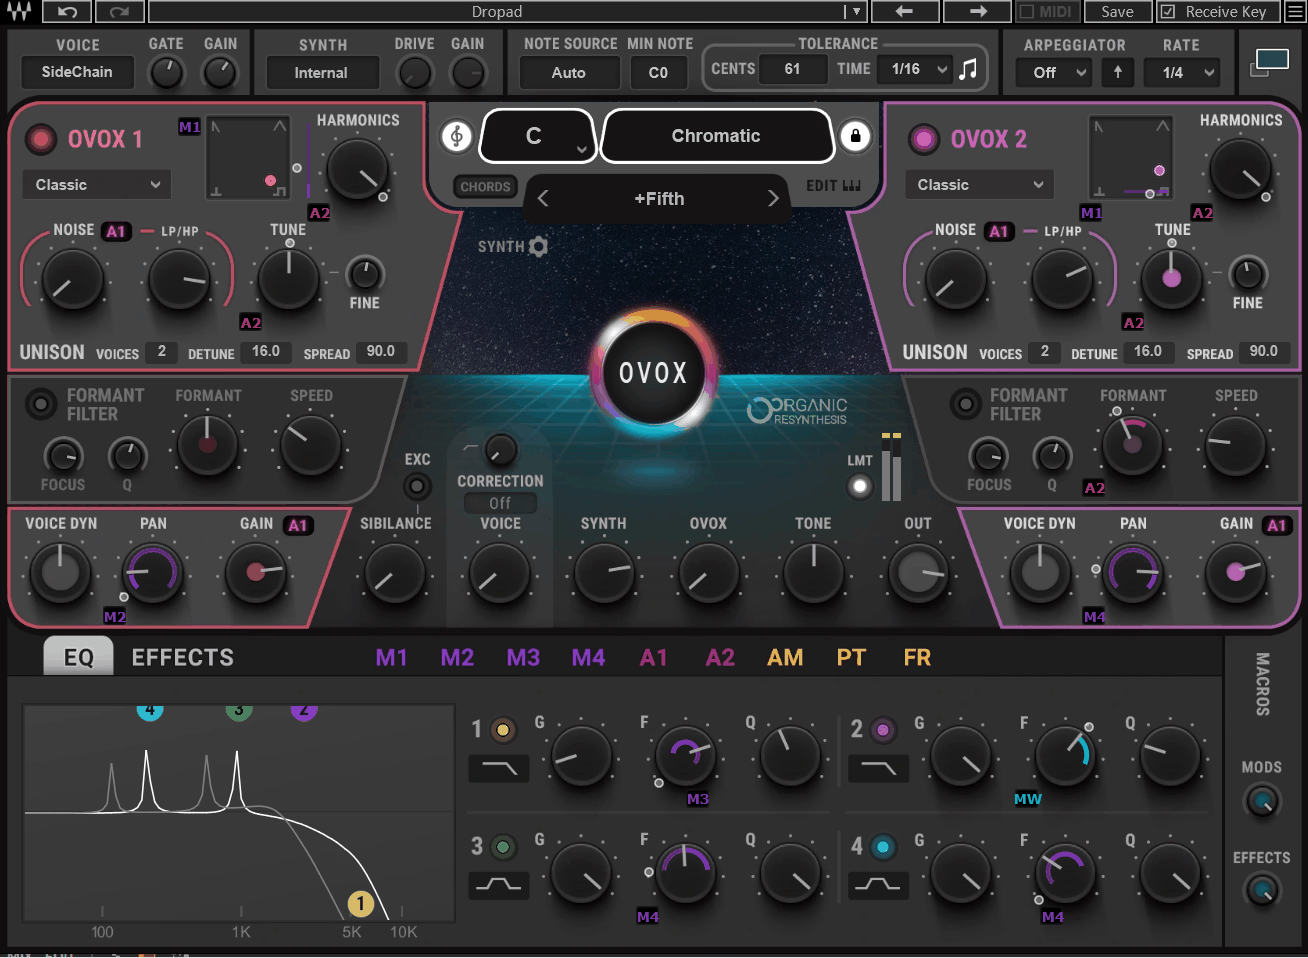
OVox takes the vocal and breaks it into information about amplitude, pitch, and formant, then uses that information to drive a synthesized reconstruction. That is why it can move much further from the sound of the original voice than a conventional vocoder.
The useful part is that those analysis streams can also be used as modulation sources. Once you start treating your voice as both the sound and the control signal, the plugin becomes much more interesting.
- Dual Synth Engines
Two synth engines, OVox 1 and OVox 2, provide an eight-voice polyphonic foundation. Layering the engines lets you keep one part relatively intelligible while making the other more synthetic.
- Automatic Note Mapper
The Note Mapper can derive notes, harmonies, scales, and chords from the vocal without requiring MIDI. You can then constrain the output to a specific range or remove notes that do not fit the part.
- Nine Modulators Including ORS Sources
The modulation system includes LFOs, sequencers, ADSR envelopes, and Organic ReSynthesis sources derived from the vocal itself. The ORS sources are especially interesting because they let the performance control parameters in ways that would be difficult to reproduce manually.
- MIDI Out
OVox can generate MIDI output from your voice, which makes it practical for turning sung or hummed ideas into instrument parts. The tracking is most reliable with clean, monophonic material, so I would use it as an idea-capture tool rather than expecting perfect transcription from every performance.
- 500 Presets And Built-In Effects
The large preset library is helpful because OVox can take some time to understand from an empty patch. Built-in effects such as compression, distortion, delay, reverb, and chorus mean many of those sounds can be finished without immediately building another chain.
- Plugin Or Standalone
It can run as a plugin or standalone application, with direct or sidechain input options. Standalone mode is particularly handy when you want to experiment with the voice processor outside the normal DAW routing setup.
12. Scheps Omni Channel 2
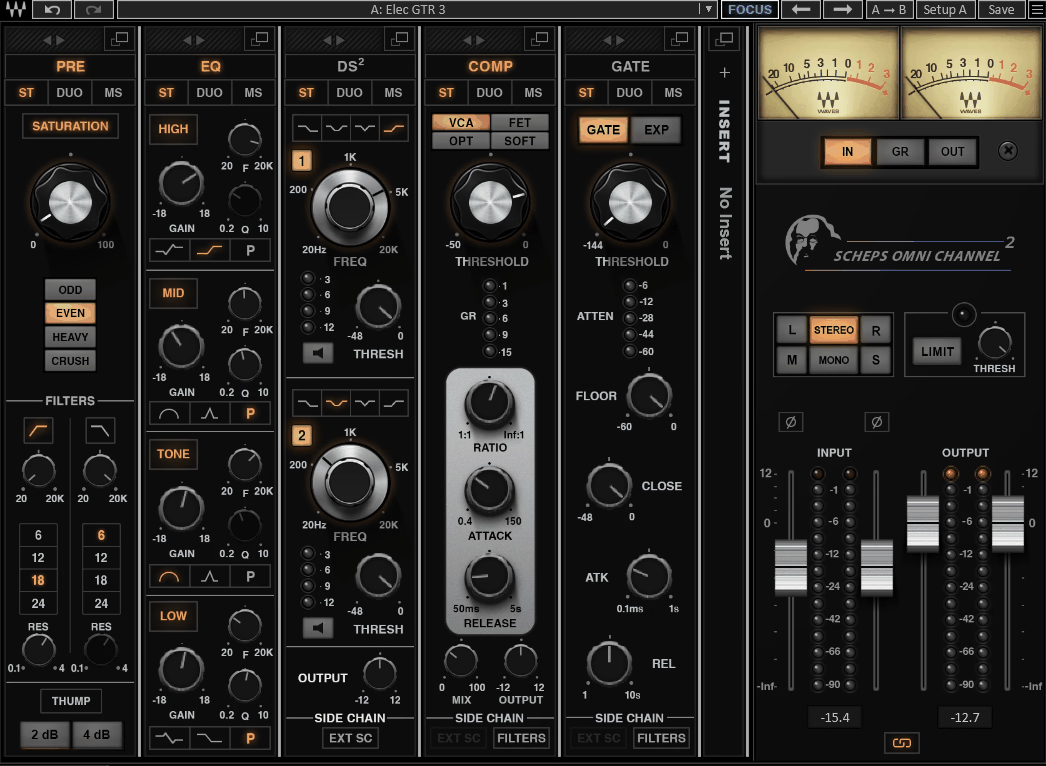
The main reason to keep Scheps Omni Channel 2 around is flexibility. Andrew Scheps designed it as a channel strip, but version 2 adds a proper Insert slot for third-party processing, so you are not forced to use every built-in module.
That makes it practical when you want a consistent starting strip but still need to swap out one part of the chain for a processor you already prefer. The signal flow is also flexible enough that the order of the built-in sections can change with the source.
- Four Saturation Colors
The preamp provides four analog-style saturation options, with CRUSH available for more obvious distortion. The input filter section also offers several slopes, including a resonant option for more creative filtering.
- Four Compression Types
You get VCA, FET, OPT, and SOFT compression choices. Rather than trying to decide which topology is “best,” I would audition them on the source and listen for whether you need speed, density, or smoother leveling.
- DS2 Dual De-Esser
The DS2 uses two independent de-essing sections, each with its own filter range and shape. That is particularly helpful when the source has different kinds of sibilance at different points in the spectrum.
- Golden Gate
The gate can also work as a linear expander, with filtering, sidechaining, and mid-side or stereo routing. It is handy for cleaning up drums and vocals, but the flexibility also makes it suitable for rhythmic gating when you deliberately trigger it from another source.
- FOCUS Presets
The FOCUS presets emphasize the controls most worth adjusting for common sources. I would treat them as learning aids as much as starting settings, because they show which parts of a complex channel strip actually make a meaningful difference.
- 250 Presets And No Added Latency
The plugin includes a large preset library and does not add additional system latency. One practical limitation is that its hosted third-party insert is based around VST3 support, so the exact behavior depends on where you are running the strip.
13. Aphex Vintage Aural Exciter
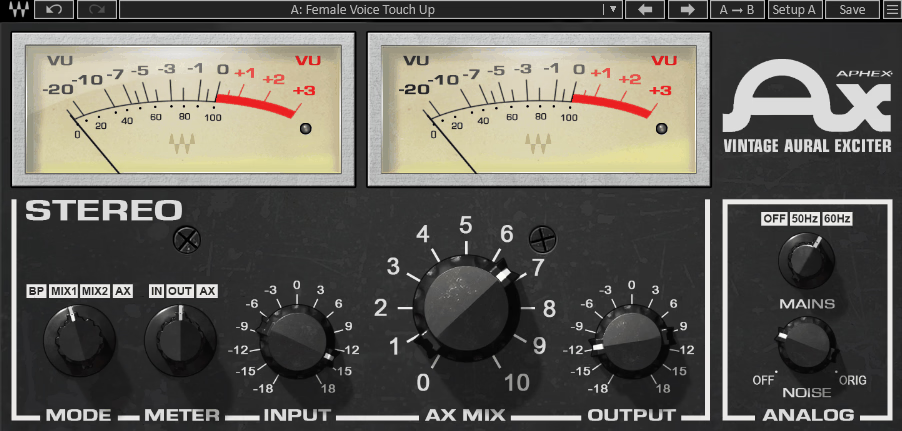
A conventional EQ can make a source brighter by increasing frequencies that are already present. The Aphex Vintage Aural Exciter works differently by generating new harmonic content, which is why it can make a dull source feel more present without relying on a large treble boost.
Waves modeled the vintage Aphex hardware and its different operating modes rather than turning the idea into a generic high-frequency enhancer. The result is most appropriate when you want brightness and presence to come from added harmonics rather than from simply lifting the top end.
- Three Modes
The plugin offers three operating modes that reflect different ways the original hardware could be used. The modes change the relationship between the original and excited signal, so they are worth switching before you start changing the amount.
- Input-Level Dependence
The exciter responds to input level, which means the same settings can behave differently across a dynamic performance. That makes gain staging part of the sound, so I would set the input deliberately rather than treating it as a neutral level control.
- Noise And Mains Controls
You can add modeled analog noise and select 50 Hz or 60 Hz mains hum characteristics. For normal mixing I would keep these very low or off, while more obvious settings make sense when the point is to recreate a vintage signal path.
- AX Mix And Output
AX MIX controls the amount of excited content, while Output handles the final level. Small amounts tend to be more practical on individual tracks, while heavier settings can work as deliberate coloration.
- 60+ Presets From Val Garay
The factory library includes settings from Val Garay as well as source-specific starting points. Because the interface is fairly simple, the presets are mainly useful for hearing how the different modes behave on different material.
14. Abbey Road Saturator
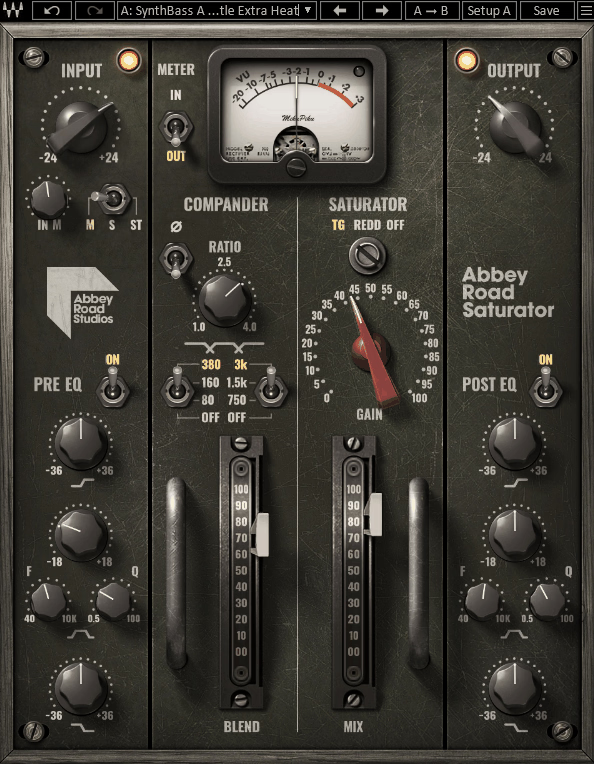
The Abbey Road Saturator grew out of a particular studio technique rather than a generic distortion concept. Abbey Road engineers found ways to use the EMI TG12321 compander and console paths to add harmonic density, and Waves built the plugin around that behavior.
The signal path gives you control over where the saturation happens and what reaches it. That makes it more practical when you want to shape the distortion rather than simply turn it up.
- REDD Or TG12345 Consoles
You can choose the REDD tube-console character or the TG12345 solid-state character. The REDD option is more obviously thick and colored, while the TG route tends to feel tighter and more controlled.
- Compander Crossover Control
The compander’s crossover lets you decide which frequency range gets the most attention. Lower settings are handy for low-end weight and punch, while higher settings put the emphasis on presence and upper harmonics.
- Mid-Side Processing
The saturation can operate in stereo, mid, or sides modes. That is useful when you want to keep the center focused while adding more character to the stereo information.
- Pre And Post EQ
The pre-EQ decides what you feed into the distortion, while the post-EQ shapes the result afterward. Boosting a range before saturation and reducing it after is a practical way to add harmonic density without permanently shifting the tonal balance.
- Phase Control
The phase control changes the character of the generated harmonics. It is not a setting I would try to predict from a manual; sweeping it while listening is quicker and usually more informative.
15. API 2500
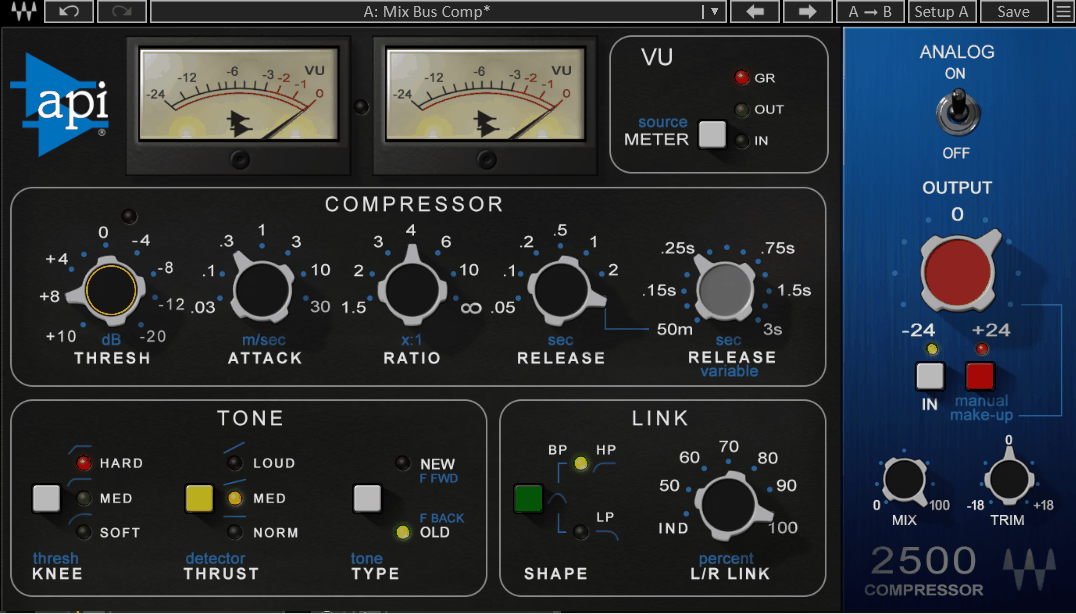
The API 2500 is one of those compressors where the unusual controls matter more than the basic threshold and ratio settings. Thrust, compression type, and knee are the controls that give it much of its range, and the plugin makes those ideas available without needing a complicated interface.
Thrust changes what the detector pays attention to in the low end, which is why the compressor can stay responsive without letting kick or bass dominate every gain-reduction move. That makes it particularly practical on drum buses and mixes with strong low-frequency energy.
- Feedback Or Feedforward
You can choose vintage feedback compression for a smoother response or modern feedforward for a faster, more direct behavior. I would use feedback when I want the compressor to blend into the bus and feedforward when I want the dynamics shaping to be more obvious.
- Three-Position Thrust
The Norm, Med, and Loud settings progressively reduce how much low-frequency energy drives the detector. On a busy drum bus, moving away from Norm can be enough to stop the kick from taking over the whole compressor.
- Three Knee Modes
The soft, medium, and hard knee options determine how gradually the compressor engages around the threshold. Soft is generally easier to keep subtle, while hard makes the compression feel more deliberate.
- Variable Link With Filtering
The stereo detector can be linked by varying amounts, with filtering options that let you decide what the left and right channels share. This is helpful when you want the bus to retain some independent movement without making the stereo image unstable.
- Auto Makeup Gain And Six Releases
Auto makeup gain keeps the output more consistent while you work, and the release section offers several fixed times plus a continuous setting. I find the continuous release particularly handy when the material sits somewhere between the standard presets.
16. SSL E-Channel
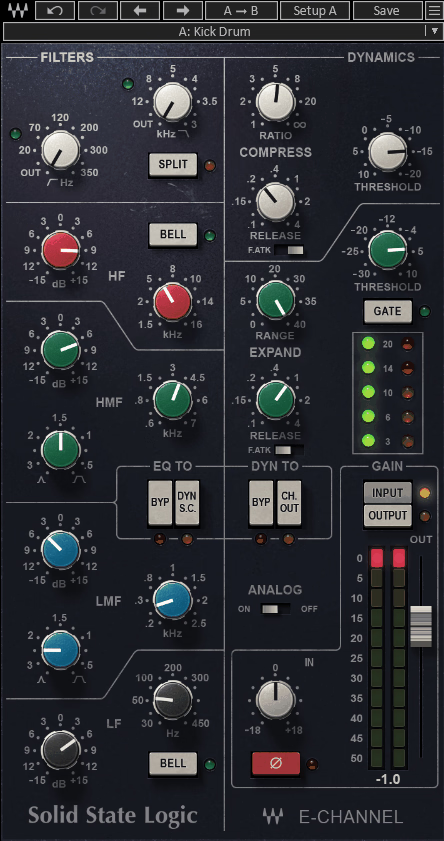
The SSL E-Channel gets much of its character from the fact that the original console circuitry never completely disappears when you set the controls to neutral. Waves modeled that always-in-the-path behavior along with the console’s VCA gain stage and Class A operation, so the strip can have an effect before you start EQing or compressing.
The EQ is based on the Black Knob SSL design, while the dynamics section follows the same overall philosophy as the original channel. That makes it a practical choice when you want one processor to handle the basic shaping of a track without stacking several plugins.
- Four-Band EQ With Shelf Or Bell
The EQ provides four bands plus high-pass and low-pass filtering, while the top and bottom sections can switch between shelf and bell behavior. That lets you make broad tonal moves or more focused boosts without opening another EQ.
- Dynamics Before Or After EQ
The compressor, limiter, gate, and expander can be positioned before or after the filters and EQ. That matters because a low-frequency cut before compression can completely change how hard the detector responds.
- Automatic Makeup Gain
Compression includes automatic makeup gain to compensate as the amount of reduction changes. It keeps the workflow close to the console, although it also means you have less manual control over the compressor’s internal gain staging than with some modern designs.
- Deep Sidechain Routing
The filters and EQ can feed the dynamics sidechain, letting you shape what the compressor actually reacts to. That is especially helpful when a bass-heavy source causes unwanted pumping.
- Engineer Presets
The presets cover vocals, drums, guitars, keys, synths, piano, and other sources, with settings associated with several experienced engineers. They are most practical as starting points because the SSL character depends heavily on how hard you drive the channel and what is already happening upstream.
17. IDX Intelligent Dynamics
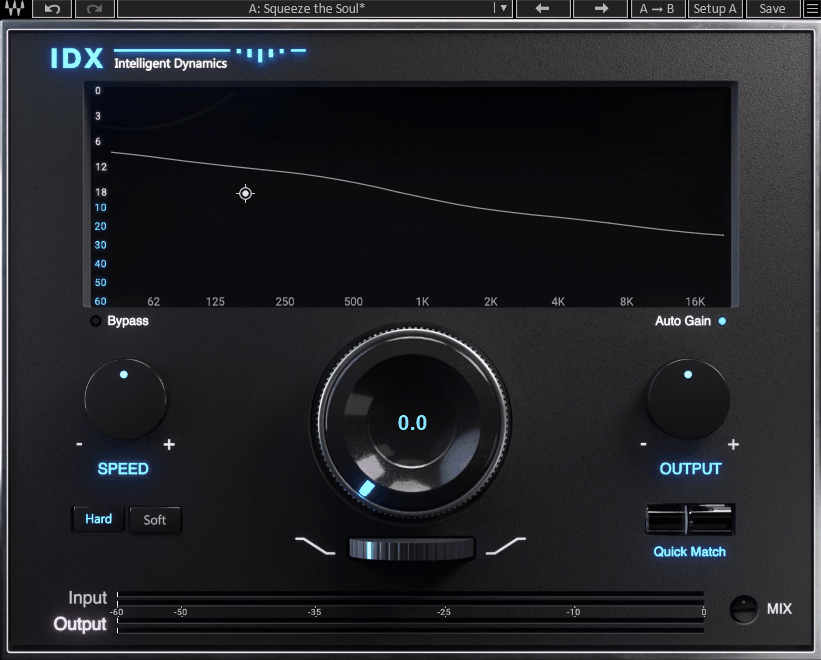
A conventional compressor responds to overall level, while IDX Intelligent Dynamics looks at where the energy is concentrated across the spectrum and targets those areas. The benefit is not simply more compression; it is getting a cleaner result by avoiding unnecessary gain reduction elsewhere.
That makes IDX handy when you hear a source as uneven rather than simply too dynamic. One main control does most of the work, while a few supporting controls determine what kind of emphasis the processor should follow.
- Frequency-Dependent Detection
IDX automatically identifies the areas carrying the most energy and focuses the processing there. That can be practical when a vocal gets harsh only on certain notes or when a drum bus has one frequency range that keeps dominating the compressor.
- Tilt Control
Tilt shifts the detector toward brighter or darker content. I would use it when the default response is broadly correct but seems to be prioritizing the wrong part of the source.
- Hard And Soft Response Modes
The two response modes let you choose between faster and smoother behavior. Hard is generally better for transient-heavy material, while Soft is easier to keep natural on sustained sources.
- Mix Knob For Parallel Use
A Mix control lets you blend the processed signal with the original. That makes the plugin more practical on buses and full mixes because you can use stronger processing internally without making the final result depend entirely on the processed signal.
- Zero-Latency Version
The zero-latency version is useful for live monitoring and tracking. The main limitation is that IDX chooses the frequencies itself, so it is not a substitute for a manually configured multiband processor when you need exact frequency control.
18. CLA-76
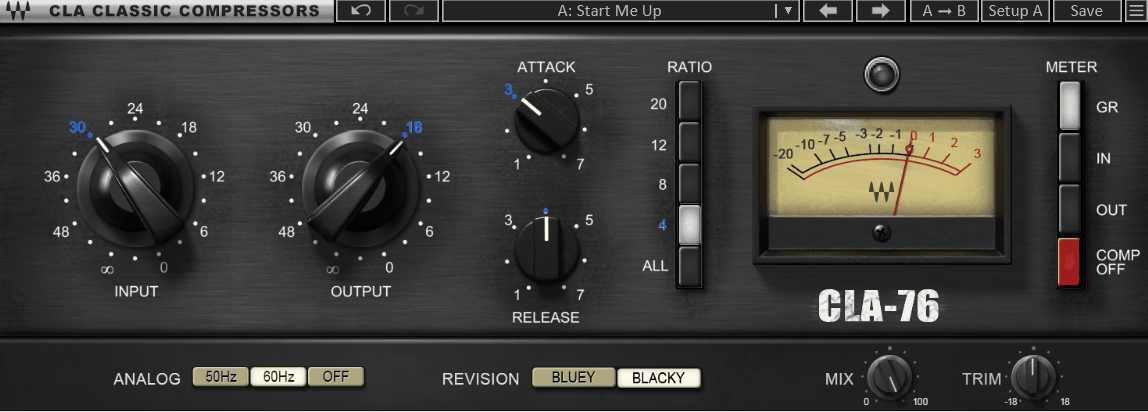
The CLA-76 is built around the fast, colored behavior of the 1176-style FET compressor and includes two different revisions. The main reason to reach for it is speed: it can grab transients very quickly and add useful density at the same time.
I would not use it simply because a source “needs compression.” It is better when the source benefits from a more immediate response, such as vocals, drums, bass, rooms, or aggressive parallel buses.
- Bluey And Blacky
The two versions, Bluey and Blacky, differ in their gain staging and tonal behavior. Bluey is generally rougher and more colored, while Blacky is a little cleaner and more controlled.
- 50 Microsecond Attack
The attack can reach 50 microseconds, which is fast enough to reshape the leading edge of a transient. That can make drums more controlled, but on some vocals it can also remove too much articulation, so the attack setting deserves more attention than the ratio.
- ALL Mode
The ALL mode combines the ratio buttons for the aggressive response associated with famous 1176 “all-buttons-in” processing. It is particularly handy on rooms, parallel drums, and moments where you want the compressor to become part of the sound.
- Modeled Preamp Distortion
The plugin also models the preamp noise and harmonic behavior of the original design. That coloration is subtle at moderate settings and more obvious when you push the input, which is useful when the source needs more edge rather than just less dynamic range.
- Mix And Trim
A built-in Mix control lets you blend the compressed and dry signals, while Trim handles output level. This makes parallel compression easy without building another bus just for the blend.
- Zero Latency
The plugin adds no processing latency, so it can be used for tracking as well as mixing. That makes it practical as a standard insert rather than something you have to reserve for later stages.
19. Clarity Vx DeReverb
Room sound becomes difficult when the recording is already compressed, brightened, or otherwise processed, because the cleanup tool has less reliable information to work with. Clarity Vx DeReverb is best used early in the chain, before those kinds of processors have changed the relationship between voice and room.
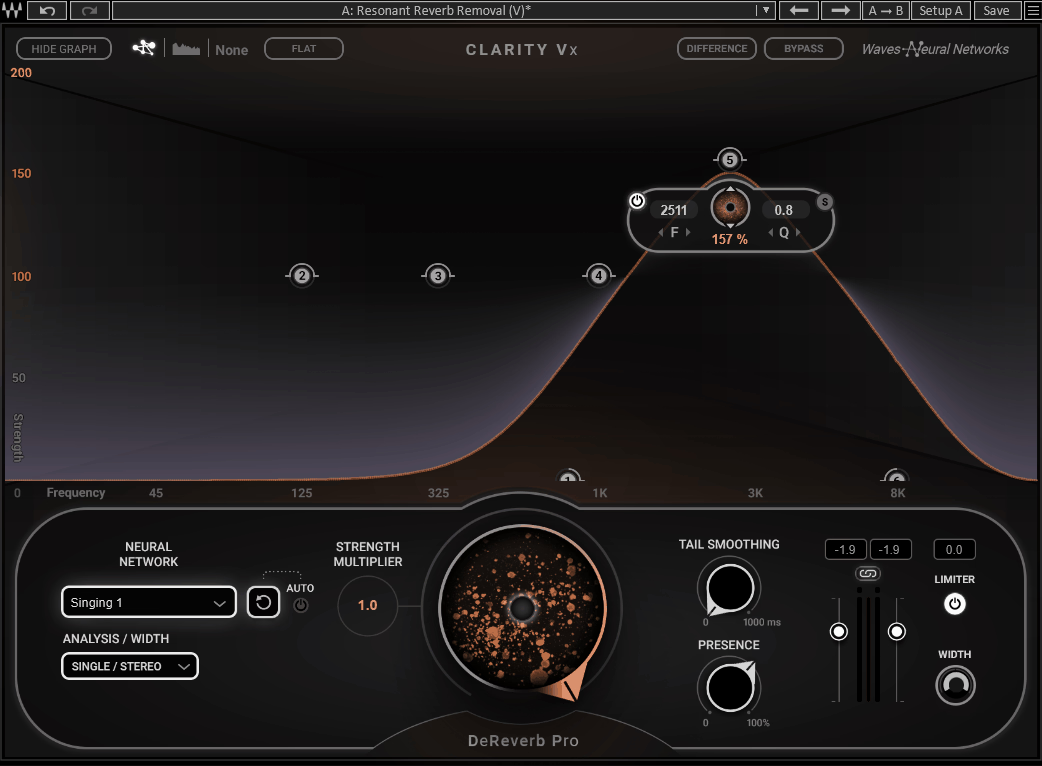
Waves uses neural-network analysis to identify the reverb component and reduce it in real time. It is most helpful as a rescue tool for recordings that are usable but have too much room around the voice.
- One Main Knob
The main control simply sets how much reverb reduction you want. That keeps the setup fast, but it also means you need to listen carefully because pushing it too far can thin out the voice.
- Selectable Neural Networks
Different neural networks are available for different types of voice material. Switching between them is often worth trying before changing the amount of reduction, since the model choice can affect the character of the cleanup.
- Analysis And Width Modes
The analysis can operate in different stereo configurations, and you can also adjust the output width. For true stereo room recordings, the analysis mode can make a noticeable difference in how naturally the room is reduced.
- Adaptive Network With Reset
The network uses recent audio information as part of its processing decisions and resets when playback stops. On a difficult section, looping the phrase before judging the final sound can help because the network has more context to work with.
- The Pro Version Difference
The Pro version adds more detailed frequency control and additional reverb-tail shaping. For ordinary music vocals, the standard version is usually the more straightforward option; the Pro features become more relevant when the room itself varies a lot across the recording.
20. CLA-2A
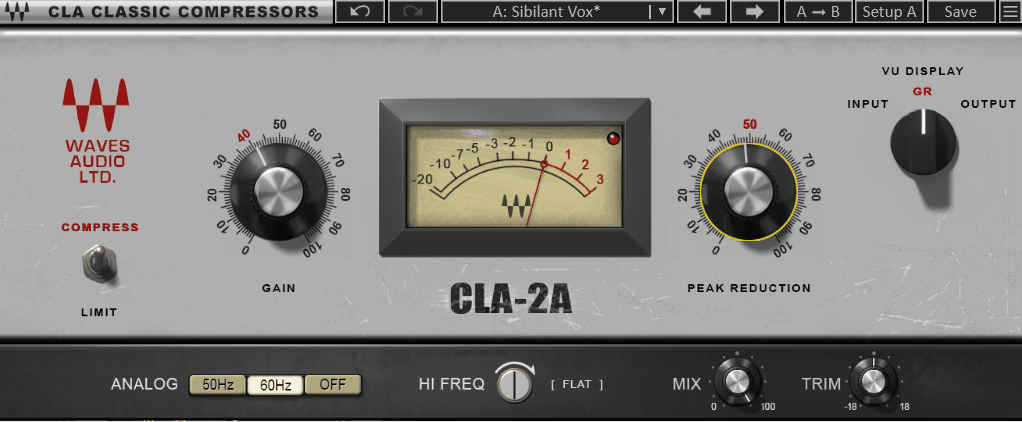
The CLA-2A takes almost the opposite approach to the CLA-76. Instead of fast, aggressive control, it uses an optical circuit with a slower, program-dependent response that works well for leveling rather than catching every transient.
That makes it particularly practical after a faster compressor or on sources that need a smoother, more even performance. Vocals, bass, guitars, and sustained instruments are the obvious places to try it.
- Compressor And Limiter Modes
The two modes change how strongly the optical circuit behaves. Compressor is the gentler choice, while Limiter applies more assertive control when the source needs to stay within a tighter range.
- HF Frequency Sidechain
The HF Freq control changes whether the compressor reacts evenly across the spectrum or pays more attention to the highs. Used carefully, it can also help control bright vocal material without pulling down the body of the voice.
- Attack Behavior
The optical design naturally keeps some of the source’s attack while smoothing the level behind it. That is why the CLA-2A can make a vocal feel more stable without giving it the obviously clamped quality that a very fast compressor can create.
- Mix And Trim
A Mix control gives you parallel compression, while Trim handles output level. Blending a more heavily compressed version underneath the original is often a cleaner approach than trying to make the main signal do all the work.
- Analog Character And Sidechain
You can include the modeled analog noise and coloration, and the sidechain can be driven from an external source. External keying is particularly practical when you want the smooth release behavior of an optical compressor while controlling it from another track.
Freebie:
Waves Free Plugin Pack
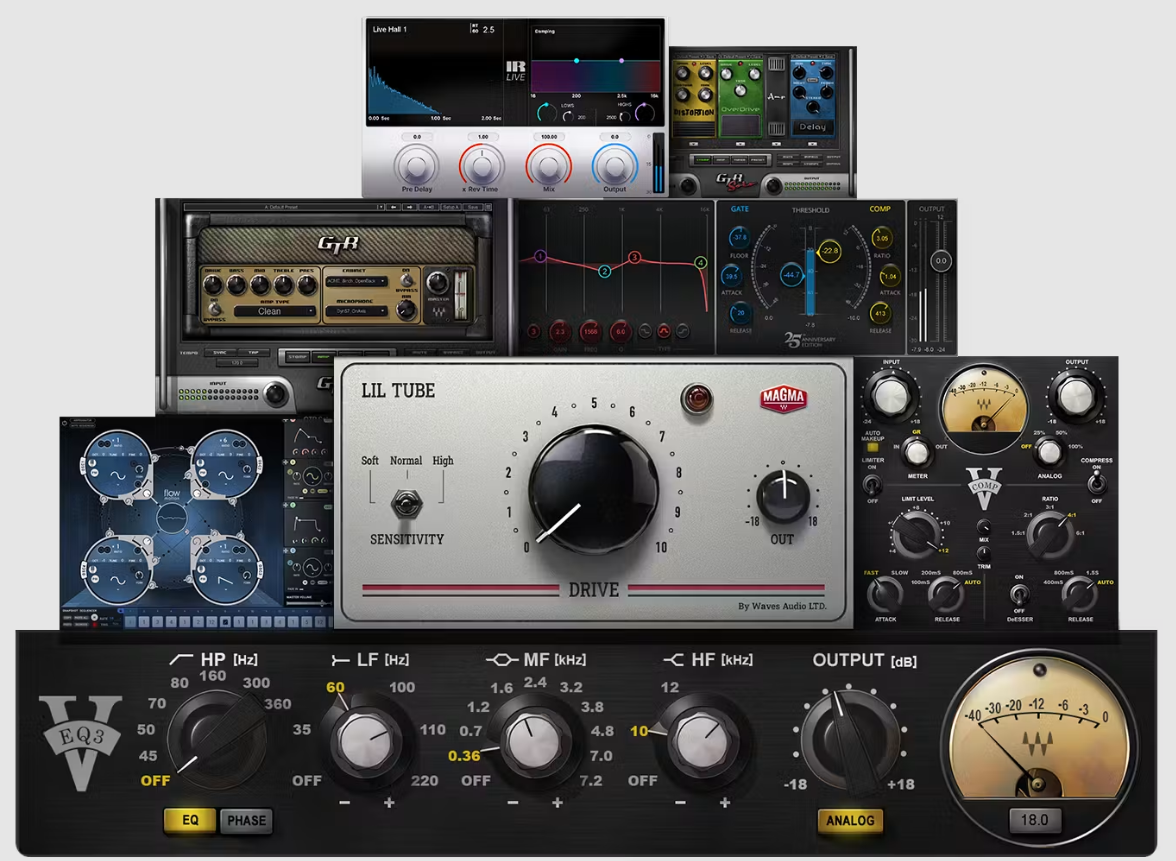
Free plugin bundles often include one useful processor surrounded by trial versions. The Waves Free Plugin Pack is more practical because it gives you several complete tools covering different parts of a basic setup, with no time-limited demo attached.
The point is not that these replace a full commercial collection. It is simply a good way to cover saturation, EQ, compression, reverb, channel processing, guitar effects, and synthesis without spending anything.
- Lil Tube
Lil Tube adds tube-style saturation with a small control set. It is handy when a track feels a little thin and you want to add some density without building a complicated saturation chain.
- V-EQ3 And V-Comp
V-EQ3 and V-Comp cover Neve-inspired EQ and compression. They are straightforward processors, and that is exactly why they are practical in a free bundle: you can drop them into a channel and get to work without learning a new workflow.
- IR Live
IR Live uses convolution to recreate the acoustic response of captured spaces. If most of your current reverbs are algorithmic, it gives you a different type of ambience that can work well for vocals, instruments, and live sources.
- AudioTrack
AudioTrack combines EQ, gating, and compression in one channel-strip style plugin. It is handy for quick setup when you want a basic track shaped without opening several separate processors.
- GTR Solo And Flow Motion
GTR Solo provides amp and pedal-style processing that can also be used on non-guitar sources for effects, while Flow Motion gives you an accessible entry point into FM synthesis. Neither needs to become a centerpiece of your setup, but both cover useful territory for free.
- StudioVerse Access
The bundle also gives you access to StudioVerse chains built around these plugins. Those chains are most helpful as starting points: load one, hear what it is doing, and then change the parts that actually fit your track.

Hey, I’m Vil, I started this site to help you find the best audio plugins covering various categories including synths, pianos, strings, and effect tools of all sorts as well. I pick these plugins based on various criteria so it best matches the actual topic.