When you purchase through the links on my site, you support the site at no extra cost to you. Here is how it works.
Plugin Alliance has a wide range of tools, from mastering processors to creative effects and channel utilities. I’m looking for a mix of newer options and established plugins that have proved themselves over time, including Shadow Hills Mastering Compressor Class A, HG-2MS, Kirchhoff-EQ, bx_aura, and bx_pulsar. There are also specialized picks for vocals, bass, saturation, limiting, and sound design.
We’ll start with Shadow Hills Mastering Compressor Class A, which combines optical and discrete compression, transformer coloration, and stereo controls in one processor.
It is a versatile choice that can handle several jobs without making the mix chain unnecessarily complicated. Along the way, we’ll see what else belongs among the best plugin alliance plugins.
1. Shadow Hills Mastering Compressor Class A
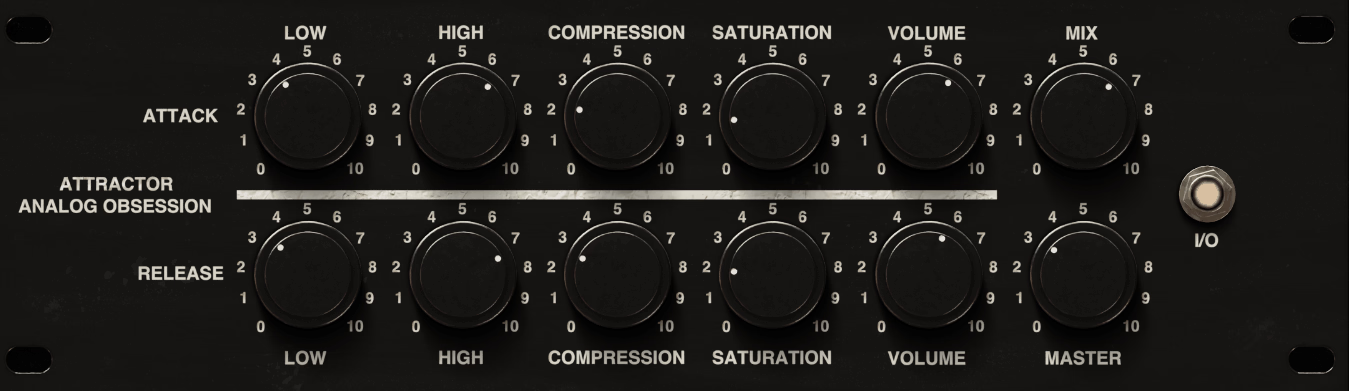
Brainworx’s emulation of the Shadow Hills Mastering Compressor Class A combines different types of compression and transformer coloration in a single mastering-oriented processor.
It gives me an optical stage for smoother control and a discrete Class A stage for more assertive compression, with three transformer options for tonal shaping. I also get Mid-Side processing, Mono Maker, Stereo Width, Parallel Mix, and sidechain controls, so it can handle several jobs that would otherwise require extra inserts.
I tend to reach for it when a mix already has the right balance but needs a little more cohesion or control. The main thing is knowing how much processing you actually need, because pushing both compression sections too hard can make a finished mix feel smaller.
- Three Output Transformers
The Nickel, Iron, and Steel transformer modes are useful when the compression is close but the tone still needs some adjustment. Nickel tends toward a smoother, brighter character, Iron adds more color, and Steel has a more pronounced low-end character and harmonic effect.
- Optical and Discrete Compression
I usually start with the Optical section if the mix already feels reasonably controlled and I just want the compressor to bring the elements a little closer together. It is slower and more forgiving than the discrete stage, so it works well when the goal is cohesion rather than obvious peak control.
The Discrete section gives me more precise control over the compression response, and using both lets me divide the job between smoother control and tighter transient management. I would not automatically engage both, because a heavier setting can make a mix smaller and less dynamic.
2. Black Box Analog Design HG-2MS
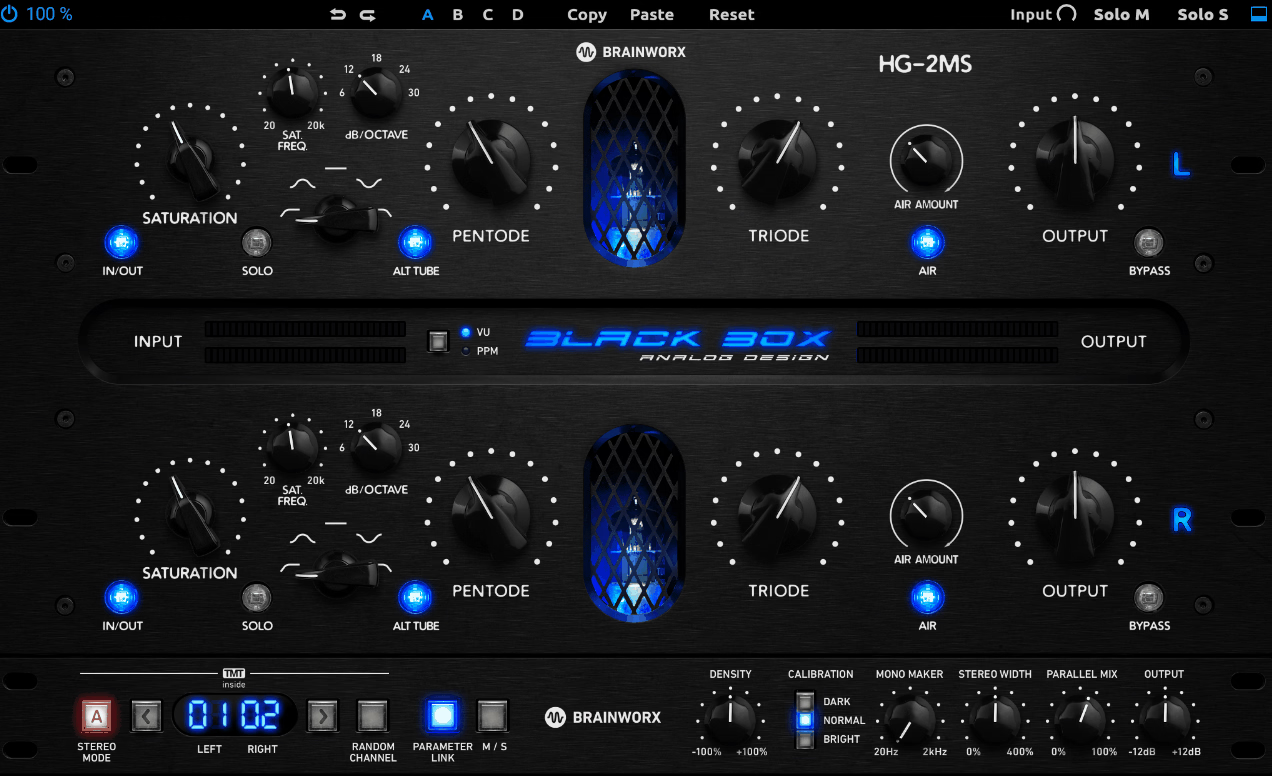
Most saturators focus on adding harmonic color, but the Black Box Analog Design HG-2MS gives me more control over where that color happens across the stereo field.
The plugin is based on the HG-2 tube processor, while the MS version adds Mid-Side processing and additional controls. I like it on mix buses, vocals, synths, and individual tracks that feel technically fine but slightly too clean.
I tend to use it when I want density or weight without committing to conventional distortion. You can keep the processing subtle or push it until the saturation becomes part of the sound.
- Tube Stages and Density
The HG-2 models multiple tube stages in series and parallel, including separate pentode and triode paths. Density lets me drive the stages harder while keeping the balance and output under control.
At lower settings, I can use it like a finishing processor. Push it harder and the saturation becomes more obvious, so I first decide whether you want to hear the effect or mainly feel it.
- Mid-Side Processing
The “MS” is more than a label here. I can process the center and sides differently, which makes the plugin useful for shaping a stereo source as well as adding harmonic color.
I might keep the center controlled while letting the sides take more saturation. On a pad, drum bus, or mix bus, that can add character without requiring another stereo processor.
- Air and Filtering
The HG-2MS adds filter options and an Air control that can add high-frequency sparkle. The filter section is useful when I want the saturation to affect a specific part of the spectrum instead of the whole signal.
You can decide whether the color follows the whole signal or stays concentrated in a specific frequency range.
3. Brainworx bx_aura
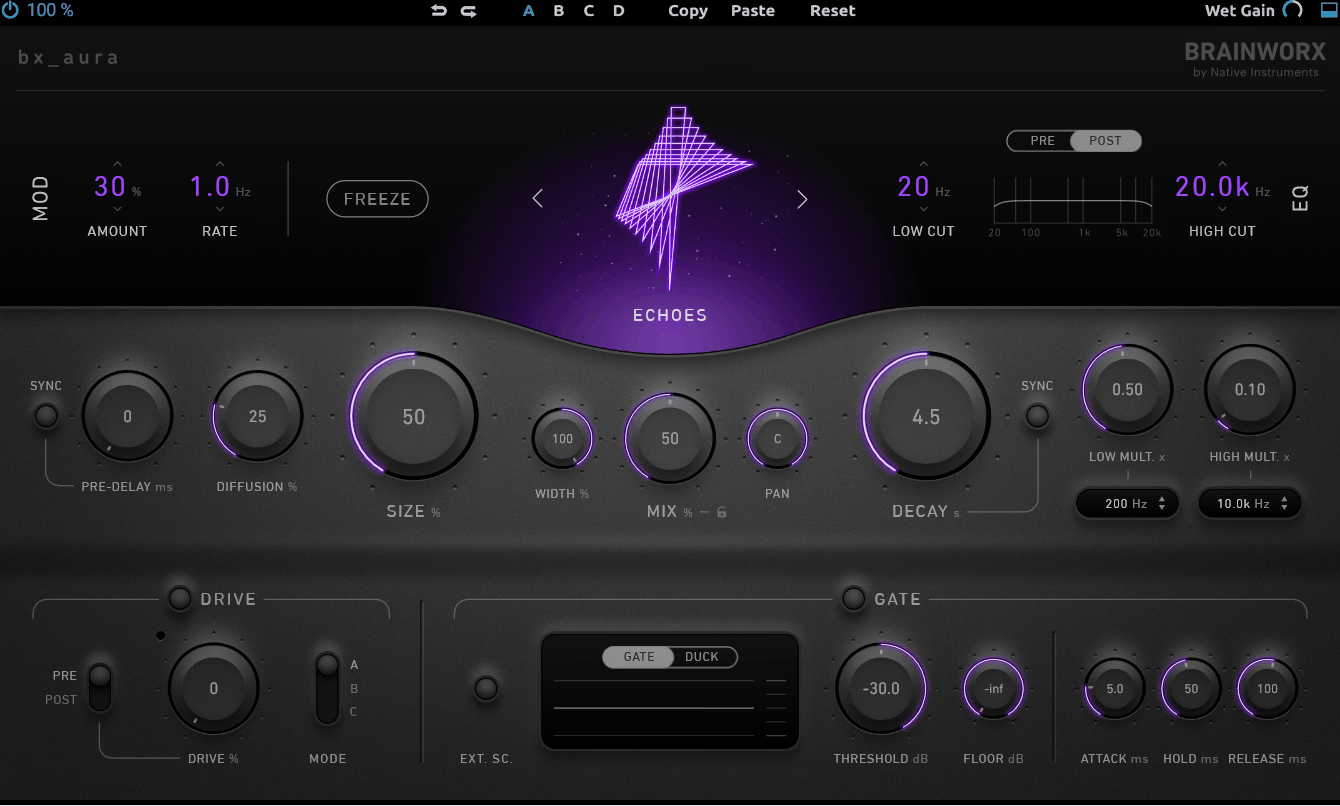
When I am working on spatial tone, Brainworx bx_aura gives me several ways to make the reverb part of the sound rather than simply placing the source farther back.
It combines five reverb algorithms with filtering, drive, ducking, gating, tempo sync, and freeze. That makes it useful for everything from a believable room around a vocal to more obvious textures for transitions and sound design.
I generally find Room useful when I want a source to sit inside an existing space, while Space, Echoes, and Reverse are more interesting when the reverb itself should be noticeable.
- Five Reverb Algorithms
The five modes are Space, Room, Echoes, Soft, and Reverse. They approach the decay differently rather than simply giving you variations of one reverb character.
For a vocal, I might use Room when I want depth without drawing attention to the effect. If you are working on transitions, pads, or sound-design elements, Space, Echoes, or Reverse can make the reverb much more obvious.
- Freeze, Gate, and Ducking
Freeze lets me turn a reverb tail into a sustained texture. Gate and ducking help keep the tail out of the way when the dry source is active. That is particularly practical on vocals and drums, where you want space without letting the decay constantly compete with the source.
- Drive and Presets
The Drive section can add warmth, grit, or distortion to the reverb itself. That makes it useful as part of a sound-design chain, not just as clean ambience.
The preset library is useful for getting close quickly, but I still treat presets as starting points. A reverb that sounds great by itself can still be wrong for your mix.
4. TBT Kirchhoff-EQ
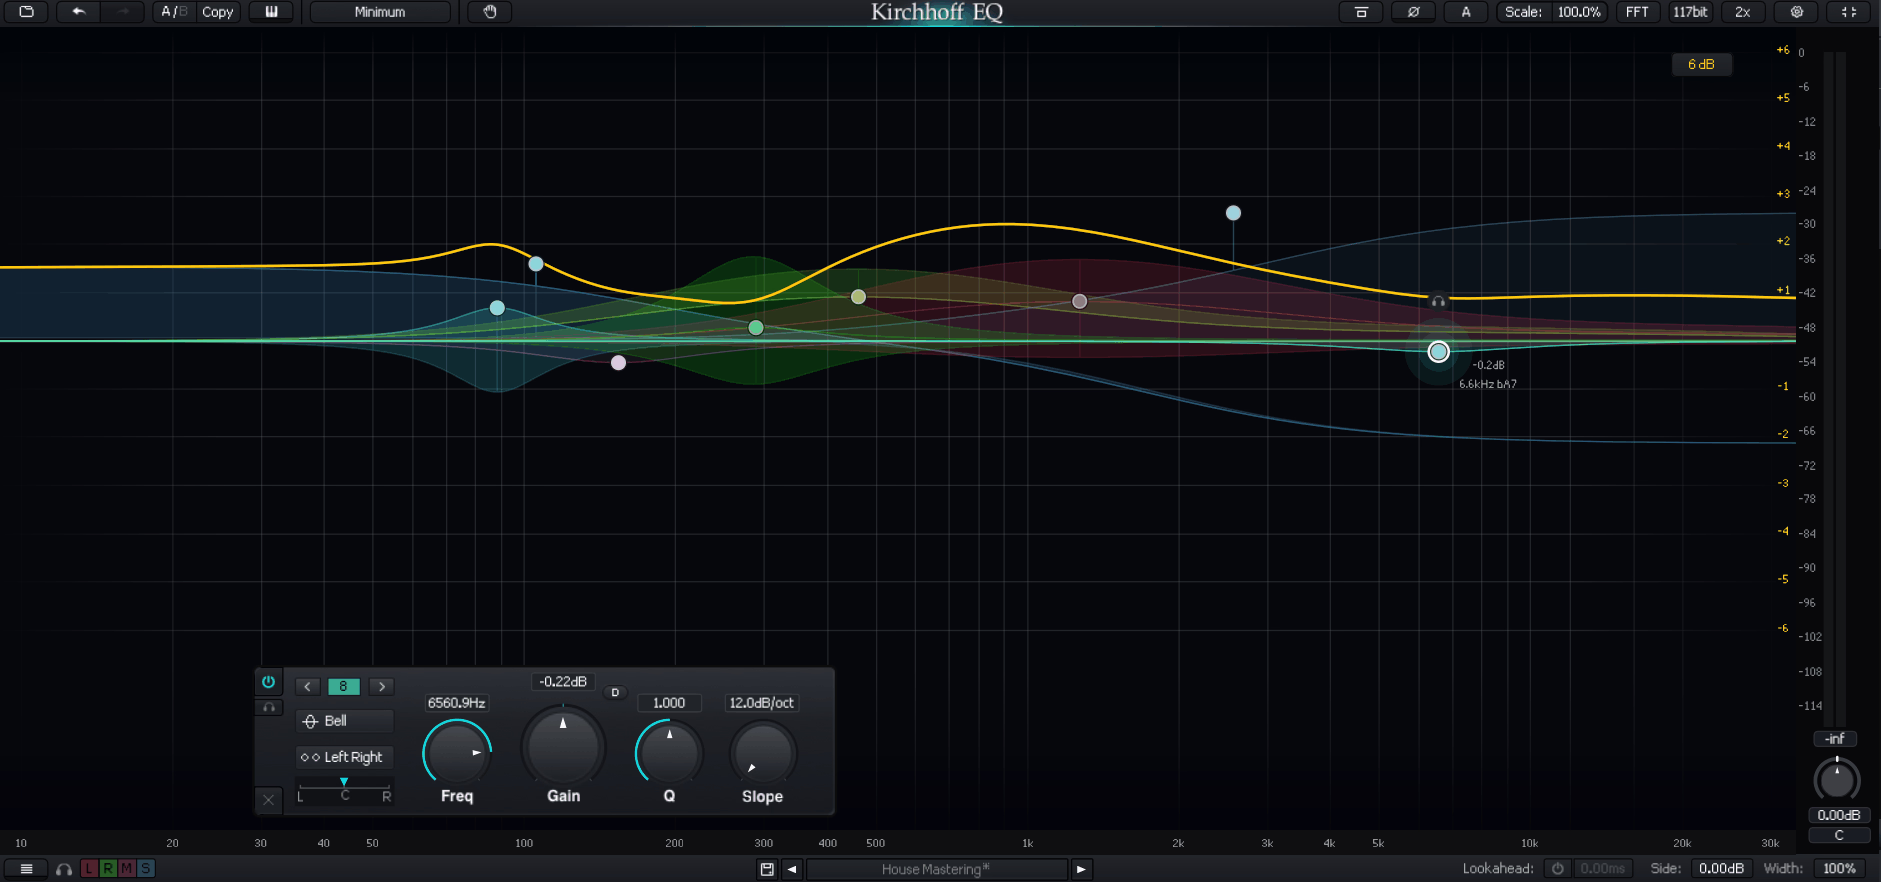
Modern parametric EQs give you surgical precision, but sometimes you need more than a clean cut or boost. The TBT Kirchhoff-EQ approaches EQ as a broader sound-shaping tool, combining corrective work with dynamic processing, stereo control, and modeled EQ curves.
I can use the same instance to remove a resonance, control vocal harshness dynamically, make a Mid-Side adjustment, and add a broad colored boost. That flexibility is the main reason I would choose it over a simpler EQ.
The bigger benefit is staying inside one familiar workflow when a channel gets more complicated.
- 32-Band Parametric Design
Kirchhoff-EQ provides 32 editable bands with continuously variable filter shapes and multiple filter types. That is more control than most mixes need, but it means the plugin does not force compromises when a source needs several kinds of filtering.
I would not use all 32 bands simply because they are available. The point is having enough room when the source eventually needs more complicated shaping.
- Dynamic EQ
The dynamic section supports two-way thresholds, onset control, relative detection, and separate detection and processing relationships. That makes it useful for transients, resonances, and frequency-dependent dynamics.
I find it particularly useful when a static cut solves one problem but damages the sound elsewhere. If you have a harsh frequency that only appears on louder notes, a dynamic band can wait for the problem.
- Vintage Curves and Stereo Control
The plugin also includes modeled vintage EQ curves, Mid-Side processing, stereo-width controls, monitoring, lookahead, and selectable phase behavior. That lets me move between surgical digital work and more characterful processing without opening another EQ.
The 117-bit internal precision is part of the technical design, but it is not why I would buy the plugin by itself. The practical reason is getting multiple EQ jobs inside one interface.
5. Lindell 902 De-Esser
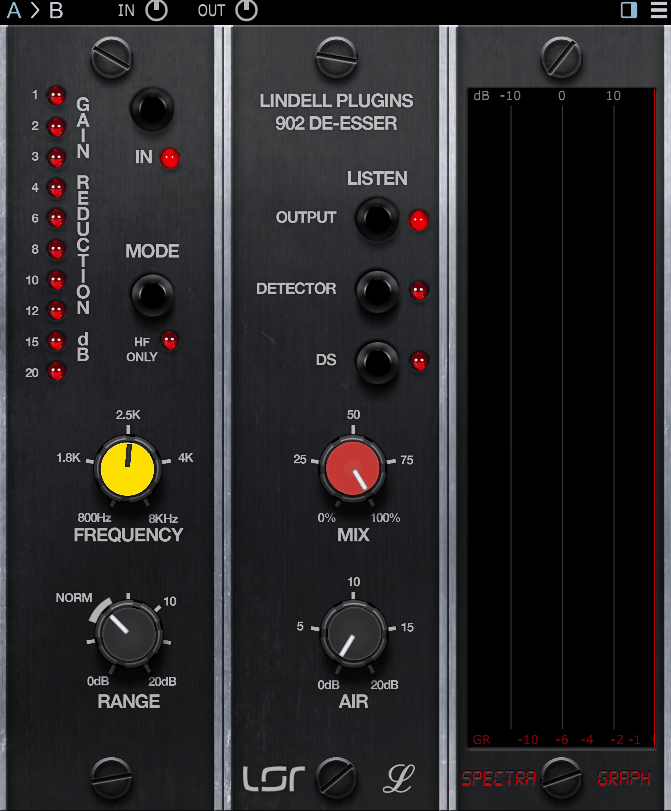
If your vocal chain spends too much time fighting sibilance, the Lindell 902 De-Esser gives you a simpler way to approach the problem. The workflow is based around choosing the target frequency and amount of reduction instead of building a complicated threshold-and-range setup.
I like that simplicity because de-essing is usually a problem I want to solve quickly. Once I know where the sibilance is concentrated, I would rather listen for the right amount of reduction than build a more complicated chain.
- No Conventional Threshold
The 902-style approach responds to the relationship between the selected frequency region and the incoming signal instead of relying on a conventional fixed threshold. That makes the response feel more automatic as the vocal moves between quieter and louder sections.
It is useful when the sibilance changes from word to word because you can focus on whether the vocal still sounds natural instead of chasing individual peaks.
- Simple Two-Knob Workflow
The basic workflow is narrow: choose the frequency you want to target and decide how much reduction you need. That makes the Lindell 902 useful when you want a dedicated tool rather than another processor with dozens of controls.
There is also a Listen function for hearing what the detector is reacting to. I find that useful for finding the right target frequency quickly.
6. SPL Vitalizer MK3-T
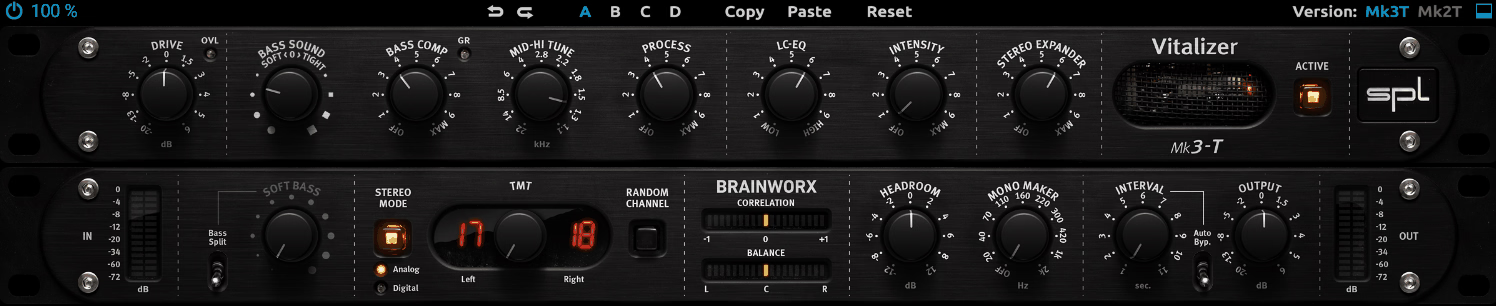
The combination of EQ and psychoacoustic processing in the SPL Vitalizer MK3-T makes it useful for a different job from a conventional tone-shaping plugin. It combines low-frequency processing, high-frequency enhancement, harmonic color, and stereo control to change how a source is perceived.
I find it most useful when a mix already has the basic balance but still feels a little flat. I tend to think of it as a finishing processor, not a substitute for getting the mix right.
- Split Bass
The Split Bass section handles soft and tight bass characteristics separately. That gives me more control over low-end perception than simply boosting the bottom end with an EQ.
I would still use it conservatively because low-frequency enhancement becomes obvious quickly.
- Tube Modeling and LC-EQ
The plugin includes Tube Modeling, while LC-EQ provides additional low- and high-frequency shaping. Together, those controls let me add harmonic character and a broad tonal adjustment in the same processor.
That can be handy on a drum bus, mix bus, or synth group where I want several small changes to happen together. I would not use it just because a mix feels “too clean.”
- Stereo Expander and Mono Maker
Stereo Expander and Mono Maker let me make wider sounds without leaving the plugin. Mono Maker is especially useful when I want the low end to stay centered while the upper part becomes more spacious.
That is practical on buses where stereo width matters but low-frequency stability still does.
7. NEOLD V76U73
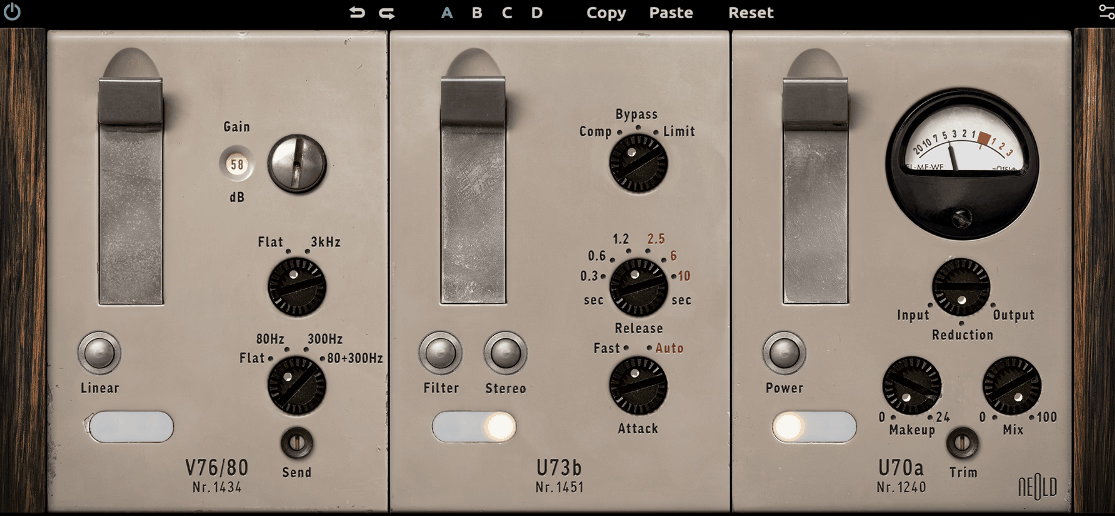
Vintage preamp and compressor plugins can easily become too colored for modern mixes. The NEOLD V76U73 balances that by combining a modeled V76-style tube preamp with a U73 compressor and limiter.
I like it when I want the source to feel as though it has passed through characterful hardware before I start doing more surgical mixing. It is particularly useful on vocals, bass, guitars, and mix elements where a clean chain feels a little too sterile.
You are not forced to use every part of the emulation at once. Linear mode, the compressor controls, and the sidechain filter give you enough flexibility to fit the character into a modern production.
- Linear Mode
The V76 section naturally has a restricted frequency response, but Linear mode opens it up to a wider 40 Hz to 15 kHz range. That makes it easier to use the preamp character without committing to all of the original tonal limitations.
I find that useful when I like the texture but want to keep more of the source’s low end and top end.
- Variable-Mu Compression
The U73 section provides a variable-mu style compression response for smoother gain control rather than fast, clinical peak grabbing. It works particularly well when the compression should feel like part of the tone.
I would use it for vocals, bass, guitars, or bus processing where some movement and density are welcome. It is less compelling when you need precise transient control.
- U70a Metering and Sidechain
The U70a module adds Mix, Makeup, and Trim controls, while the compressor provides a sidechain filter. That lets me shape how much compression is audible and stop low-frequency energy from dominating the response.
If you are dealing with a kick-and-bass-heavy mix, that filter can save you from adding another plugin just to clean up the detector.
8. Ampeg B-15N
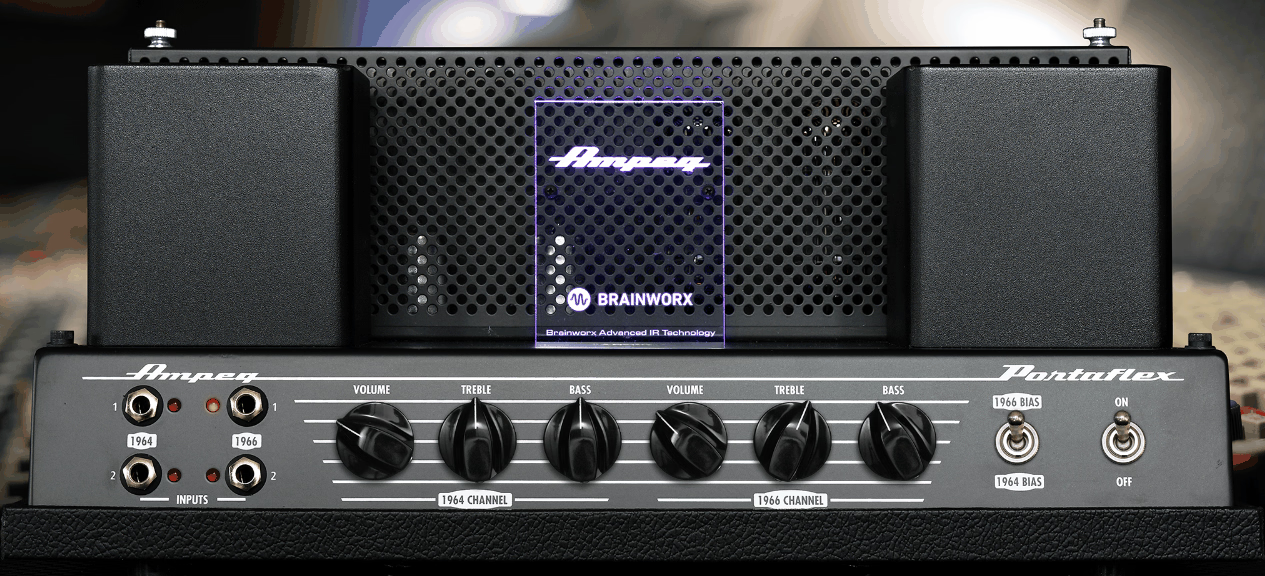
Upright or electric bass recordings can sound perfectly usable as DI tracks while still missing the character that makes them sit properly in a mix. The Ampeg B-15N gives you a way to bring that amp character into the session without needing a real bass cabinet.
The plugin is useful when you want the bass to feel like a recorded instrument rather than a clean DI with distortion added afterward. I find that the modeled channels and recording chains give me enough options without losing the identity of the original performance.
It is a specialist tool, but that is also why I like having it available. When a DI bass is the problem, a dedicated amp workflow is faster than recreating the same response with separate saturation, EQ, cabinet, and room plugins.
- 1964 and 1966 Channels
The two modeled channels give me a choice between a softer, thicker sound and a more assertive character. That is useful because bass needs different kinds of drive depending on whether it is supporting the kick or acting as a more prominent element.
I normally choose the channel before doing much EQ. Once the amp character is right, smaller tonal adjustments are easier.
- Recording Chains
The plugin includes multiple cabinet and microphone combinations, giving you different recorded tones without rebuilding the microphone position. That saves time when the DI sounds fine but the mix still needs a more convincing bass sound.
It is also useful when you want to audition several realistic bass tones quickly.
- Power Soak and Filtering
Power Soak lets me push the amp harder without simply raising the output. That is useful when I want more amp character while keeping the level manageable.
9. Brainworx bx_pulsar
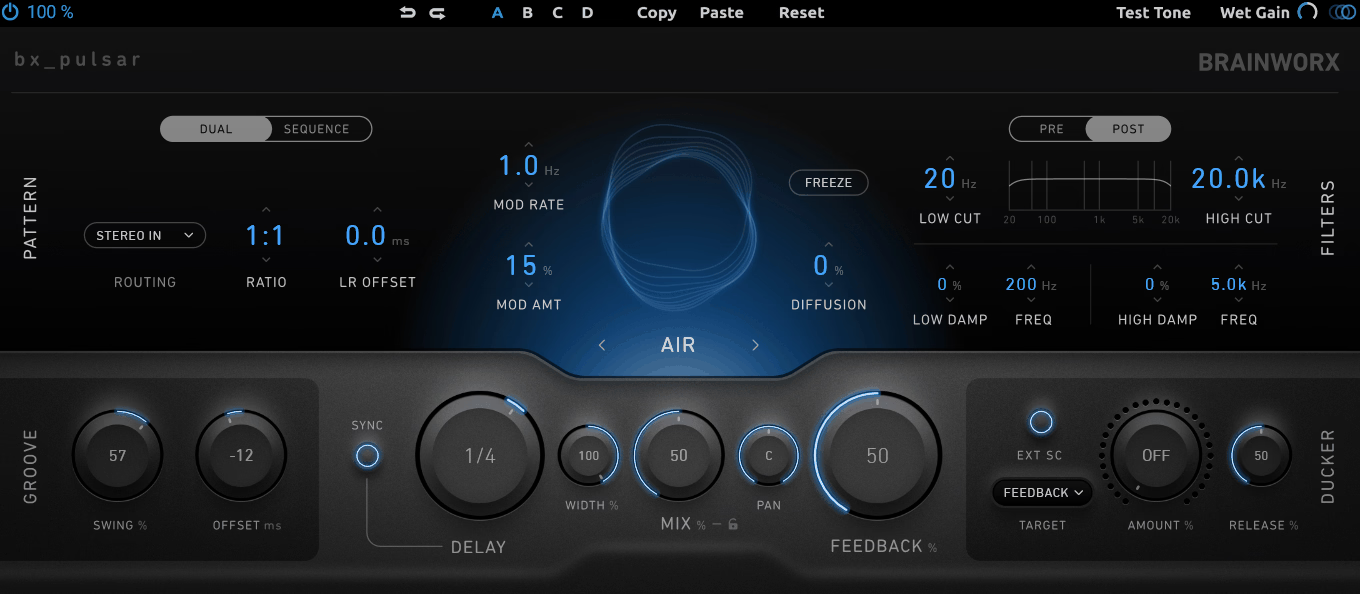
If your delay starts sounding too repetitive, Brainworx bx_pulsar gives you several ways to make the repeats part of the rhythm instead of simply sitting behind the source.
It combines five delay modes, an eight-step pattern system, stereo routing, ducking, freeze, and rhythmic controls. I especially like it on leads, vocals, percussion, and transitional sounds where the delay needs to become part of the groove.
The trick is to create movement without turning every repeat into an obvious effect. If you already have enough automation in a session, this can be a faster way to add variation.
- Five Delay Modes
bx_pulsar includes Air, Magnetic, Circuit, Aether, and Reverse modes, giving the delay different behaviors. Magnetic and Circuit also provide additional character variations, so I can move from relatively clean repeats toward more degraded sounds.
I find that useful when I want the delay to match the role of the source. A clean repeat may work on a vocal, while a granular or degraded mode can work better as a texture.
- Eight-Step Sequence Mode
The 8-Step Sequencer is where the plugin moves beyond a conventional delay. I can shape the rhythm of the repeats instead of relying on the same interval every time.
That is particularly useful when the delay needs to reinforce the groove. If you are already doing a lot of DAW automation, the sequencer can save you from drawing every movement by hand.
- Freeze and Sound Design
Freeze and Clear Buffer let me capture and manipulate delay material rather than treating it as a simple echo. That makes bx_pulsar useful for transitions, sustained textures, and sound design.
I would not use all of its features on every track. The strength is having enough control to build a specific rhythmic or textural delay without stacking several other effects.
10. Unfiltered Audio LO-FI-AF
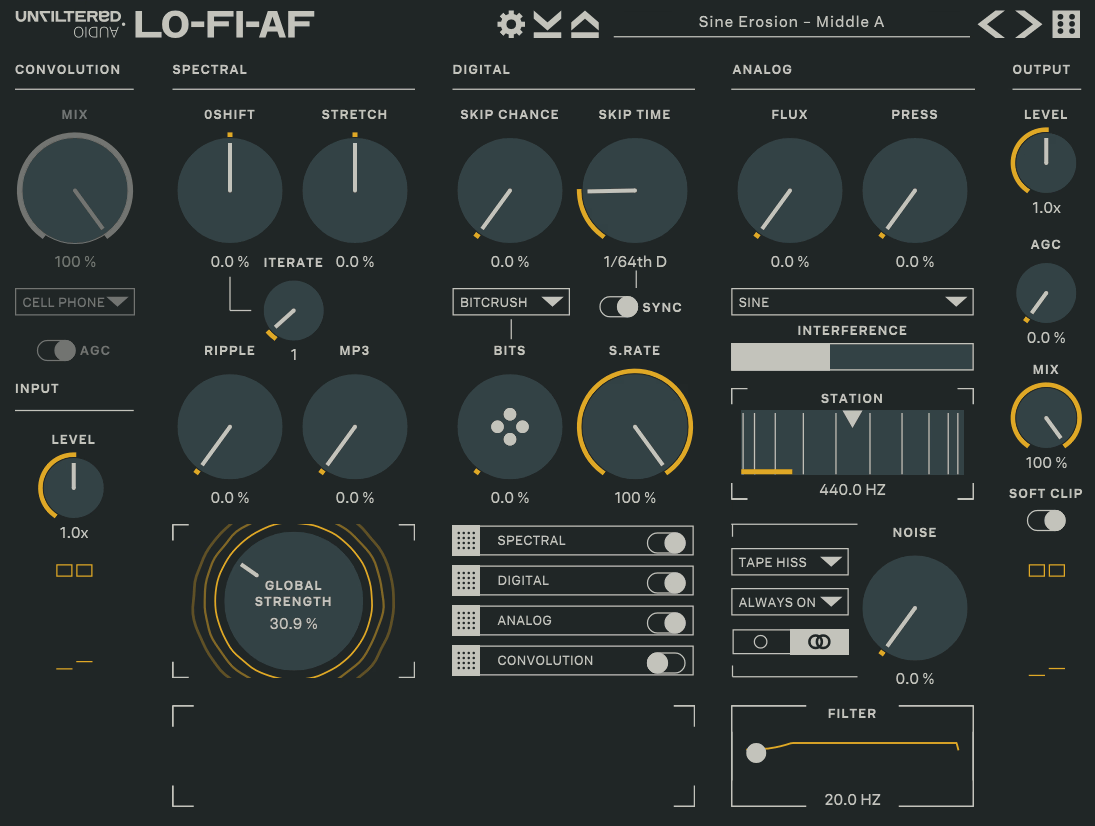
A lot of lo-fi plugins claim to add “analog warmth” or digital degradation, but the Unfiltered Audio LO-FI-AF takes a broader approach by combining several kinds of audio damage in one chain.
It combines convolution, spectral processing, digital degradation, and analog-style processing, and you can reorder the modules so the processing order becomes part of the sound. That makes it much more useful for sound design than a basic bit crusher.
I tend to use these effects more subtly than the plugin initially encourages. A small loss of fidelity can make a synth, vocal, or transition more interesting without turning it into an obvious lo-fi effect.
- Four Reorderable Modules
The four main modules, Convolution, Spectral, Digital, and Analog, can be turned on or off and rearranged. That means the processing order itself becomes part of the sound.
When a simple bit crusher sounds too obvious, changing the order of several smaller degradations can produce something that feels more like a genuinely broken recording.
- Cool GUI Skins
- Digital and Analog Degradation
The Digital section covers effects such as bit reduction, sample-rate reduction, and CD-style artifacts. The Analog section adds tape coloration, radio interference, vinyl noise, and mechanical instability.
I tend to use these in smaller amounts. A subtle loss of fidelity can make a sound more interesting without becoming the entire character of the track.
- Convolution and Spectral Processing
The Convolution section includes impulse responses based on poor microphones and old speakers, while the Spectral section can introduce stretching, pitch-related artifacts, and reduced-resolution effects.
Those sections are useful when I want a clean sample to feel like it passed through an unusual recording or playback system.
11. Swivel Audio HitStrip
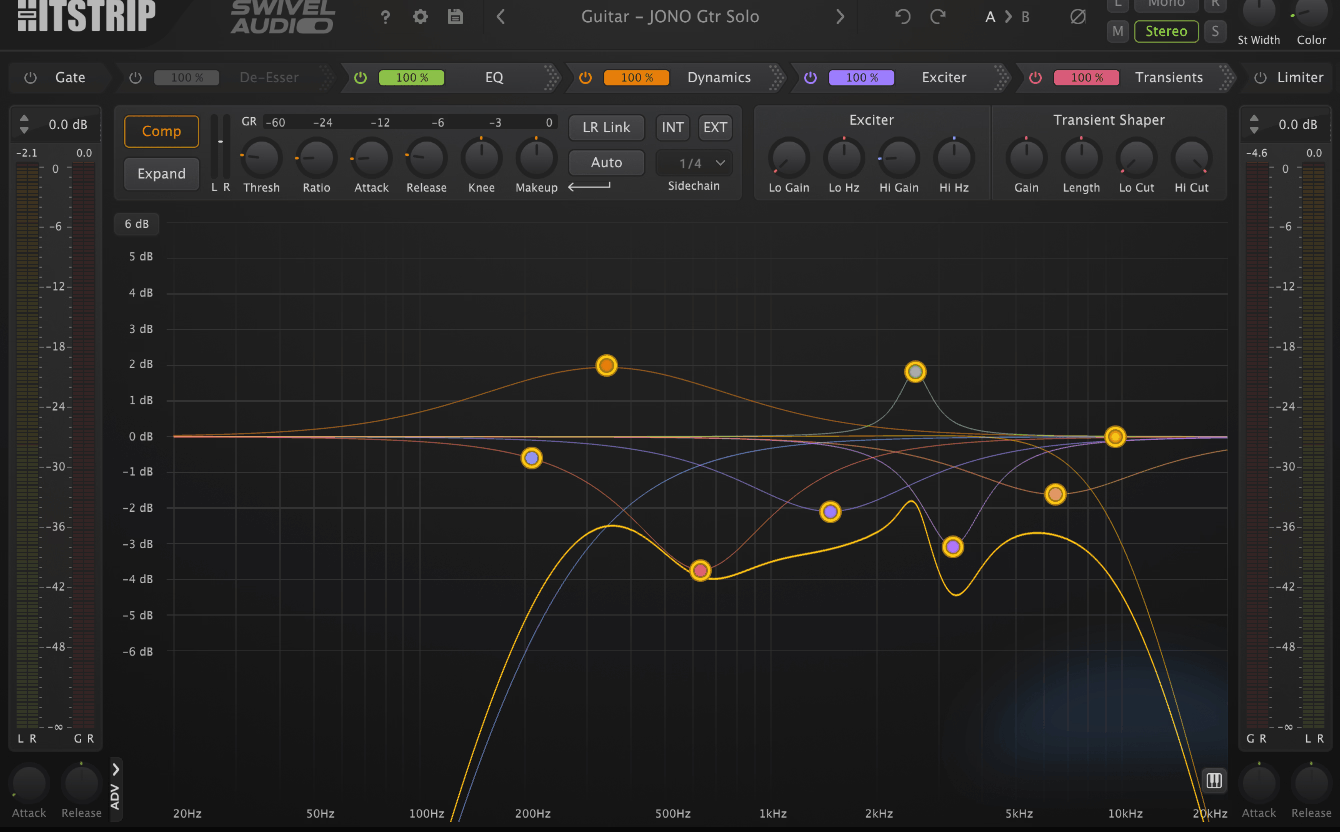
Channel strips are supposed to make mixing faster, but they can become cluttered once every processor gets its own controls and submenu. Swivel Audio HitStrip takes a different approach by keeping the main processing modules visible in one place.
It combines EQ, compression, gating, de-essing, transient shaping, saturation, and other processing inside one interface. I would particularly consider it for vocals, drums, and other tracks that tend to accumulate several utility processors.
The value is less about the number of features and more about keeping the common decisions in one place. If you prefer minimal insert chains, that can be a meaningful advantage.
- Three EQ Approaches
HitStrip offers Dynamic, Transient, and Tonal EQ approaches, each aimed at a different kind of shaping. That makes more sense to me than simply offering three cosmetic variations of one EQ.
I might use Tonal for a broad balance change, Transient when the attack needs work, and Dynamic when a frequency problem changes with the performance.
- Large Number of Configurations
The combination of its modules creates a large number of processing paths. That is useful, but I would not judge the plugin by the number itself because a huge configuration count does not automatically make a strip better.
The practical advantage is being able to build a channel around the order and combination of processors that fit the source instead of reaching for several separate plugins.
- Tape Color, Gate, and De-Esser
The tape-style Color control adds saturation without requiring a separate processor. The built-in Gate and De-Esser cover cleanup work that often creates a longer insert chain on vocals and drums.
I would still use dedicated processors when I need very specialized control. HitStrip makes more sense when speed, consistency, and a compact workflow matter more.
12. bx_limiter True Peak
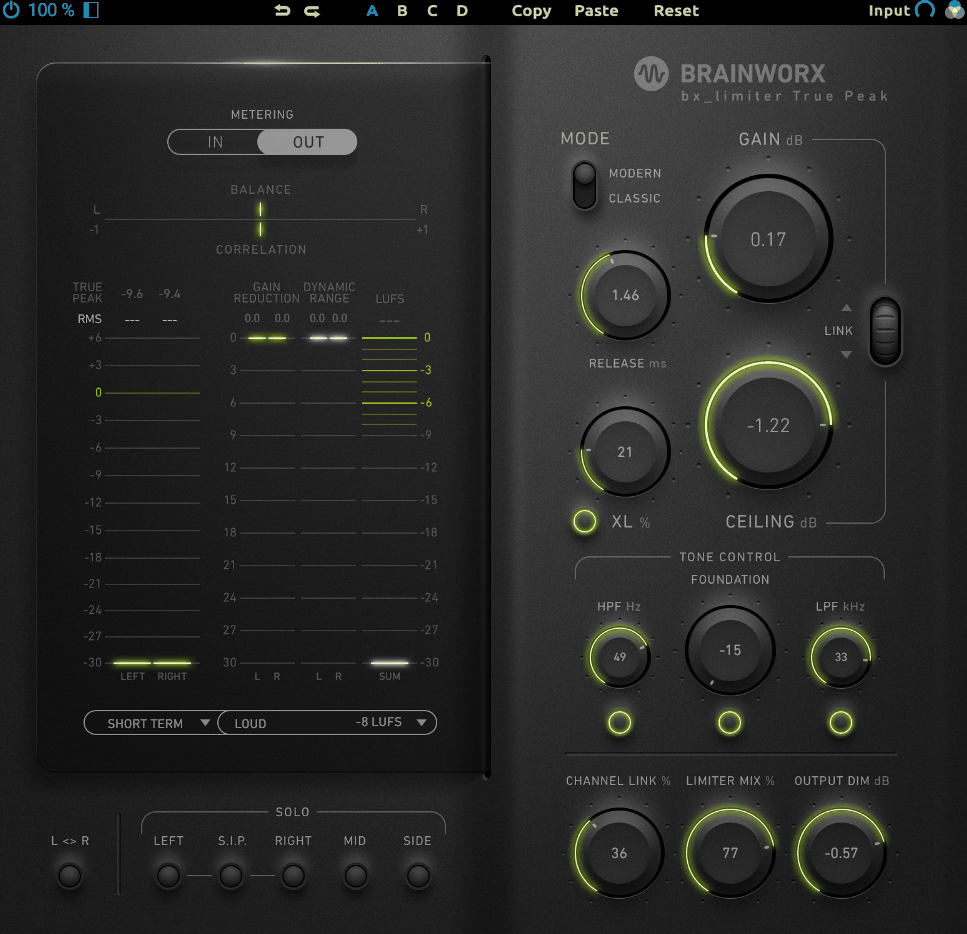
When I first started using true-peak limiters, I found that the hardest part was not getting the meter to show the right number. It was keeping the master controlled without making the transients feel flattened, which is why bx_limiter True Peak makes sense as a focused final-stage tool.
It includes XL Saturation, channel linking, a mix control, output trimming, and metering options that give me more control over the limiting. I would still treat it as a mastering tool rather than a magic loudness button.
If you are already getting the dynamics right before the limiter, it can be a useful final stage. If the mix is fundamentally too dynamic or too dull, I would fix those problems earlier instead.
- Selective Processing
The limiter provides controls for how much the signal is processed and how the stereo channels interact. Channel Link matters when stereo stability is important because fully independent limiting can change the image as the left and right channels hit different peaks.
That gives me a way to balance transparency against independent peak control. I would normally start with more linking and only move toward greater independence when I hear a reason to.
- XL Saturation
XL Saturation adds harmonic processing before the limiting stage, which can make the result feel denser. I tend to keep this conservative because saturation and limiting together can remove transient detail.
Used lightly, it can make the limiter feel less clinical. I always compare the processed and unprocessed versions at matched loudness.
Bonus Pick: Knif Audio Knifonium
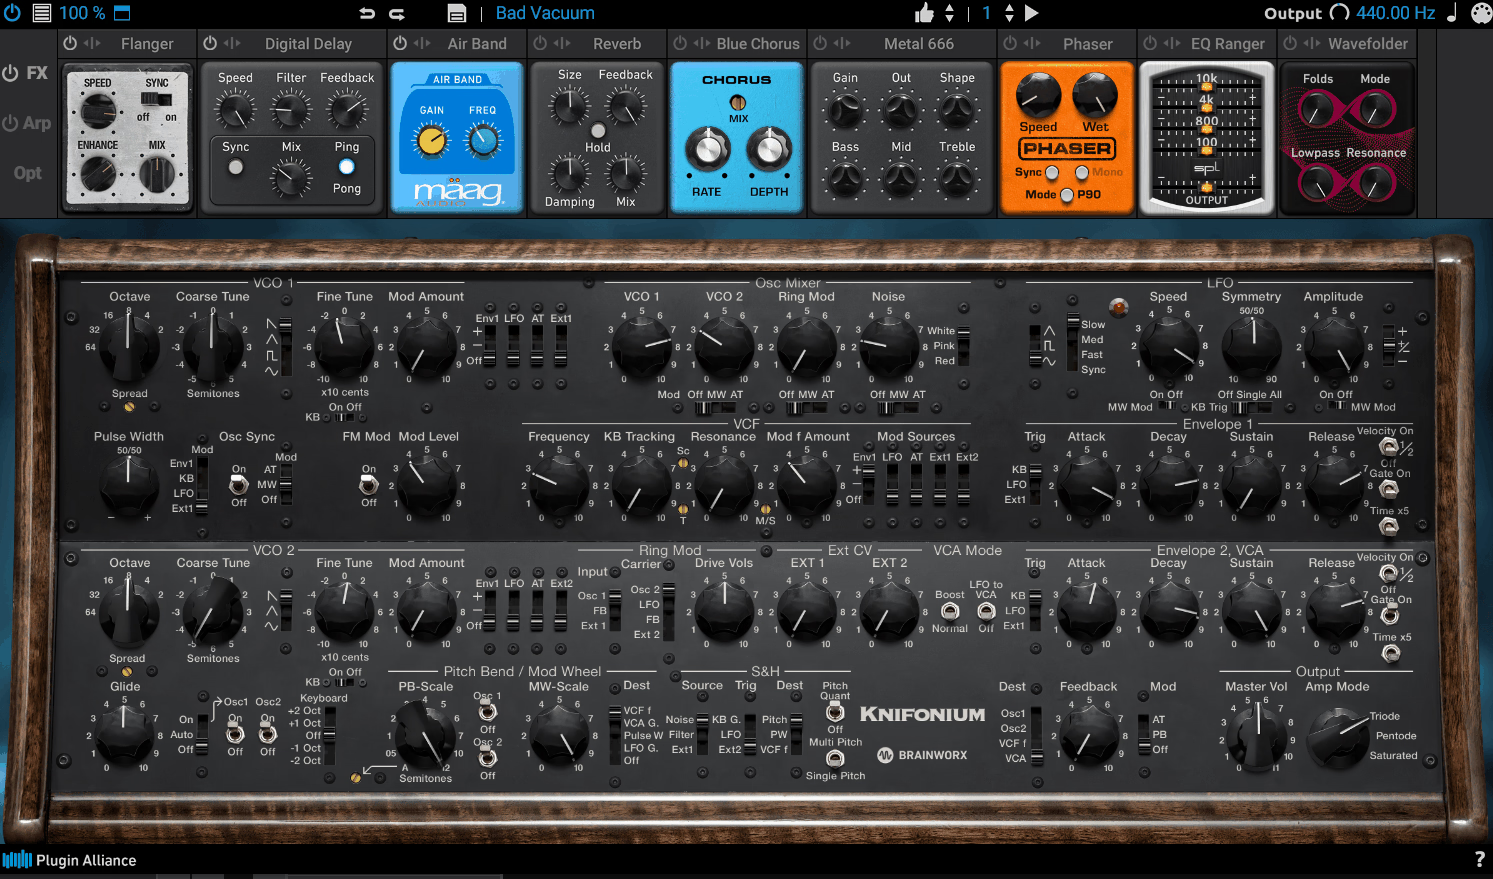
Modal synthesis becomes much more interesting once you hear how differently resonant systems can behave from conventional oscillators. Knifonium takes that specialist, character-focused approach into a software synth that is more flexible than its hardware inspiration.
The instrument is based on a very limited hardware design, but the software version adds practical features for modern production. I would look at it when a conventional subtractive synth feels too familiar and you want a more unusual analog-style character.
I would still call Knifonium a specialist instrument rather than an essential purchase. If you want a straightforward all-purpose synth, this probably would not be my first recommendation.
- Polyphony and Unison
Knifonium provides polyphony and unison options that make it easier to build pads, stacked leads, and thicker synth parts than the original hardware concept would suggest.
I would especially look at it when a conventional subtractive synth gets too clean or familiar. The character is useful precisely because it does not behave like another generic modern wavetable instrument.
- Presets and Sound Design
The preset library gives you a quick way into the instrument, but I would spend some time exploring the synth’s own architecture once I knew I liked the basic tone. The unusual combination of oscillator and filter character is where the instrument becomes more interesting than its factory patches.
The built-in effects also make it easier to turn a raw patch into something usable without immediately building another effects chain.
- Modulation and Effects
Unison, the arpeggiator, modulation controls, and built-in effects give the synth enough internal movement that I can create evolving sounds without immediately leaving the instrument. That is especially useful for pads and sequenced parts where the motion is part of the patch itself.

Hey, I’m Vil, I started this site to help you find the best audio plugins covering various categories including synths, pianos, strings, and effect tools of all sorts as well. I pick these plugins based on various criteria so it best matches the actual topic.