When you purchase through the links on my site, you support the site at no extra cost to you. Here is how it works.
Reaper already gives you a surprisingly capable set of stock effects, so I wouldn’t choose third-party plugins simply because they sound good. The more helpful question is what a plugin lets you do that Reaper’s own tools don’t make as easy.
For me, that usually comes down to a few things: better instruments, more specialized processing, deeper modulation, or a workflow that saves time when a stock effect starts to feel limiting.
That’s where the plugins below fit. Native Instruments Kontakt 8 covers sample-based instruments, Arturia B-3 V handles modeled organ sounds, IK Multimedia MODO Bass 2 takes a physical-modeling approach to bass, while tools such as FabFilter Pro-Q 4, Waves IDX Intelligent Dynamics, and Devious Machines Infiltrator 2 are aimed at different parts of mixing and sound design.
I’ve also included several free plugins at the end. They cover synths, effects, EQ, and sampled instruments, so you can add useful tools to Reaper without spending anything.
1. Native Instruments Kontakt 8
Native Instruments Kontakt 8 is less about giving Reaper a sampler it doesn’t already have and more about providing access to a huge ecosystem of sample-based instruments built around the platform.
It works particularly well when your projects rely on orchestral, cinematic, keyboard, or other specialized libraries. Rather than behaving like a simple sampler, Kontakt combines an extensive Factory Library with a browser, MIDI tools, and newer instruments such as Leap and Conflux, giving you more to work with before you even add another library.
- Chords And Phrases Tools
Kontakt 8 includes Tools that generate MIDI material such as chord progressions and playable phrases. I find this most useful at the beginning of a track, when I have a sound but no clear musical idea yet. Rather than writing every note from an empty piano roll, I can generate something, audition it against the current instrument, and then edit the result.
The point isn’t to let Kontakt write the part for me. It’s simply a faster way to get from a blank project to something I can react to.
- Leap
Leap is Kontakt’s loop and one-shot instrument, with genre-focused expansions covering styles such as Afrobeats, Latin Trap, and Progressive Trance.
It sits somewhere between a traditional sample browser and a playable instrument. I can audition sounds, manipulate loops, and build a starting idea without constantly switching between the instrument and a separate sample window.
For quick sketching, that can make a meaningful difference.
- Conflux Hybrid Instrument
Conflux is a hybrid instrument included with Kontakt 8 that combines different synthesis approaches inside a single patch. I see this as more of a sound-design option than an everyday bread-and-butter instrument.
- Full VST3, AU, AAX Support
Kontakt 8 runs in the major plugin formats used by modern DAWs and supports Apple Silicon and current Windows systems.
2. Arturia B-3 V
Modern organ plugins can give you convincing sounds very quickly, but many approaches still treat the instrument as a collection of presets rather than something whose behavior changes as you play.
Traditional Hammond organs approached tone differently through interacting drawbars, percussion, vibrato, rotary movement, and preamp coloration, where each part contributes to the character of the instrument rather than simply adding another effect afterward.
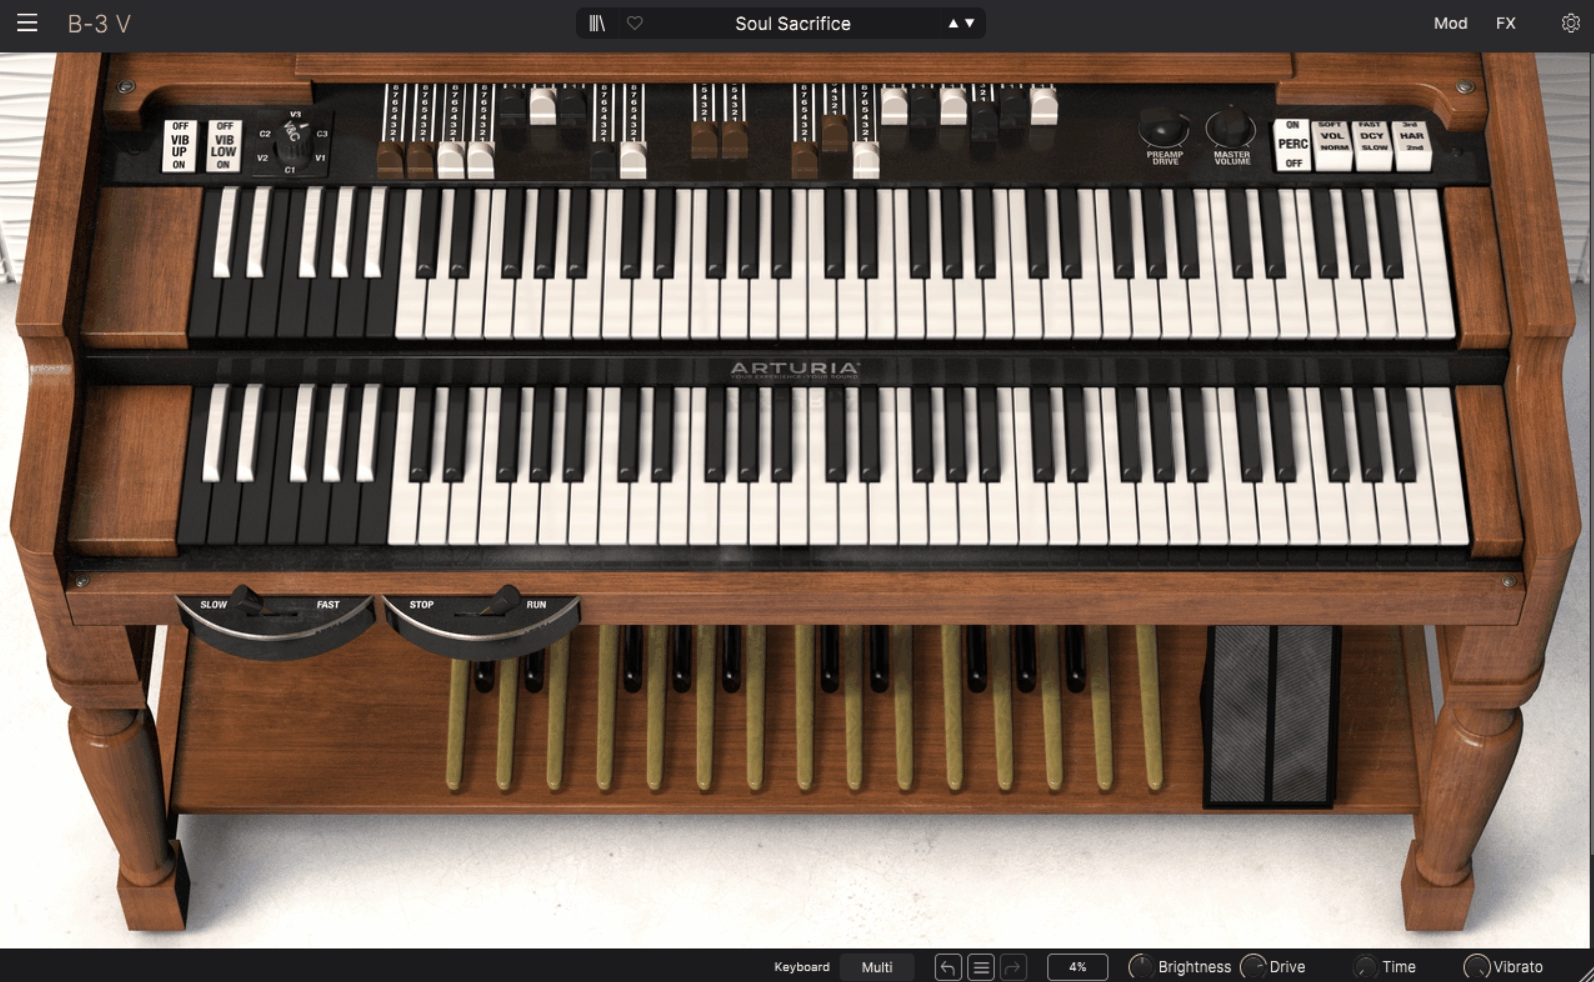
The Arturia B-3 V is a digitally modeled tonewheel-organ instrument built around that approach. I think what makes this different from a basic sampled organ is how its drawbars, rotary speaker, modulation, percussion, and tube preamp interact with one another to shape the sound.
- 9 Drawbars Per Manual
Each manual has its own set of nine drawbars, so I can build the harmonic balance myself rather than choosing from a small number of fixed sounds.
For an organ part, I would spend some time here before relying on presets. Small drawbar changes can completely alter the balance of the sound, and that’s part of what makes the instrument helpful in the first place.
- Modeled Rotary Speaker
The rotary section recreates the familiar Leslie-style behavior, including slow and fast speeds and the option to stop the rotation.That matters because the rotary speaker isn’t just an effect added after the organ. The changing movement is part of the performance.
I can use a slower setting for a more stable sound, speed it up for transitions, or stop it entirely when I want something much more direct.
- Advanced Drawbar Modulation
The drawbars can also be modulated using LFOs, multipoint envelopes, and a step sequencer. This is where B-3 V stops behaving like a straightforward organ emulation.
For conventional organ parts, I may never need these controls. For sound design, though, they let me automate the harmonic structure itself and turn the instrument into something much more experimental.
- AO28 Tube Preamp
3. IK Multimedia MODO Bass 2
Traditional sampled bass instruments trigger recordings of individual notes and articulations that have already been captured, which means many aspects of the performance are fixed before you even start programming.
Physical modeling approaches this differently by simulating how the bass itself responds, giving you control over things such as playing position, hand position, articulation, and the interaction between the strings, fretboard, body, and pickups.
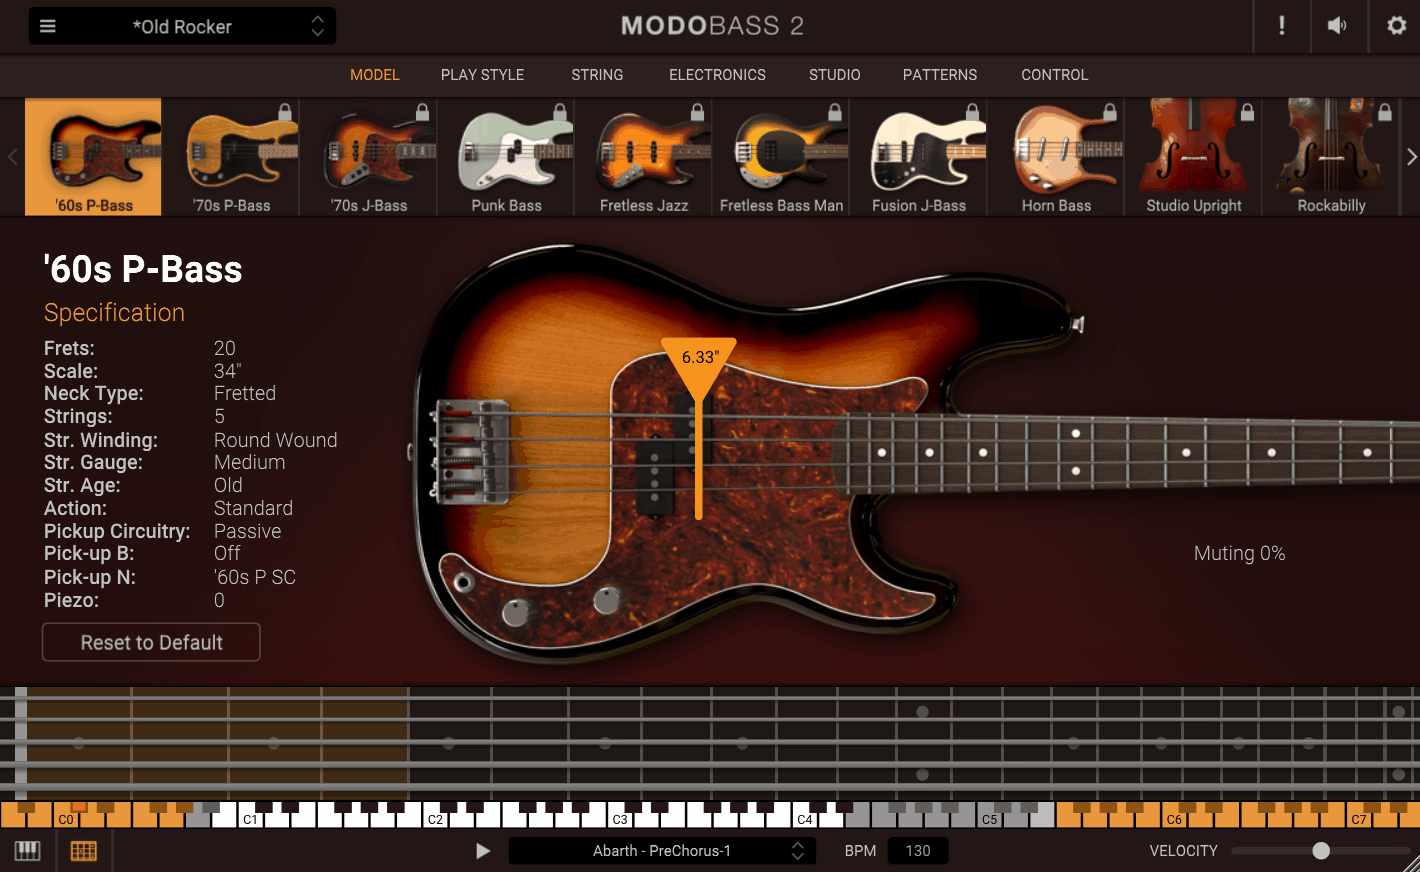
IK Multimedia MODO Bass 2 is a physical-modeling bass instrument built around that idea. Its modeled engine generates the performance in real time, including 22 bass models, fretless behavior, and MIDI-controlled playing characteristics rather than relying entirely on prerecorded samples.
- 22 Bass Models Including Fretless And Double Bass
MODO Bass 2 includes 22 modeled basses, including fretless and double-bass options. The range is useful because the underlying modeling approach stays consistent while the instrument choices change.
I find the fretless models particularly interesting because fretless bass can be awkward to program convincingly when every note depends on very precise intonation.
A modeled instrument doesn’t remove all of the work, but it gives you more control over that behavior.
- Fretless Toggle On Any Bass
One of the more unusual features is the ability to switch any bass model into a fretless configuration. That means I can start with a familiar bass model and change its playing behavior without loading a completely different instrument.
- Physically Modeled String Interaction
The modeling engine responds to variables such as picking position, playing style, and the interaction between the string, fretboard, body, and pickups.
The important part for a Reaper workflow is that those changes can be driven from MIDI rather than being fixed into recorded samples. That gives me a way to automate a change in tone during a track instead of switching instruments just to get another articulation.4. Waves IDX Intelligent Dynamics
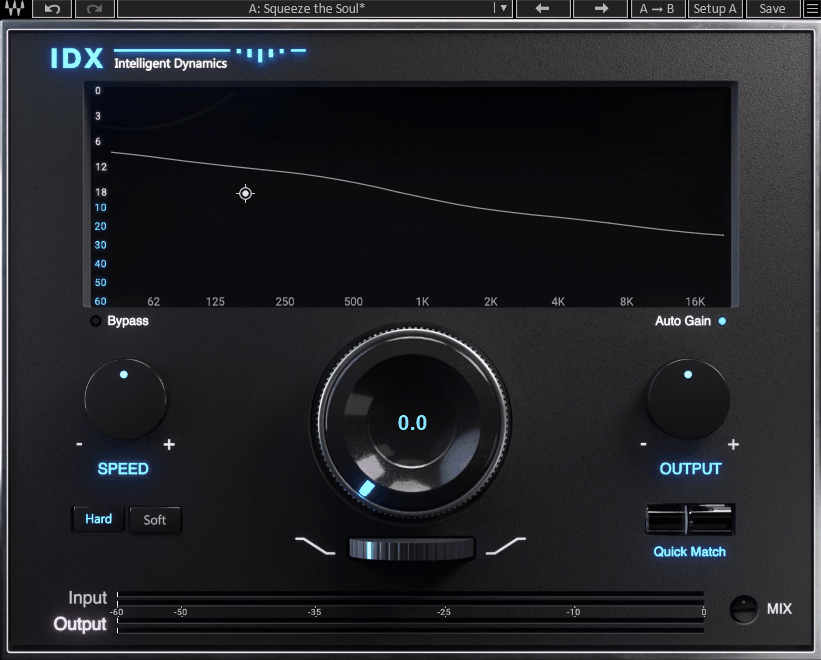
With conventional compressors, you often get a strong response from the most energetic part of a signal even when the rest of the frequency range doesn’t really need the same amount of control.
Waves IDX Intelligent Dynamics takes a different approach by analyzing different parts of the spectrum and adjusting the areas that are contributing the most. The first time you use it, the main difference becomes clear: it is designed to respond to the spectral distribution of the signal rather than treating the whole source as one block.
Instead, you’re getting frequency-dependent dynamics with controls such as Tilt, Hard and Soft response modes, and a Mix control for blending the processing back with the original signal.
- Frequency-Dependent Detection
IDX uses multiple detectors across the frequency spectrum rather than relying only on overall level.
In practice, this means I can use it to control busy areas of a signal without automatically compressing everything else to the same degree.
- Tilt Control
The Tilt control shifts the detector’s emphasis toward brighter or darker areas. This is useful because different sources tend to have different problems.
A drum bus may benefit from stronger attention toward brighter transients, while a vocal might need a more balanced response. The control gives me a quick way to change the plugin’s priorities without rebuilding the processing.
- Hard And Soft Response Modes
The Hard and Soft response modes change how quickly the processing reacts.
5. Native Instruments Guitar Rig 7 Pro
Guitar Rig 7 Pro is designed as a complete guitar-processing environment rather than just another amp simulator. Whether you’re building a guitar rig from scratch or processing an already recorded part, its combination of amp models, cabinets, pedals, modulation, and effects lets you keep most of the chain inside one plugin.
For me, the biggest advantage is the flexibility of that setup. The newer ICM amp models, custom impulse-response loader, Loop Machine Pro, and newer lo-fi components give you several ways to shape the signal without having to assemble every stage from separate processors.
- Four New ICM Amp Models
The newer ICM amp section adds models covering high-gain, clean, bass, and British-style amp flavors.
The practical benefit isn’t simply having more presets. Each model gives me another starting point before I decide how much cabinet, room, or effect processing the part actually needs.
The inclusion of impulse responses from OwnHammer and 3 Sigma Audio also gives the cabinet section more flexibility than a fixed speaker model would.
- Loop Machine Pro
Loop Machine Pro provides tempo synchronization, count-in, and hardware footswitch control. For live guitar work, that’s a useful part of the package because the looper isn’t separated from the rest of the rig.
I can build a layer, hear it immediately, and keep shaping the same sound without leaving the plugin.
- Four New Lo-Fi Components
Tape Wobble, Noise Machine, Vintage Vibrato, and Kolor are aimed more at texture than traditional guitar processing. That’s where I think Guitar Rig becomes more interesting as a general-purpose effect.
A distorted or modulation-heavy signal can work just as well on a synth or vocal as it does on a guitar, particularly when the goal is to make something feel less clean or predictable.
- Distortion Pedals Treated With ICM
Some of the newer distortion effects use the same ICM approach as the newer amp models. For the user, the practical difference is less about the marketing term and more about having a consistent modeling approach across the whole guitar chain.
Guitar Rig 7 Pro is a good fit when convenience matters. If you only need one amp sound and already own a favorite pedal and cabinet setup, a more specialized amp simulator may be a better buy.
6. Devious Machines Infiltrator 2
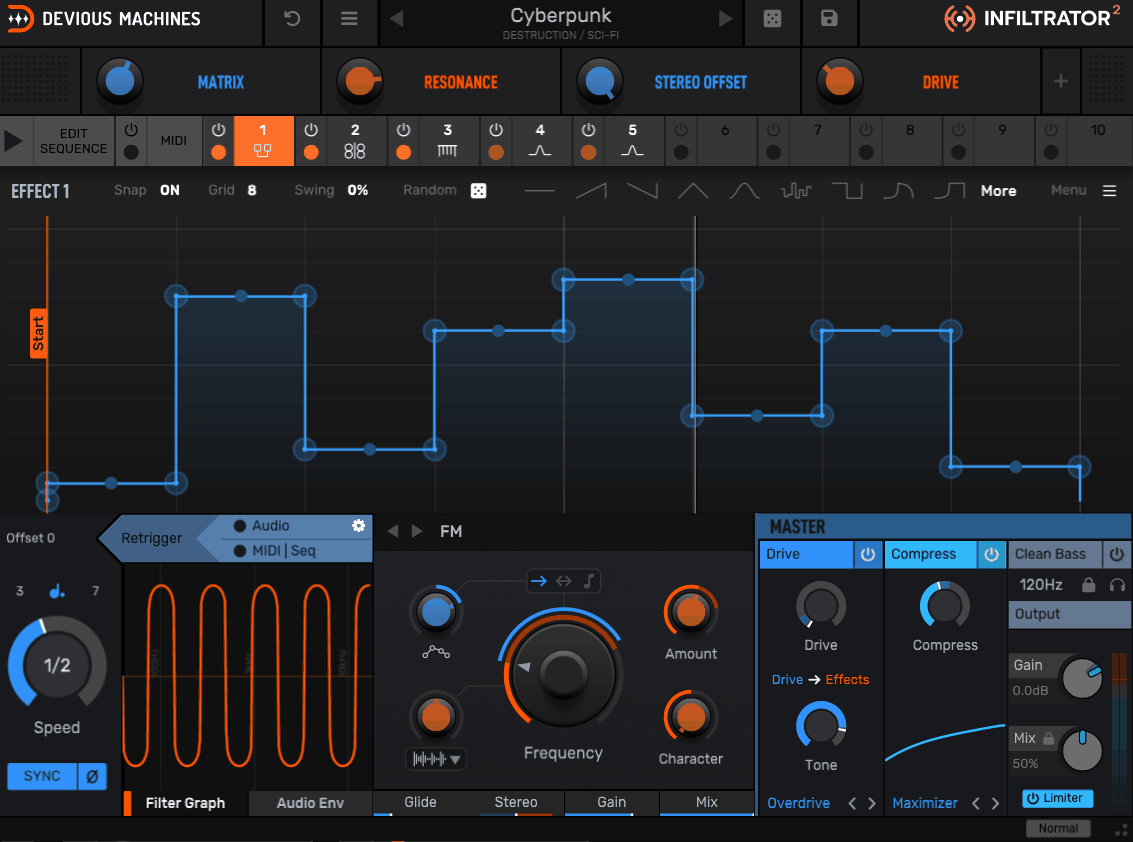
If a track is sounding a bit too static, Devious Machines Infiltrator 2 is one of the first plugins I’d reach for. It’s built for breaking up predictable sounds and adding controlled movement without requiring me to draw every modulation change manually in Reaper.
Infiltrator 2 is basically a step-sequenced multi-effect environment. You get up to ten effect slots, tempo-synced envelopes, and a large collection of modules that can be combined and sequenced into evolving patterns.
The best part is that the modulation stays tied to the effect itself. I can sequence filters, distortion, delay, reverb, or other modules and then use the onboard envelopes, randomization, or Euclidean tools to create variation without losing the underlying rhythm.
- 10-Slot Effects Chain With Onboard Sequencer
The ten slots can be switched and sequenced independently. This lets me create rhythmic effect patterns without drawing separate automation for every on/off change in Reaper. That’s where Infiltrator becomes more than a multi-effect rack. The sequence itself can become part of the musical idea.
- 1500 Presets
The large preset library is useful because Infiltrator’s modulation system can take time to learn. Starting from a preset lets me see how the modules and envelopes interact, then modify the parts that are actually relevant to the track.
For a plugin this deep, that is usually a faster way to learn it than building every patch from an empty screen.
Infiltrator 2 is best suited to producers who want motion and variation as part of the effect itself. If you mainly need straightforward delay, reverb, or filtering, it is probably more tool than necessary.
- 54 Effect Modules Across Every Category
The module library covers filters, distortion, spectral processing, modulation, delay, and reverb.
The exact number matters less to me than the range of combinations. A simple source can go from a clean loop to a heavily rhythmic effect chain without needing several separate plugins. That makes Infiltrator particularly practical for transitions, fills, rhythmic textures, and sound-design layers.
- Two Tempo-Synced Envelopes Per Effect
Each effect slot gets two multi-segment envelopes that can be used to automate parameters over time. The envelopes also support tools such as randomization, Euclidean rhythms, and pitch-related processing.
I find that useful because I can start with a repeatable rhythmic shape, then introduce variation without losing control of the result.
7. Beatsurfing RANDOM Metal
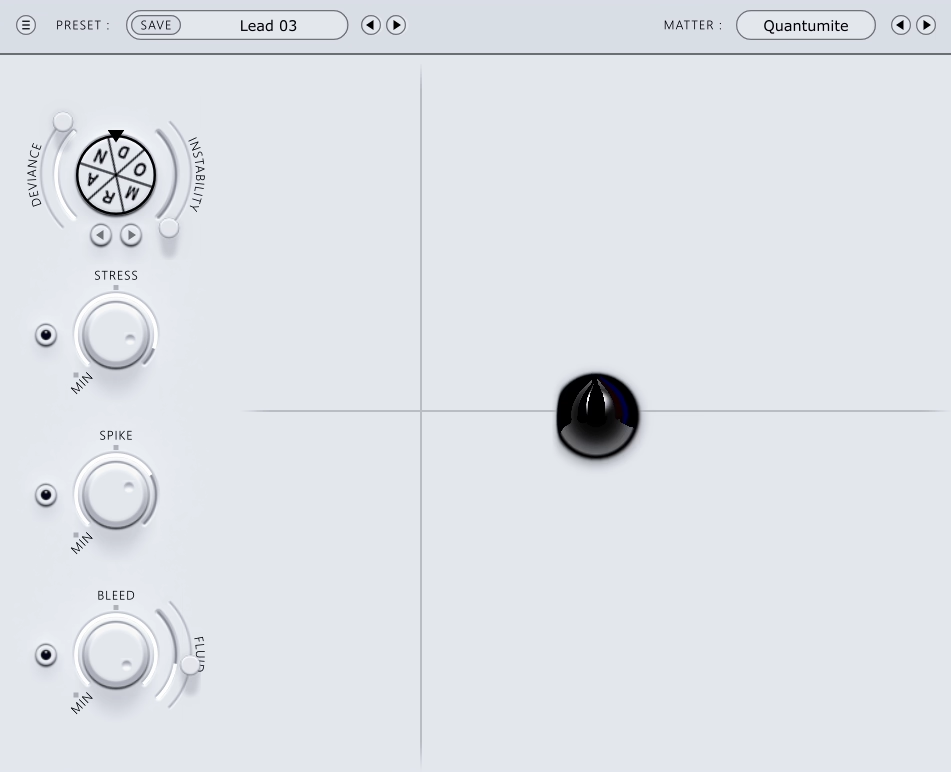
RANDOM Metal is built around generating percussion rather than simply reproducing a collection of recorded hits. Instead of relying entirely on samples, it creates percussive sounds through synthesis and gives you controlled ways to vary those sounds.
At first, the randomization approach might seem like a gimmick, but it becomes much more useful once you start adjusting the amount of variation. The RANDOM button changes the current sound, while the Deviance control determines how far that change moves from the original.
I found that this makes it useful for building percussion that changes without becoming completely unpredictable. Low settings can introduce small variations between repeated hits, while higher settings can push the sound toward more experimental territory.
The instrument also lets you work with more than one approach to playing, so you can build a conventional percussion kit or treat the generated sounds more like pitched electronic instruments.
- 40+ Percussive Matter Types
The engines can create textures ranging from metallic cymbal-like sounds to shakers, hi-hats, and less conventional percussive material.
The useful part is that the same basic engine can move into very different territory depending on how it is shaped. For electronic production, that makes it easier to create a kit that feels related without every sound being a copy of the same sample aesthetic.
- RANDOM Button With Adjustable Deviance
The RANDOM function changes the current sound, while the Deviance control determines how far that change goes.
I like this better than fully destructive randomization because it gives me a way to introduce small variations without throwing away a sound that already works.
Low settings can be useful for making repeated hits feel slightly different. Higher settings are better suited to more experimental material.
- Dual Trigger Modes
The instrument can be played from pads or chromatically across a keyboard.
That gives the same engine two very different uses.
I can build a conventional percussion kit, or I can treat the sound more like a pitched electronic instrument and use it melodically.
8. XLN Audio RC-20 Retro Color
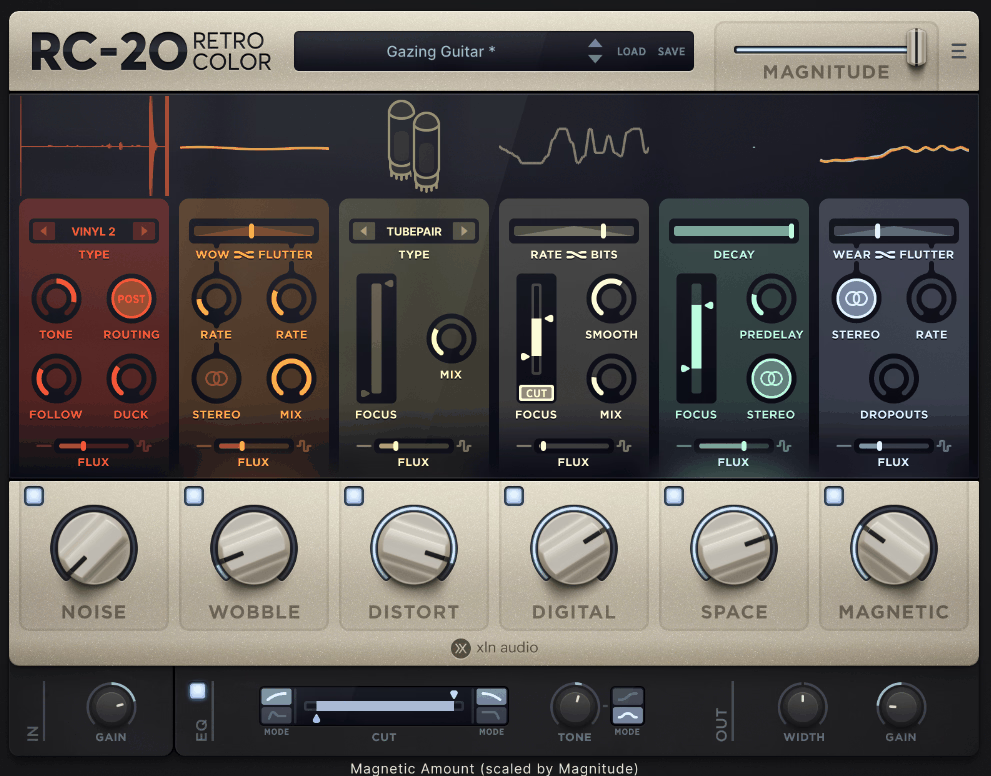
A lot of character plugins claim to offer “analog warmth” or retro degradation, but RC-20 Retro Color stands out because it feels more like a deliberate tone-shaping environment than a single distortion effect.
The processing it adds is purposeful. Whether you’re working with synth pads, drum loops, vocals, or full mixes, the six modules let you combine noise, wobble, distortion, digital degradation, space, and magnetic-style coloration without needing a separate plugin for every stage.
I also like that the interface keeps the main controls easy to reach. Flux adds continuous variation, while the Magnitude control gives you a simple way to automate the overall intensity without adjusting every module separately.
The result is useful for anything from subtle instability to heavily degraded textures, especially when a clean recording feels too polished and you want to introduce movement and character on purpose.
- Six Independent Modules
The six sections cover Noise, Wobble, Distortion, Digital, Space, and Magnetic processing.
Each section can be used independently or combined with the others.
That makes the plugin easy to scale. I can add a small amount of wobble to a synth, use more aggressive distortion on a drum loop, or combine several modules when I want a deliberately degraded texture.
- Flux Engine
Flux adds continuous variation across the active modules.
This matters because static distortion or noise can quickly become recognizable as an effect. Flux introduces small changes over time, which helps the result feel less like a fixed preset. For sustained sounds and looping material, that extra movement can be particularly useful.
- Magnitude Control
Magnitude gives me one overall control for the amount of processing.
That’s useful when the arrangement already works but I want the effect to become stronger during a transition or weaker when the track needs to open back up. Instead of automating several modules separately, I can automate one control.
- Tailored Presets By Source
The presets are organized around sources such as drums, keys, guitars, bass, full mixes, and post-production. I wouldn’t rely on those presets unchanged, but they are a useful starting point because the same effect can behave very differently depending on the source.
9. FabFilter Pro-Q 4
FabFilter Pro-Q 4 focuses on precision, control, and flexibility while keeping the EQ workflow fast enough for everyday mixing.
Pro-Q 4 gives you detailed frequency selection, flexible Q control, dynamic processing, and visual feedback that makes everything from surgical notches to broad tonal shaping easy to manage.
I like how FabFilter has added features such as the Instance List, EQ Sketch, curve drawing, copy-and-paste, and fractional slopes without making the basic workflow feel cluttered. What stands out to me is that the extra functionality generally reduces friction rather than forcing you into a more complicated way of working.
You can use it for tight corrective moves, dynamic frequency control, or broader tone shaping, and the immersive and Dolby Atmos support becomes useful when the session goes beyond conventional stereo work.
- Spectral Dynamics
The major addition in Pro-Q 4 is Spectral Dynamics, which extends dynamic EQ processing with frequency-specific expansion and compression.
Instead of treating the whole selected band the same way, the processing can react only to the frequencies that cross the relevant threshold.
For a complex mix, that can be useful when one part of a band needs controlling but the surrounding frequencies are already behaving correctly.
- Instance List
The Instance List gives you a central view of Pro-Q instances across the session and can also include other supported FabFilter plugins. This is less about making EQ itself sound different and more about reducing the friction of managing a large mix.
When a session contains many EQ instances, being able to move between them from one place is simply quicker than hunting through plugin windows.
- Character Modes
The newer character modes add modeled saturation behavior alongside the EQ processing. I wouldn’t treat this as a replacement for a dedicated saturator, but it is useful when I want a small amount of tone shaping without inserting another plugin.
The benefit is workflow rather than having yet another effect type available for its own sake.
Freebies:
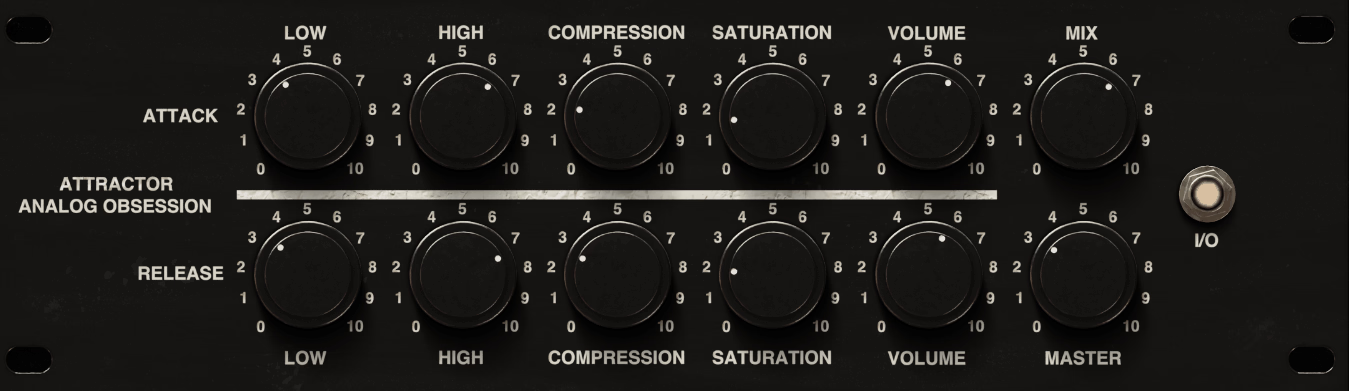
Analog Obsession BUSTERse
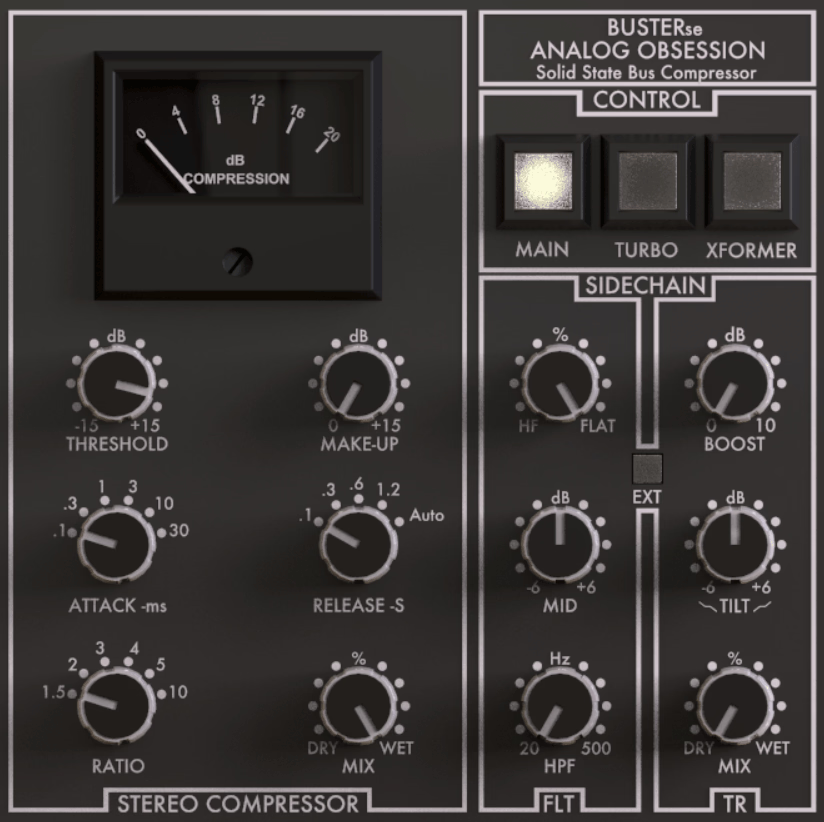
If you want a compressor that is easy to understand and still gives you some extra control, Analog Obsession BUSTERse is a solid choice for bus processing. It’s inspired by the familiar console-style bus-compression approach, so the basic workflow remains straightforward.
What really sets it apart is the additional shaping around the compressor. The filtered sidechain lets you control which parts of the signal trigger the processing, while Transient Boost gives you another way to preserve or emphasize attacks.
- Filtered Sidechain With Transient Boost
The sidechain filter lets you control which parts of the signal have the biggest influence on the compressor.
I find this particularly useful on drum groups because the low end can otherwise cause the compressor to react harder than intended. The Transient Boost control gives you another way to emphasize attacks rather than simply increasing the amount of compression.
- Turbo And Xformer Modes
Turbo changes how broadly the compression acts across the frequency range, while Xformer adds a modeled transformer-style coloration. These are useful when you want more than a clean bus compressor, although I wouldn’t leave them enabled automatically.
- Familiar Controls, Extra Depth
The main compressor controls remain straightforward: threshold, attack, release, and ratio, with a Mix control for parallel compression.
Lunacy Audio HAZE
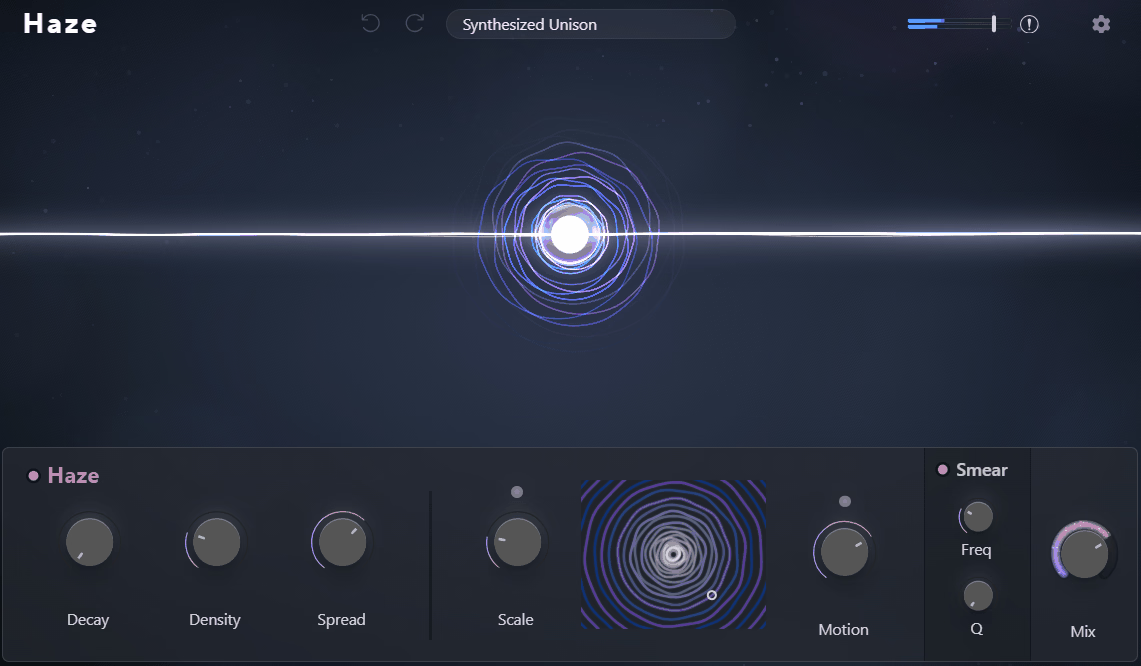
Standard reverbs and modulation effects can add depth, but they often leave you manually combining several processors when you want a source to become more diffuse, evolving, or atmospheric.
You’re either working with straightforward time-based effects that sound familiar or building increasingly complicated chains just to get something that feels less static. Lunacy Audio HAZE functions more like a sound manipulator, combining spectral dispersion, reverb-like behavior, and modulation inside a single environment rather than acting like a conventional reverb.
I think what makes HAZE different is the way its processing can smear and resonate harmonics while still giving you control over decay, density, spread, scale, and motion.
That makes it particularly useful for pads, guitars, sustained synths, and other sources where you want a more evolving texture instead of simply adding another obvious layer of reverb.
- Spectral Dispersion Engine
The spectral engine forms the core of HAZE.
It can smear and resonate harmonics so that a relatively simple source develops into something more diffuse and evolving.
That’s useful when a pad or guitar part needs more depth but conventional chorus and reverb are making it sound too familiar.
- Scale And Motion
Scale changes the perceived size of the processing, while Motion introduces movement over time. Motion is particularly useful on sustained sounds because it prevents the effect from becoming a static wash.
HAZE is free, but the important point isn’t simply that it costs nothing. It gives you a type of texture that is difficult to reproduce with a handful of basic stock effects.
Surge XT
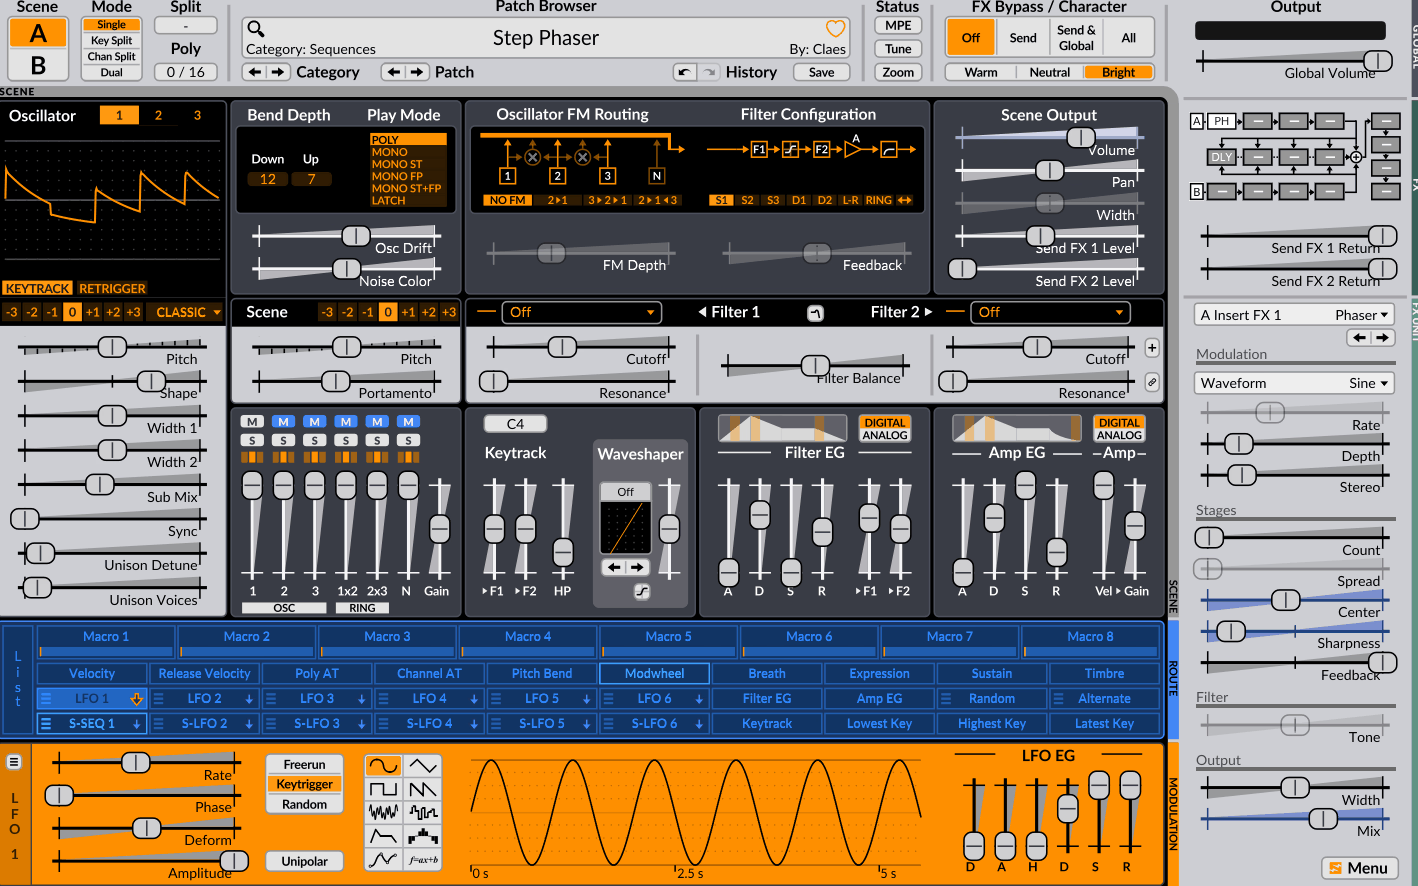
Subtractive synthesis is familiar because it starts with straightforward waveforms and then shapes them with filters, envelopes, and modulation. Surge XT takes that basic idea much further by combining several synthesis approaches inside one instrument.
Instead of limiting you to a single oscillator model, each scene gives you three oscillators with algorithms covering subtractive, wavetable, FM-based, and string-modeling approaches.
For Reaper users, I see it as a versatile free synth rather than a minimal beginner instrument. The dual-scene architecture lets you layer or split two distinct sound sources, while the modulation system gives you enough depth to build more complex relationships between different parts of a patch.
It can take longer to learn than a stripped-down free synth, but that depth is also what makes Surge XT useful when you want one open-source instrument capable of covering several synthesis workflows.
- Three Oscillators, Twelve Algorithms
Each scene has three oscillators with multiple synthesis algorithms, including subtractive, wavetable, FM-based, and string-modeling approaches.
That gives the instrument enough range to cover conventional synth patches as well as more unusual sounds.
The benefit for Reaper users is that one free instrument can cover several synthesis workflows instead of requiring a separate plugin for every style.
- Dual Scene Architecture
Each patch contains two scenes that can be layered or split.
I find this useful when a sound needs two distinct layers, such as a bright transient sound above a wider pad, without building two separate instrument tracks.
It’s a simple idea, but it can make more complex patches easier to organize.
- Deep Modulation Matrix
Surge XT includes a broad modulation system that lets you route sources to a large number of parameters.
That’s where the instrument starts to become especially useful for sound design. Rather than relying entirely on fixed envelopes and LFOs, you can build relationships between several parts of the patch.
Because the synth is open source, the project also isn’t tied to one commercial company’s product cycle.
iZotope Ozone EQ
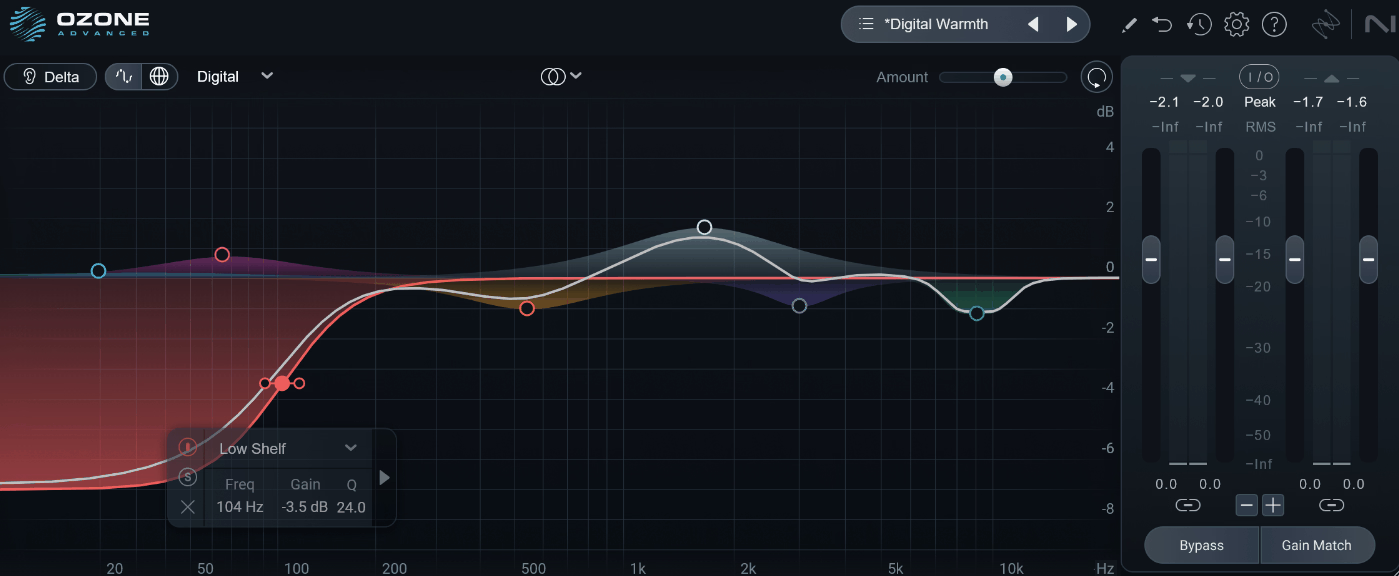
The combination of precision EQ and more specialized processing in a single plugin can sometimes feel like a marketing gimmick, but iZotope Ozone EQ actually makes a convincing case for keeping those options together.
You get analog and digital EQ modes, Mid/Side processing, and transient/sustain processing, so the same plugin can move between corrective work and broader tonal shaping without feeling limited to one use case.
What separates it from a basic EQ is how those different processing modes let you approach the same problem from several directions. You can treat the transient and sustained parts of a source differently, work on the center and sides independently, and use Delta monitoring to hear what the EQ is actually changing.
For a free EQ, that combination makes it useful in both mixing and mastering rather than being limited to simple frequency cuts and boosts.
- Analog And Digital Modes
The analog and digital modes let you choose between a more characterful behavior and a cleaner, more precise approach.
For corrective work, I’d generally start with the cleaner option. For broad tonal shaping, the modeled mode can make more sense when you actually want the EQ to contribute some character.
- Transient/Sustain Processing
The transient/sustain mode lets you work differently on the attack and sustained parts of a sound
- Mid/Side And Delta
Mid/Side processing lets you treat the center and sides separately, while Delta monitoring lets you hear the part of the signal being affected by the EQ.
Delta is especially useful when checking whether an EQ move is actually doing what I intended.
It’s a small feature, but it makes broad EQ decisions easier to evaluate by ear.
Echo Sound Works Vinyl Guitar 2
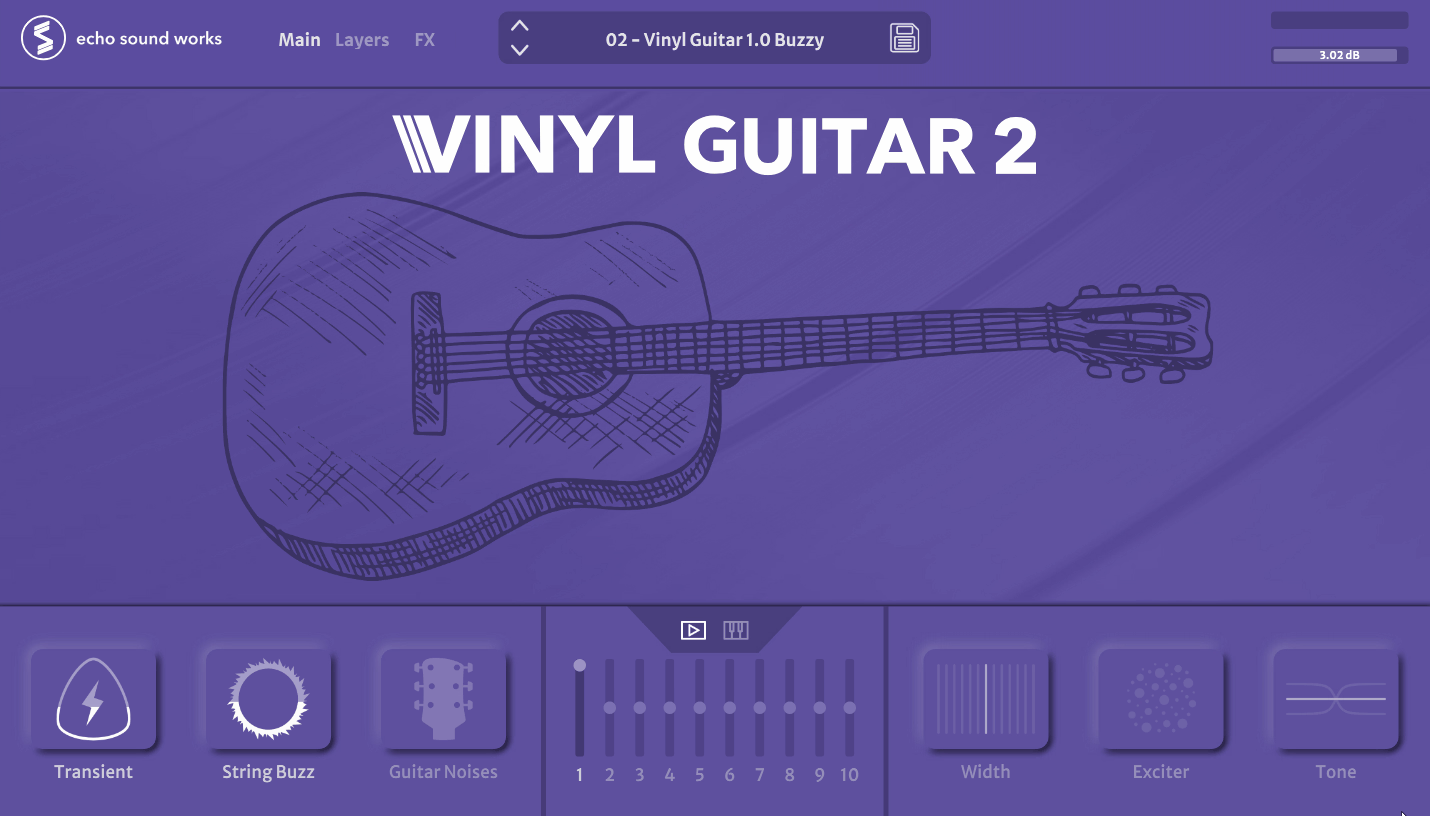
Acoustic-guitar processing usually relies on EQ, compression, reverb, and other effects, but those tools only go so far when the goal is a deliberately lo-fi or stylized guitar sound. Building that character entirely from separate processors can take more time than the part itself.
Vinyl Guitar 2 combines layered acoustic-guitar samples with built-in processing aimed at lo-fi, chill, hip-hop, and trap production. The ten multi-sampled sets can be shaped independently, while the included effects provide speaker coloration, background noise, delay, and reverb.
The round-robin and pitch-shifting features also help move the instrument away from sounding like a simple repeated sample.
I find that useful when I want the basic guitar texture and its degraded character to arrive together, rather than starting with a clean acoustic instrument and rebuilding the aesthetic from several separate plugins.
- 10 Multi-Sampled Sets With Per-Layer Sculpting
The instrument includes ten sample sets that can be adjusted individually.
That makes it possible to combine layers rather than relying on one fixed guitar tone.
I find that useful when the supplied sound is close to what I need but not quite there. A brighter layer and a warmer one can be combined into a more specific texture without resorting to external processing immediately.
- 11 Built-In Effects
The effects include speaker and background-noise processing, delay, and reverb.
Those aren’t necessarily the kinds of effects I’d want on every acoustic-guitar sound, but they make sense for the styles the instrument is aimed at.
The advantage is that the basic lo-fi character is already part of the instrument instead of requiring several separate plugins.
- Round Robin And Pitch Shifting
The round-robin function helps avoid obvious repetition when the same notes or articulations are triggered repeatedly.
The pitch-shifting options add another way to move away from the original sample tone.
Together, those features make the instrument less dependent on sounding like a straightforward acoustic-guitar recording.
Matt Tytel Vital
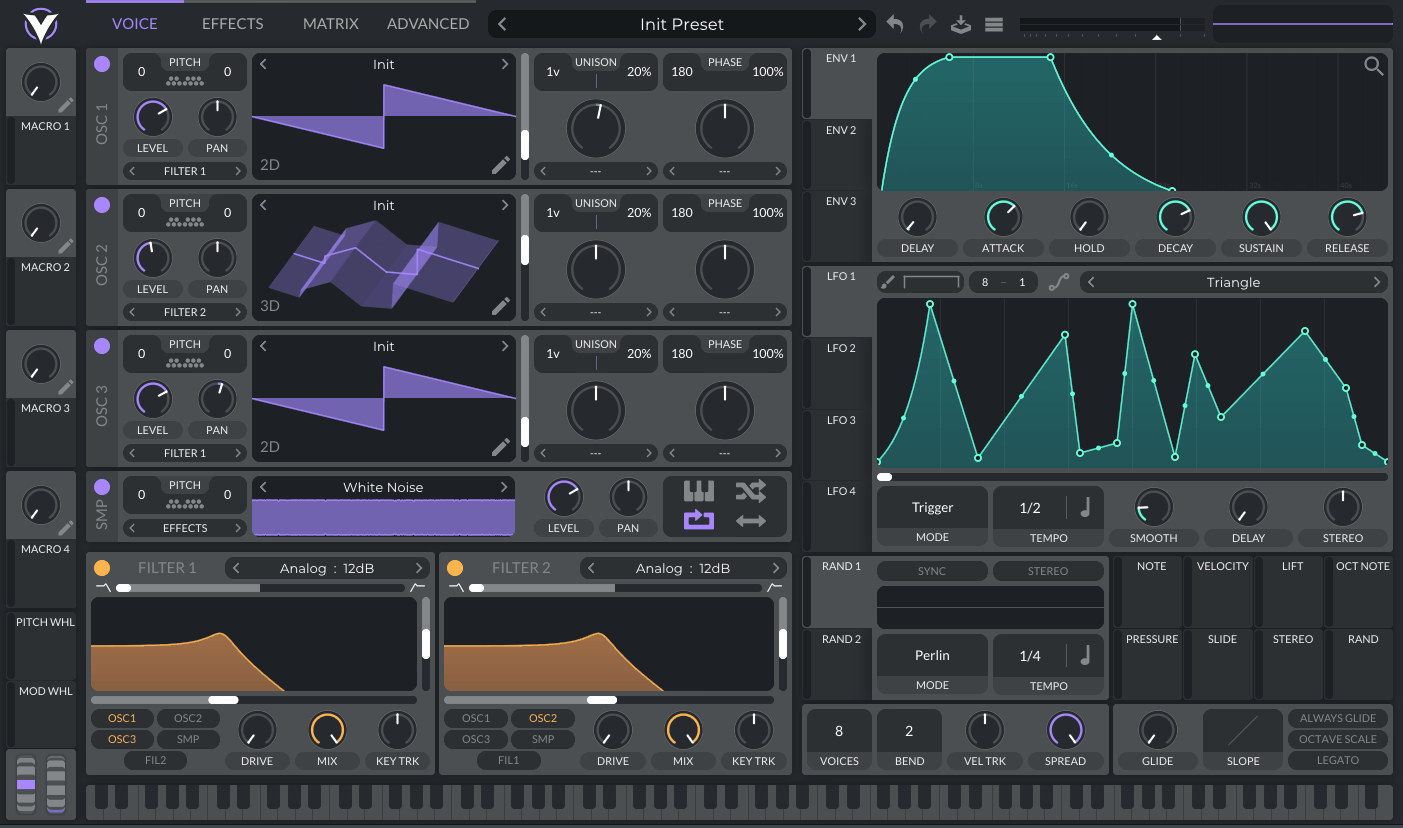
When I first came across Matt Tytel Vital, I was looking for a modern wavetable synth that didn’t make the free version feel like a temporary demonstration.
I found that Vital takes a straightforward approach to the core synthesis engine while still giving you enough depth for serious sound design. The three wavetable oscillators include spectral warping, while the modulation system, built-in effects, and visual routing make it possible to create much more complex sounds than the interface initially suggests.
I’ve found it useful on everything from simple basses and leads to heavily modulated electronic patches, and the interface makes it easy to experiment without constantly searching through menus.
- Three Wavetable Oscillators With Spectral Warping
Vital’s three main wavetable oscillators can use spectral warping to change the harmonic structure of the source. That’s useful because a relatively simple wavetable can become much more complex without switching to a completely different oscillator.
For electronic music, small changes in harmonics can have a large effect on how a patch feels, especially once those changes are being modulated.
- 25 Wavetables And 75 Presets
The free edition includes 25 wavetables and 75 presets. The paid versions mainly add more content and additional account features rather than withholding the core synthesis engine.
That distinction matters when deciding whether the free version is actually useful. In this case, it is. You can learn the same synthesis workflow in the free edition and add more factory content later if you find yourself wanting it.
- Comprehensive Modulation
Vital includes multiple LFOs, envelopes, random sources, and built-in effects, with drag-and-drop modulation routing. I especially like the visual approach because it makes it easy to see what is controlling what.
- Wavetable Editor With Resynthesis
The wavetable editor lets you draw and reshape waveforms, while resynthesis can turn existing material into a new wavetable. That gives you a practical path from “I want a different oscillator” to “I want to build my own oscillator.”

Hey, I’m Vil, I started this site to help you find the best audio plugins covering various categories including synths, pianos, strings, and effect tools of all sorts as well. I pick these plugins based on various criteria so it best matches the actual topic.