When you purchase through the links on my site, you support the site at no extra cost to you. Here is how it works.
There are really two kinds of AI audio plugins on the market right now, and mixing them up is why so many producers end up disappointed. The first kind makes decisions for you, listening to your audio and setting up processing that would have taken you twenty minutes of sweeping filters around.
The second kind generates sound that has no conventional equivalent at all, taking your input and rebuilding it into something a synthesizer could not have produced.
Both types show up here. Waves Clarity Vx Pro strips background noise out of dialogue in real time. sonible smart:EQ 4 lets EQ instances on different tracks negotiate with each other. Baby Audio TAIP learned the behavior of a 1970s tape machine instead of modeling its components one by one.
On the generative side, Neutone Morpho re-renders your performance in a completely different timbre, DataMind Audio Concatenator rebuilds your audio out of fragments from your own sample folder, and Dreamtonics Vocoflex turns a ten-second voice clip into a target you can morph toward in real time.
That is six, and there are eight more below covering mastering, kick design, sample organization, reverb, resonance control, and vocal cleanup.
Let’s talk about some of the best AI plugins you can get right now.
1. DataMind Audio Combobulator
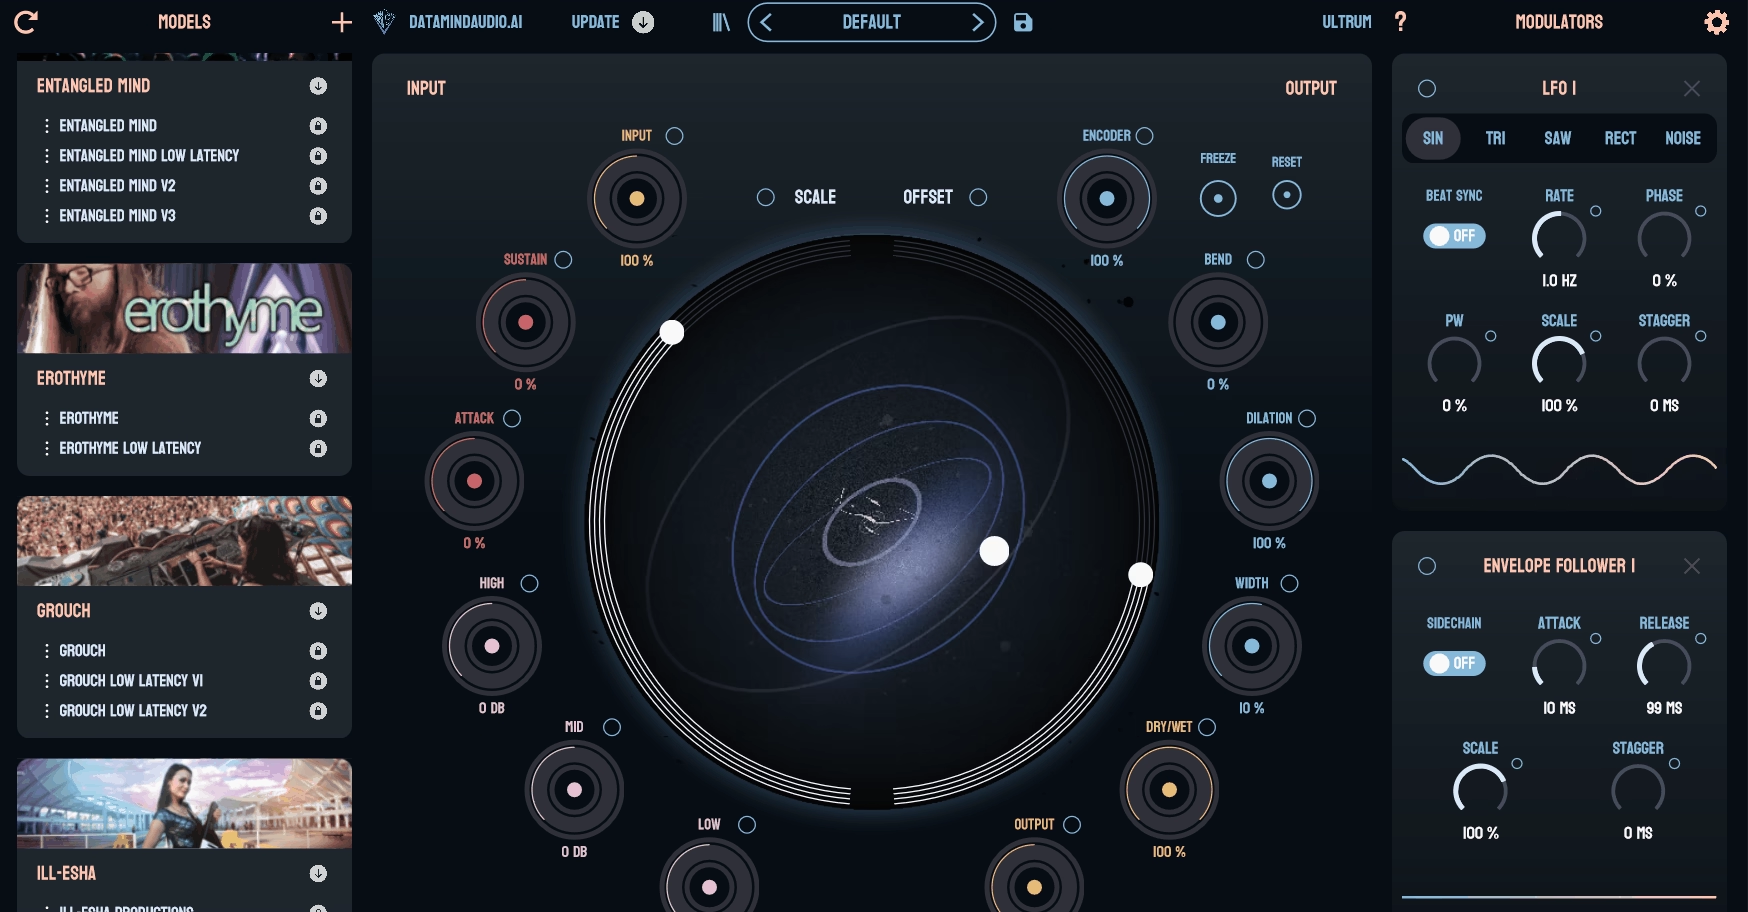
Load Combobulator onto an audio track, pick a model, and it resynthesizes your incoming signal through a neural network in real time, so the output sounds like a different sound world playing your part. DataMind Audio launched in 2024 and the whole company is built around this one idea.
The models are called Artist Brains, each trained on audio from a specific producer or sound designer who agreed to it, with 50% of gross sales going back to that artist.
I mention the business model because it is unusual in this category, and because it is the reason the sound sources are as good as they are.
- Artist Brain Library
The plugin ships with brains from Rob Clouth, Encanti, and Popbot, plus a Nature Models SFX Brain, and DataMind has since added models trained on foley libraries in collaboration with Sound Ideas for film, TV, and game work.
What I like about it is that each brain has a genuinely distinct personality, so switching between them feels closer to swapping instruments than turning a knob.
- Latent Modulators
Encode, Freeze, Bend, and Dilation steer the model away from a literal reading of your input. I found that Dilation is where the genuinely strange territory lives, since stretching how the model interprets your audio produces results you could not have programmed deliberately.
- Familiar Modulation On Top
Alongside the neural controls sit LFOs and envelope followers that behave exactly like they would in any modern synth. To me this is a smart design decision, because it means the unpredictable part of the plugin can be automated using tools you already understand.
- Latency Is The Real Cost
Processing carries meaningful latency that varies by model, along with a noticeable CPU load
- No Pro Tools
It installs as VST or Audio Unit and runs in every major host except Pro Tools. I suggest paying attention to this before you get attached to the sound, because for anyone working in post it is a hard stop.
2. Baby Audio TAIP
Tape plugins are not exactly a gap in the market, so the interesting part of TAIP is the method behind it.
Baby Audio skipped the usual approach of modeling analog components individually and guessing at how they interact, and instead trained a neural network on a 1970s tape machine until it learned the behavior directly.
The training material was white noise, sine sweeps, and similar signals generated entirely in-house, meaning no third-party audio was studied.
Then they did the part that actually matters for daily use: the learned characteristics were broken apart into separate parameters you can recombine. You are not choosing between three fixed tape flavors but building your own.
- Drive That Goes Negative
The Drive control extends into negative values, which gives you a genuinely small amount of saturation instead of the “barely switched on” floor most tape plugins bottom out at. Right off the bat this is the parameter I use most, usually on group buses where I want cohesion with no audible tone change.
- Wear
Combining wow, flutter, and an altered frequency response curve, this simulates a machine that has seen better days. Pairing Wear with the Mix control produces a tape flanging effect, and I would recommend trying that on backing vocals when a standard chorus sounds too polished.
- Single And Dual Model
The Model switch runs your signal through one modeled deck or two in series, roughly doubling the character. Drum buses are where I reach for Dual most often, because that second pass is what visibly rounds the transients.
- Glue, Limiter, And Auto Gain
A Glue stage provides compression for cohesion, the output feeds a brickwall limiter when you want to slam things, and Auto Gain keeps output level consistent as you push Drive. If you would ask me which of the three earns its keep, it is Auto Gain, because level-matched comparison is the only way to tell whether saturation is actually helping.
- 135 Presets
The preset bank was built by working engineers including Mark Needham and Max Jaeger. Preset banks rarely do much for me, and this one is worth scrolling anyway, purely because the starting points reveal how differently these parameters can be stacked.
3. LANDR Composer
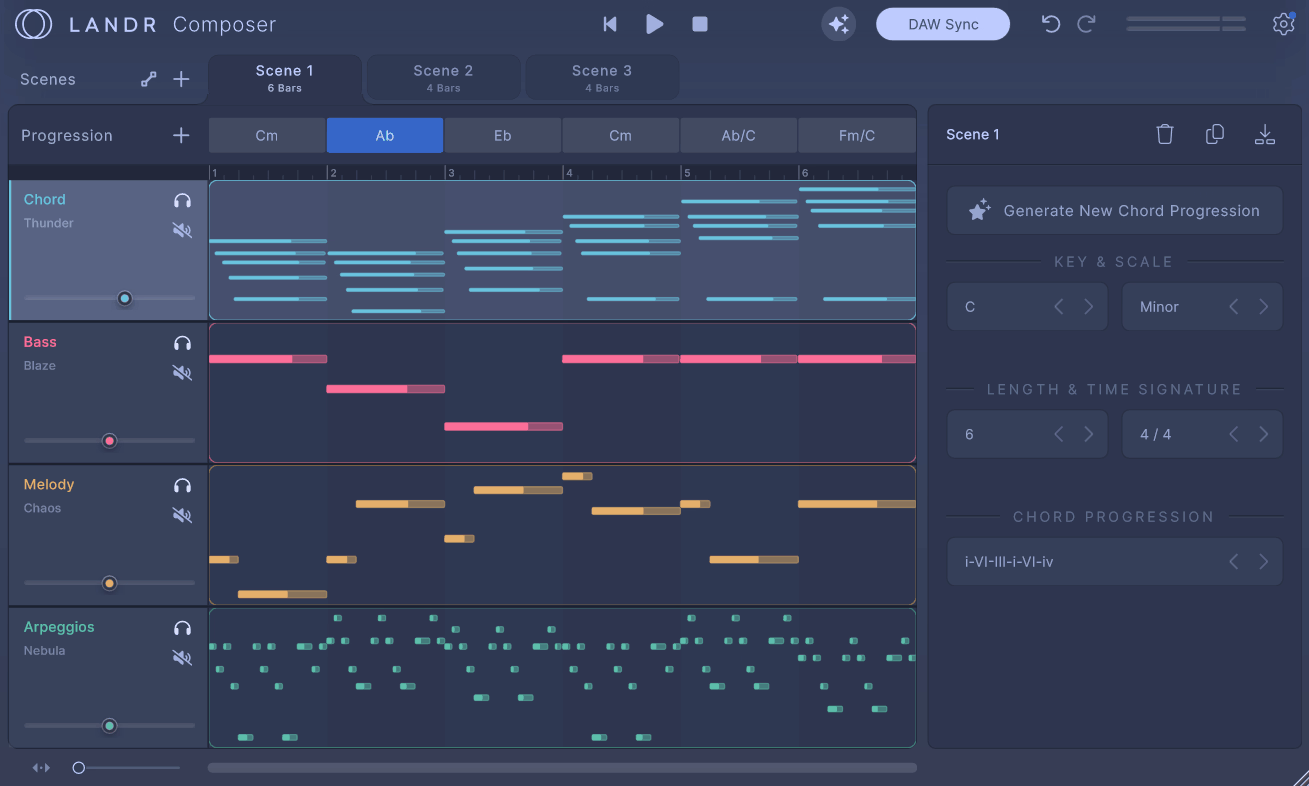
LANDR Composer is a sketchpad. It generates chord progressions, melodies, basslines, and arpeggios with no theory knowledge required,.
The plugin has some history behind it. LANDR acquired Orb Plugins in 2024 and folded the four separate tools of Orb Producer Suite 3 into this single interface, adding an expanded preset synth and more generation controls in the process.
- Chords First, Everything Else After
Generation starts with a progression you can then edit, move, and refine chord by chord through the chord progression guide.
Once that exists, melodies, arpeggios, and basslines are generated against those chords so they are harmonically compatible by default. To me the biggest time saving is on bass parts, where following a progression correctly is tedious work with almost no creative payoff.
- Drag-And-Drop MIDI
Anything the plugin produces can be dragged straight into your DAW timeline as MIDI
- DAW Sync
A DAW Sync function pulls tempo and key from your session automatically. What I like about it is the small thing it prevents, which is generating a great idea and then discovering it arrived in the wrong key.
4. Algonaut Atlas 2
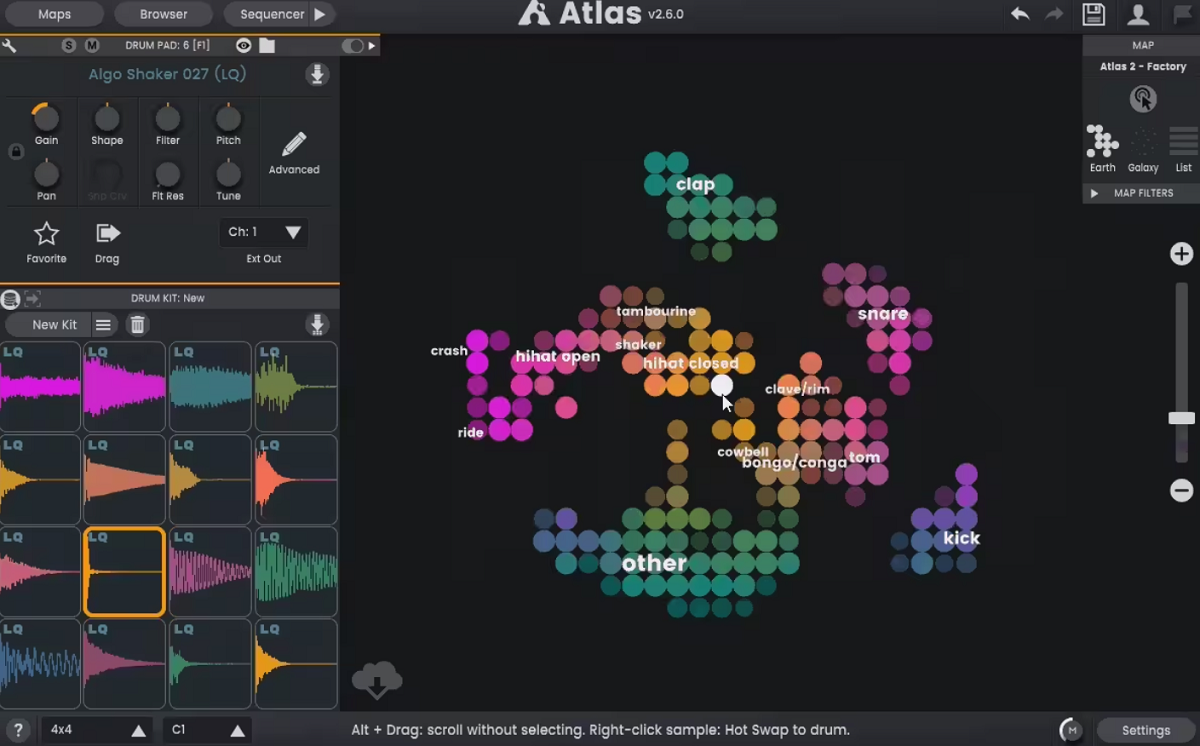
Somewhere on your drive there are thousands of drum samples you have never once heard. That is the problem Atlas 2 was built for, and Algonaut’s answer is spatial: point it at your folders, let it identify what each one-shot is from the audio itself, and it renders your whole collection as a zoomable 2D map where sonically similar sounds cluster together.
I found the scan quality holds up on messy folders with mixed content, and it is fast, taking seconds on a single pack.
- World And Galaxy Views
World view groups sounds into larger clumps for an overview, while Galaxy view exposes every individual sample at once on an automatically generated map. Browsing by ear becomes the fastest way to work, since hovering across a region surfaces neighbors you would never have found by filename.
- Instant Kit Generation
You can fill drum slots manually or have Atlas suggest a complete kit with one button press, then swap individual sounds without rebuilding anything around them. Kits scale to 8, 16, or 64 channels, and multi-channel output sends each pad to its own DAW track for separate processing, which is how I use it in Bitwig when I want to treat the hats and the kick differently.
- Hybrid Sequencer
The sequencer runs at step-sequencer speed while allowing mixed timings inside a single pattern, so a triplet hi-hat fill can close out an otherwise straight bar. There is also a variation generator for when a groove is nearly right and needs a nudge instead of a rewrite.
- Built For One-Shots Only
The analysis engine targets drum one-shots, and longer melodic samples and loops get skipped during the scan entirely. If you were hoping to bring order to a melodic loop library, this is the wrong tool
5. Techivation AI-Clarity
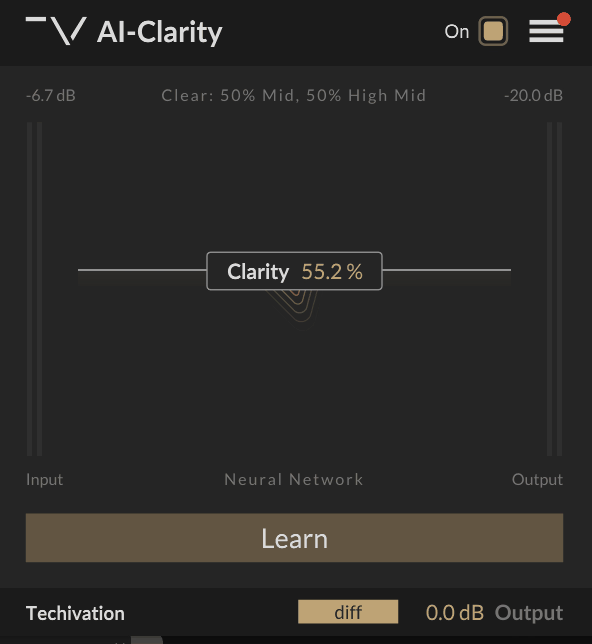
Most of the value here depends on something you do, not something the plugin does, so I want to start there. AI-Clarity is a dynamic resonance suppressor built on convolutional neural networks, and it works by listening to a short slice of your audio and configuring itself from that. The catch is that the slice you give it decides the quality of everything after.
Hitting Learn captures 3.5 seconds, and Techivation’s own guidance is to play the busiest section of the track during that window. I found the difference between learning on a sparse intro and learning on a full chorus is not subtle at all.
- What It Targets
The engine goes after boxiness, muddiness, and harshness, adapting its frequency ranges to the material instead of applying a fixed curve. On rough sources this gets you to a workable starting point in seconds, and I would recommend reacing out for a regular EQ afterward for anything surgical
- M/S and L/R Processing
- Diff Monitoring
The Diff control plays back only the difference between the processed and original signals. This is the feature that actually improves your decisions, because hearing precisely what is being removed is the only honest way to judge whether you have taken too much out.
- Clarity Knob
After learning, a single Clarity control scales suppression across all the identified problem areas. What I like about it is how little it demands of you since you cannot back off one frequency band while keeping another intact.
6. Waves Clarity Vx Pro
The standard Clarity Vx is a one-knob plugin, and for a lot of jobs that is genuinely enough. The Pro version exists for the situations where one knob forces a compromise you cannot accept, which in practice means any recording where different frequency ranges need different amounts of reduction. Both run on Waves Neural Networks trained on millions of voice files with human evaluation on the results.
Everything happens in real time and non-destructively, so you mix with the cleanup in place and hear it inside the full session without rendering, bouncing, or duplicating tracks first.
- Six Independent Bands
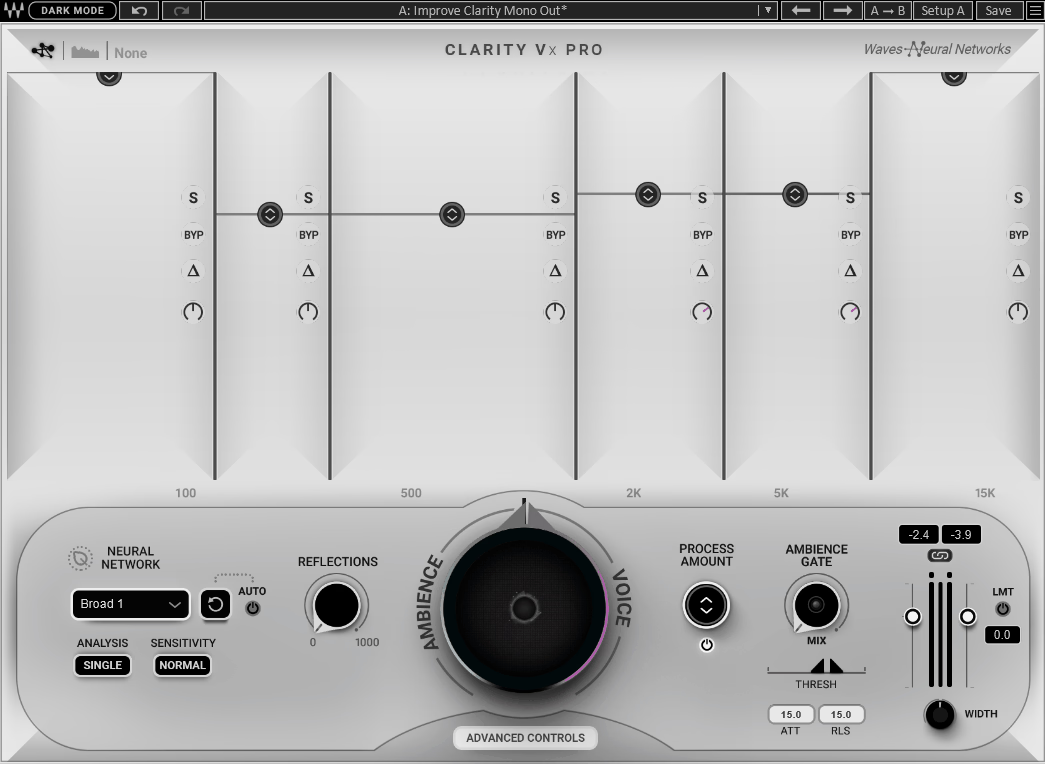
Reduction is split across six frequency bands, each carrying its own processing amount, solo, bypass, delta, and pure gain controls.
That said, this is the whole reason the Pro version exists, because a low-mid fan hum and a top-end hiss almost never want the same treatment, and one global knob makes you choose.
- VCA Across The Bands
A VCA control moves all six bands together while preserving the ratio between your settings. I would recommend dialing in the band balance first and then riding the VCA, since it means the detailed work survives every later change of mind about the overall amount.
- Voice-Sensitive Ambience Gate
The gate here reacts to voice presence instead of volume, lowering residual ambience during unvoiced gaps between lines. What I like about it is that quiet consonants survive, which is exactly what a threshold-based gate tends to chew up.
- Three Selectable Networks
Also, you can choose Broad 1 for general work, Broad 2 when background voices or heavier noise are bleeding through, and Broad ECO as a low-CPU network. If you would ask me when ECO matters, it is any session running many instances at once, because the full networks are heavy enough to become your bottleneck.
7. sonible smart:EQ 4
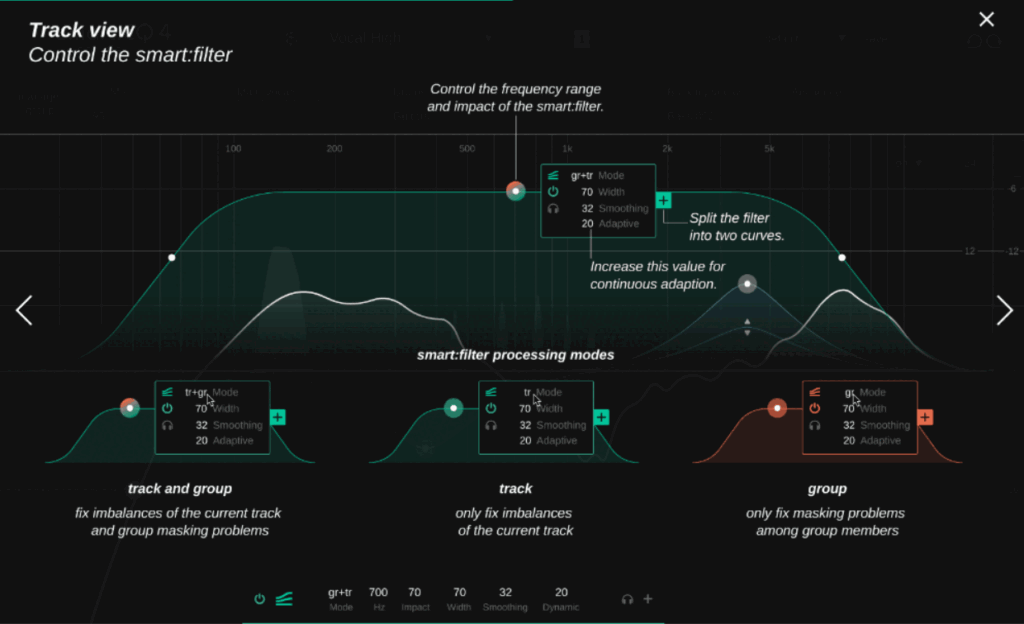
The clever part of this plugin is not that it builds an EQ curve for you. Plenty of things do that now. What makes smart:EQ 4 different is that separate instances across your session talk to each other, so the EQ on your vocal knows what the guitars are doing and can act on it.
You assign tracks into a Group and rank up to 10 of them in a hierarchy by drag and drop, telling the plugin what matters most.
It then reduces masking between them according to that priority order. Remote control across instances means you can adjust another channel’s curve from whichever window you happen to have open, which changes how it feels to mix a dense arrangement.
- Profiles And Reference Matching
The smart:filter balances a signal against a target you choose, drawing from a Universal setting, 21 instrument and vocal profiles, or genre-based Mix Profiles. You can also import a reference track so the filter targets that record’s character
- 24 Bands With Dynamic Mode
Every standard band can switch into dynamic operation with threshold, ratio, attack, release, and range controls. To me this is what makes it viable as your everyday EQ, since it covers multiband compression and de-essing without loading anything else, and a plugin you only open for one trick tends to get forgotten.
- Smoothing And Adaptive
Inside the smart:filter widget, Smoothing produces gentler filtering while Adaptive handles highly dynamic signals. I suggest turning Smoothing up on vocals in particular, because the generated curve can be more surgical than a vocal genuinely wants.
- Phase And Routing Options
It offers switchable minimum and linear phase operation plus mid/side processing globally or per band, with Auto Gain compensating for level changes as you work. The multichannel analyzer showing every instance in a group is what I use to find the actual source of a problem instead of guessing.
8. Neutone Morpho
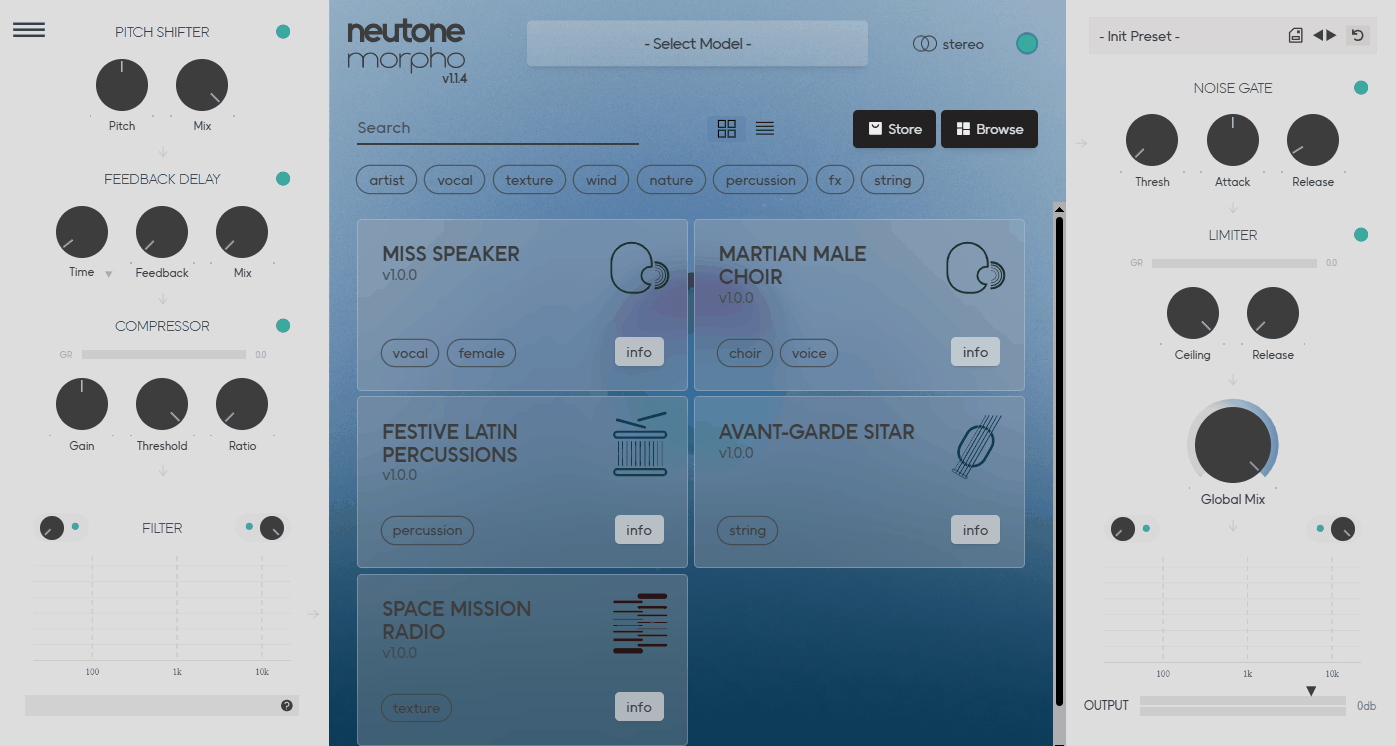
The useful way to think about timbre transfer is in terms of what survives it. Your pitch, dynamics, and rhythm come through intact, and the tone gets completely replaced. Hum a melody, and the output is that exact melody with your exact phrasing, played by something else entirely.
Neutone built Morpho on the engine behind their earlier Neutone FX plugin, then wrote a new algorithm from scratch that trains faster on less data while keeping audio quality high. Also, It runs in real time on your CPU.
- Micro View And Latent Variables
Incoming audio gets compressed into six or more latent variables, and Micro View lets you offset and scale those values directly using Morpho Modifiers. What I like about it is the discovery aspect, since you occasionally find a variable that correlates with pitch or brightness and can start steering the output on purpose.
- Cocoon Custom Training
The Cocoon service lets you train your own Morpho models by uploading audio, with no GPU and no coding involved, and the finished model appears inside your plugin. Anyone sitting on a distinctive personal sound source should look hard at this, because a model built from your own recordings is something nobody else can have.
- Licensed Training Data
All model datasets are either public domain or licensed, which Neutone has been explicit about. In a category where provenance is usually vague, being able to actually check what went into a model counts for something.
- Free Version
A free tier with a handful of models runs with no time limit, and upgrading unlocks additional models plus Cocoon access. Start there, because timbre transfer suits some workflows and completely fails to click with others, and an hour will tell you which you are.
- Where It Works Best
Sources with clear pitch and strong dynamic movement translate most convincingly, so hummed melodies and percussion come through beautifully. Dense polyphonic material is where results get muddy I would say..
9. The Him DSP Kick Ninja
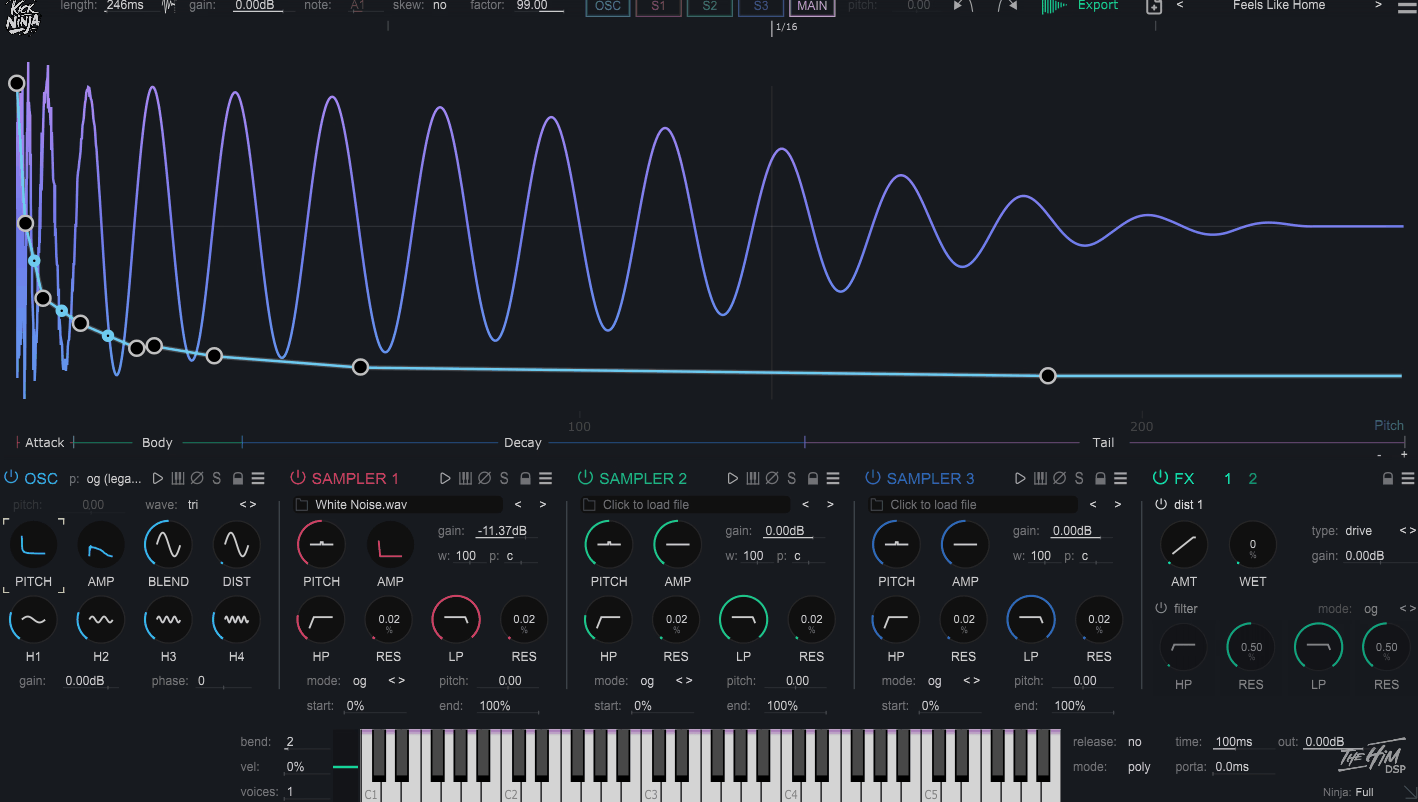
Try layering three kick samples that you did not design and the phase relationships fall apart, mostly because you have no idea what note any of them is tuned to. Kick Ninja was built by Dutch producer The Him around a fix for exactly that: its AI analyzes an imported kick and rebuilds its pitch and amplitude curves as editable envelopes inside the synth engine.
That reframing is the whole point. A sample stops being frozen audio and becomes pitch motion, transient slope, and tail shape that you can rewrite, so instead of stacking EQ and transient shapers to approximate a kick you like, you rebuild its behavior directly.
- AI Sample Import
Drag in any kick and the analysis reconstructs its pitch and amplitude behavior as curve data. A low pass filter defaulting to 600 Hz runs before import to remove high-frequency noise that would otherwise generate unnecessary envelope points, and I found leaving that default alone produces the cleanest reconstructions.
- Anti-Aliasing Oscillator
The core engine blends a pure sine wave with a selectable waveform plus a harmonic oscillator, with control over individual harmonics.
Because the fundamental is synthesized instead of sampled, it stays phase-consistent no matter how aggressively you redraw the pitch envelope, which is precisely what breaks when you do this with audio.
- Three Sample Layers
Sitting above the oscillator are three sample layers, each with automatable high-pass and low-pass filters plus independent pitch and amp envelopes. Having every layer tuned and visualized in one structure is what turns multi-layer kick building from guesswork into something you can actually see.
- Envelope Editing Depth
You get copy and paste of envelope points, undo and redo, extreme zoom, a section ruler, and both linear and logarithmic time views with a settable skew factor.
10. Dreamtonics Vocoflex
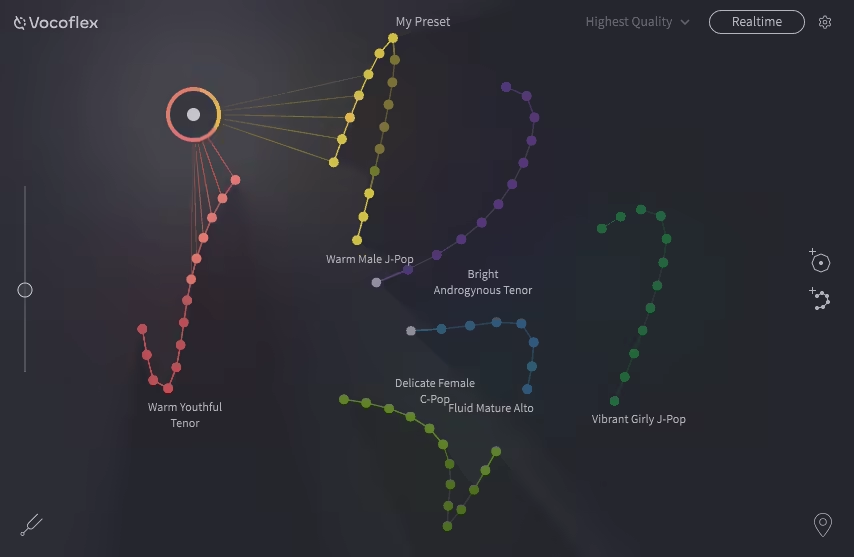
Two things make Vocoflex unusual, and the first one is how little audio it needs. A clean sample as short as ten seconds is enough to build a target voice, where competing tools often want minutes of material and a rendering wait.
That single fact changes what is practical, because casual experimentation stops being expensive.
Imported voices appear as curves made of dots, automatically positioned so similar voices sit near each other, and you blend them by moving a light probe across the display. Voices under the light get added, voices in shadow get subtracted. It seems as a gimmick for about five minutes and then becomes completely intuitive.
- Waypoints And Automation
You can place waypoints and assign them to a MIDI controller, and the morph position responds to DAW automation so a voice can shift across a section. One real limitation: you cannot slide smoothly between waypoints using MIDI, so gradual transitions have to come from automation instead.
- Synthesizer V Pairing
Placing Vocoflex after Synthesizer V Studio in the chain expands a limited set of voice databases into a far wider range of identities. 40 licensed voice presets ship with it as a starting point, across VST3, AU, AAX, and standalone formats.
- Honest Sonic Caveat
Results are not always as clean as offline-rendered competitors like SoundID VoiceAI or Voice-Swap. The trade you are making is real-time flexibility for absolute polish, and for backing vocals, harmonies, and demo work I think that trade lands in your favor.
11. DataMind Audio Concatenator
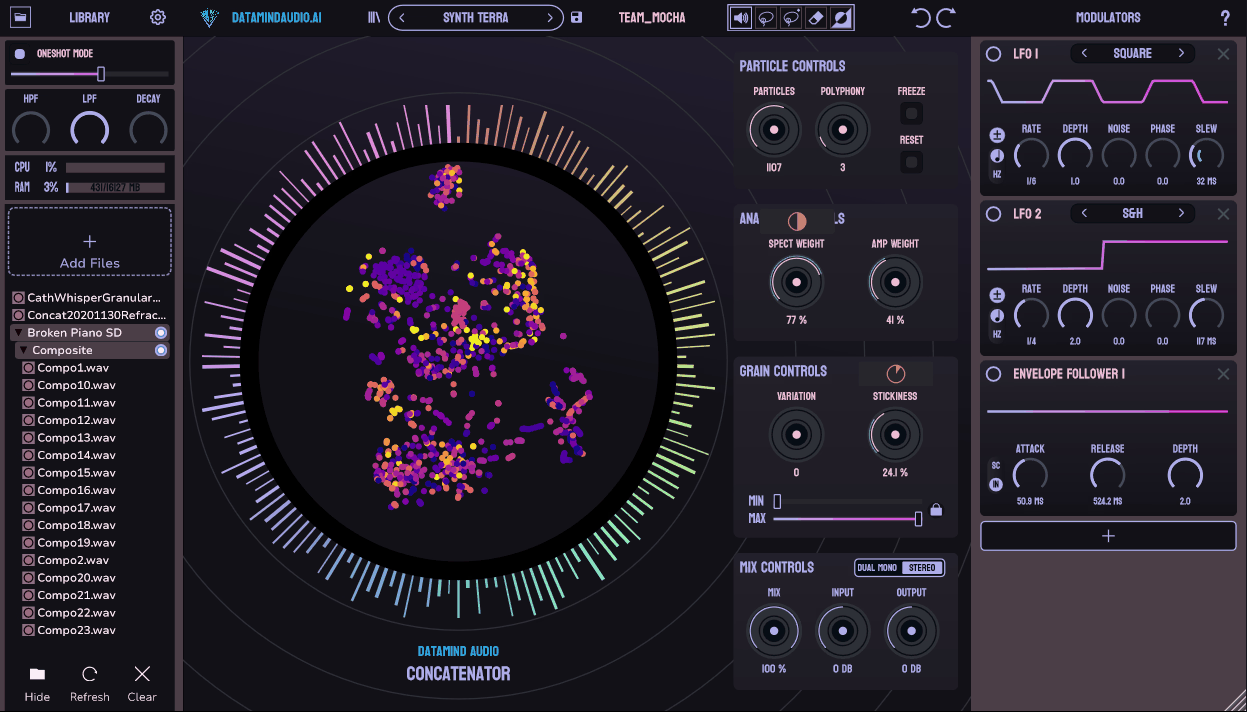
Think of granular synthesis, then change one thing: instead of grain selection being random, an incoming audio signal decides which fragments get chosen and how they behave.
That is concatenative synthesis, and Concatenator is the plugin built around it. Machine learning analyzes the pitch, amplitude, and spectral features of your input, then reconstructs that signal in real time out of pieces from a sample library you loaded.
Everything it outputs is made from your own material, which is the part I find most compelling. A folder you have owned for five years starts producing sounds you have never heard, and none of it came from a preset.
- Machine Learning Weighting
You can modulate how the matching algorithm weighs spectral against amplitude components of the input. Favoring spectral matching keeps the mosaic tight to your source, and favoring amplitude lets it wander somewhere much stranger, so this is the deepest control in the plugin by a distance.
- Variation, Particles, And Stickiness
Variation governs sample repetition, Particle Reset re-scatters the probabilities across chosen slices, and Stickiness sets how likely a selected sample is to hold once picked. I would say Stickiness deserves more attention because it is what decides whether you get rhythmic stutter or a smooth evolving texture.
- Deep Modulation
You get 5 LFOs, 5 envelope followers, and 5 sidechain-enabled MIDI envelopes. Routing an envelope follower to Variation early is what I would try first, since tying mosaic density to your input dynamics is the difference between something responsive and something mechanical.
12. iZotope Neoverb
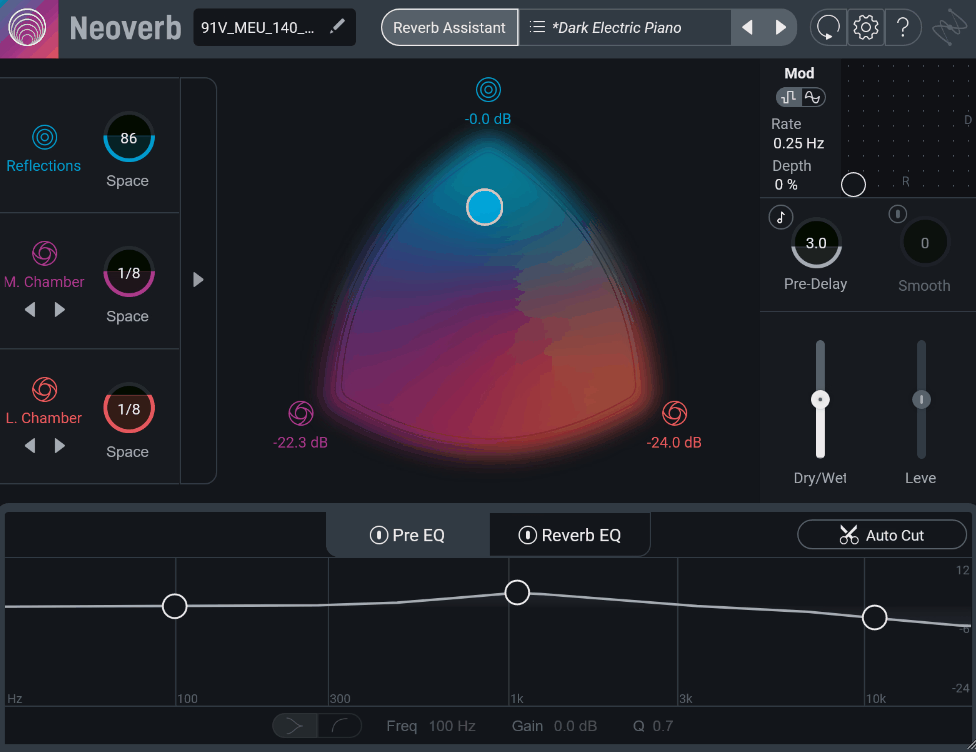
The parameters that matter most carry names like diffusion, damping, and decay time, and not many people thinks in those terms while a mix is playing. Neoverb asks what you want in plain language, then sets those parameters itself, running Exponential Audio reverb technology underneath.
The Blend Pad defines the workflow. Three engines sit at the corners of a triangle and you drag one puck to mix between them, which makes hybrid spaces trivial to build.
- Reverb Assistant
A four-step process asks for Size, Style, and Tone, with tone options for Clean, Dark, Bright, and Airy, then analyzes your material and tunes the parameters accordingly. The Tone stage is where I would spend the most thought, because shaping timbre at the source means far less corrective EQ later and a more natural result.
- Three Blended Engines
As mentioned, you get Reverb 1 generates early reflections, Reverb 2 produces Room, Medium Chamber, or Plate tails, and Reverb 3 covers Large Chamber and Hall. Putting a plate tail behind room-style early reflections becomes a thirty-second job instead of a two-plugin routing exercise, and that flexibility is what keeps me coming back to it.
- Reverb EQ With Unmasking
The output stage includes a Masking Meter and an Unmask function that keeps the reverb from colliding with your dry signal. What makes this better than ducked reverb is that it stays clean at high wet levels without the audible pumping that sidechaining introduces.
- Advanced Panel
For deeper work, 17 additional parameters including Decay Time, Size, Damping, and Diffusion are exposed. Running the Assistant first and then opening this panel is the workflow I would suggest
13. LANDR Mastering Plugin Pro
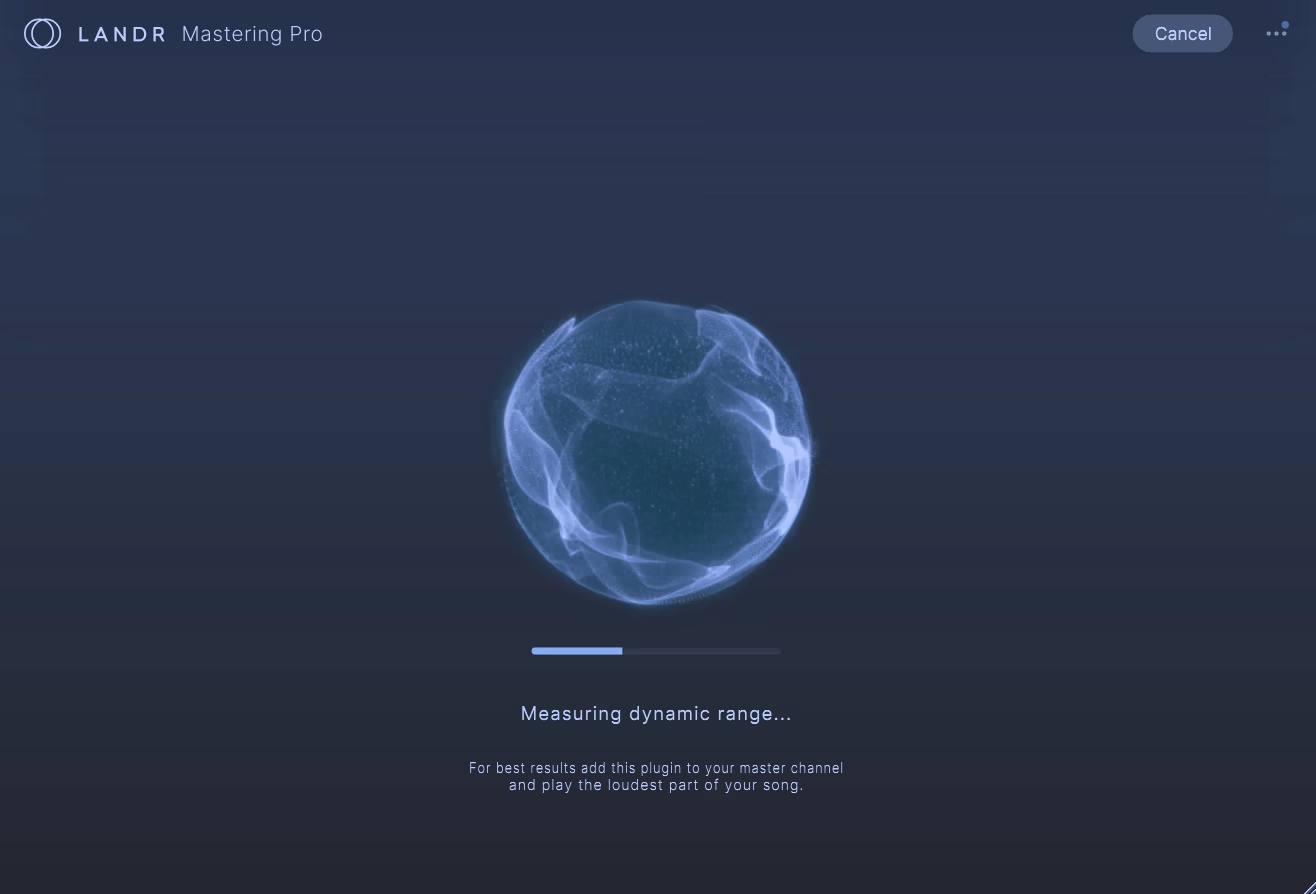
Here is the thing nobody mentions about Mastering Plugin Pro: it changes how you mix more than how you master.
Running LANDR’s mastering engine in real time on your mix bus means you hear what the tonal shaping and limiting will do to your low end while you are still deciding what your low end should be. The bounce, upload, wait, download, find a problem, repeat cycle disappears completely.
That comes with a warning I would rather give you now. Mixing into any mastering chain for hours makes it genuinely easy to lose track of what your actual mix sounds like, so bypass it regularly.
- Three Generated Masters
Analysis produces three distinct masters in Warm, Balanced, and Open styles, each sculpted to your specific track instead of applied as a preset. Comparing them tells you something useful about your mix, since a track that only holds up in one of the three usually has a tonal imbalance worth chasing down.
- Full Revision Controls
You can reshape the result using EQ across high, mid, and low energy, plus Compression, Saturation, Presence, and a De-Esser. This is what separates the plugin from the web service, because the automated result becomes a starting point you can argue with instead of a finished file you either accept or reject.
- Loudness With LUFS Metering
A Loudness control paired with a LUFS meter lets you hit a specific delivery target. Worth thinking about if you release across multiple platforms, since the right answer genuinely changes depending on where the track is going.
14. Supertone CLEAR
Nearly every noise reduction tool asks you to identify the noise so it can be subtracted.
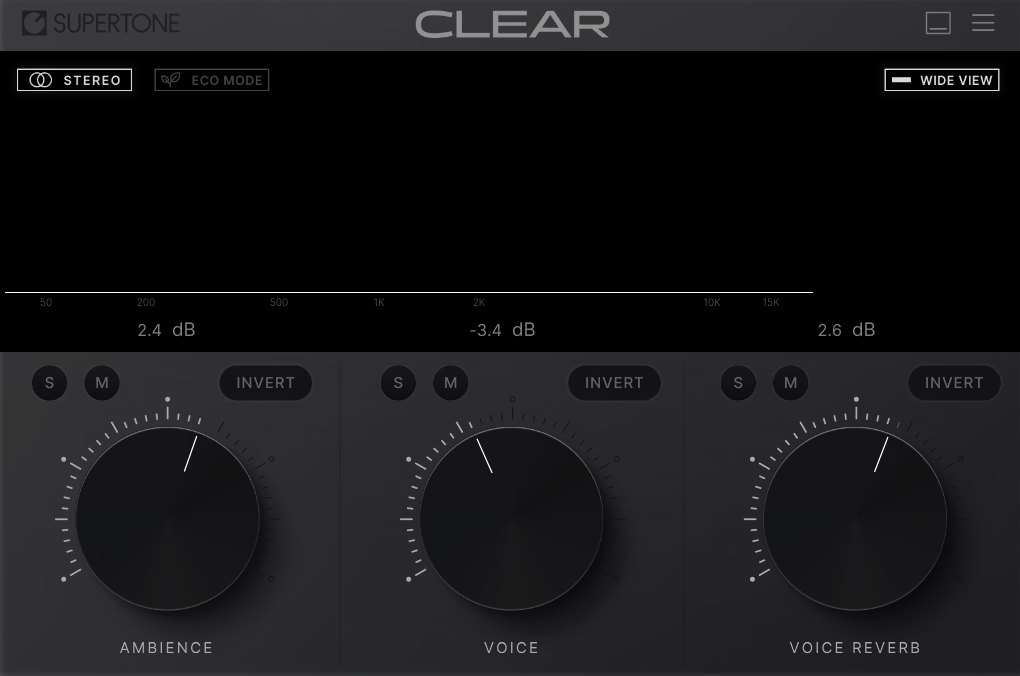
CLEAR operates on a completely different premise: a proprietary neural network separates the recording into three components, which are the voice, the ambience around it, and the reverb on the voice.
You then rebalance those three however you like. The plugin had an earlier life as GOYO Voice Separator before Supertone released it under this name.
That premise has a consequence worth spelling out. Because ambience is a separate channel and not just something being removed, you can turn the voice down and the ambience up and walk away with clean room tone to use as a bed, which most cleanup tools cannot do at all.
- Three-Knob Control
Voice, ambience, and voice reverb each get a single control, and you can rebalance by ear in seconds however you want in seconds. Combined and split three-channel visualization shows what you are actually adjusting
- Real-Time Operation
Processing runs live with low enough latency for streaming and monitoring, with both online and offline workflows supported
Hey, I’m Vil, I started this site to help you find the best audio plugins covering various categories including synths, pianos, strings, and effect tools of all sorts as well. I pick these plugins based on various criteria so it best matches the actual topic.